


45
SERVICE (cont.)
L.E.D./ADJUSTMENT BOARD
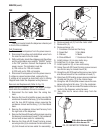
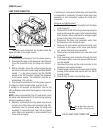
3. Lift switch panel with wires and L.E.D. /adjust-
ment
board as an assembly and turn over.
4. Disconnect the connector on the dispenser wiring
harness from the pin connector on the rear of the
L.E.D./adjustment board.
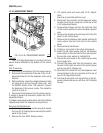
5. Remove the #4 keps nut from the right rear stud
on the control panel and remove the green ground
wire.
6. Remove the remaining five #4 keps nuts from the
studs on the control panel.
7. Remove the #6 stainless steel washer and the #6
nylon washer from the front stud on the control
panel.
8. Remove board and discard.
9. Position a new board on the studs and spacers.
10. Install the #6 nylon washer and the #6 stainless
steel washer on the front stud of the control panel.
Be sure the nylon washer is installed first.
11. Secure the new board to the control panel using
five #4 keps nuts.
12. Connect the green lead from the dispenser main
harness to the right rear stud of the control panel
and secure with a #4 keps nut.
13. Reconnect the connector from the dispenser main
wiring harness to the pin connector at the rear of
new L.E.D./adjustment board.
14. Turn board and panel over and position in the dis-
penser drawer and secure with four #8-32 locking
screws.
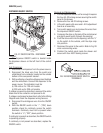
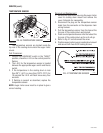
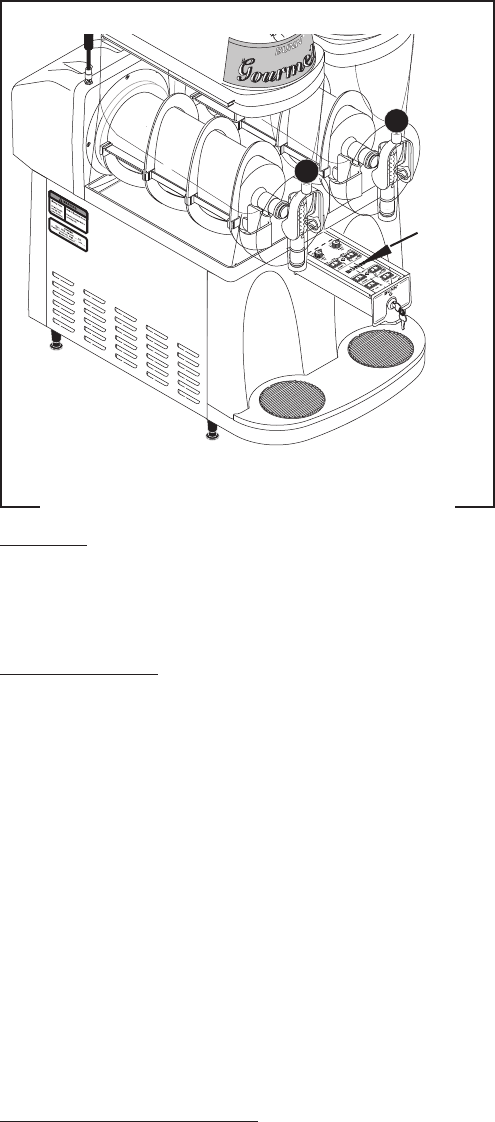
FIG. 43 L.E.D./ ADJUSTMENT BOARD
P1343
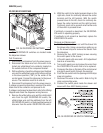
Location:
The L.E.D./adjustment board is located in the dis-
penser drawer attached to the bottom of the control
panel.
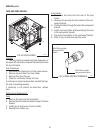
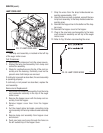
Test Procedures:
1. Disconnect the dispenser from the power source.
2. Disconnect the connector at the rear of the L.E.D./
adjustment board from the dispenser main wiring
harness.
3. With a voltmeter, check the voltage between pin hole
#1 (black wire) and pin hole #8 (pink wire) with
the ON/OFF switch in the “ON” position. Connect
the dispenser to the power source. The indication
must be 5 volts dc.
4. Disconnect the dispenser from the power source.
If voltage is present as described, replace the L.E.D./
adjustment board.
If voltage is not present as described, refer to the Wiring
Diagram and check the dispenser wiring harness.
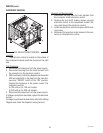
Removal and Replacement:
1. Pull the dispenser drawer out far enough to expose
the four #8 -32 locking screws securing the switch
panel to the drawer.
2. Remove the four #8-32 locking screws.
27646 122200