


25
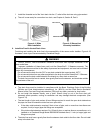
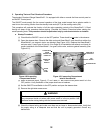
NOTE: It may be easier to install the hose over the upper fitting first, and then loosen the lower
fitting (by turning the lower drain plumbing assembly counter clockwise) to get the hose started
over the lower hose fitting. Once started in this manner the hose will then slide over the hose
fitting when the pipe assembly is turned back into its final position as shown in Figure 4-7.
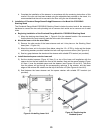
13).Tighten the hose onto the hose fittings with the worm drive clamps.
f. Installing the Plumbing
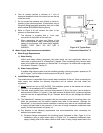
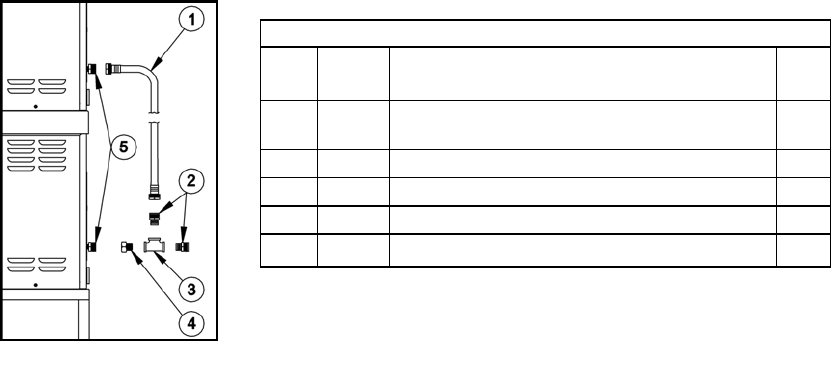
14).Assemble the water trains for the condenser and feed water as shown in Figure 4-8. Be sure
and use pipe dope at all threaded pipe connections and that a suitable washer or washer
strainer is located at each National Hose threaded (GHT, garden hose thread) connection (DO
NOT USE PIPE DOPE ON NATIONAL HOSE THREAD CONNECTIONS).
NOTE: The national hose thread (also known as garden hose thread) inlets of the
SteamChef¥ 3 steamers water connections, come supplied with strainer washers (not
shown). These washers must be used at the steamer water inlet connections.
g. Complete the Installation of the Steamer
15).Complete the installation of the steamer in accordance with the remaining instructions of
this manual. Once the unit has been leveled using the adjustable feet provided on the
stand, it is recommended that the unit be secured to the floor using the two Anchorable
legs.
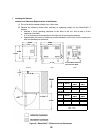
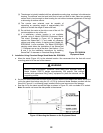
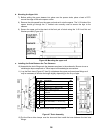
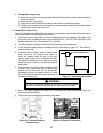
4. Installing the Legs
The legs on the SteamChef¥ 3 are used for installing the steamer, except when it is installed with any
of the Cleveland Range stands.
(1) Check that the feet are fully retracted into the legs. Do not over tighten. The feet should easily
screw in and out using fingers only.
(2) Place the SteamChef¥ 3 on its left side.
(3) Screw the four legs into the weldnut mounting holes. All four legs must be installed for proper
mounting of the SteamChef¥ 3.
(4) Place the steamer upright on the four legs
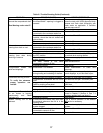
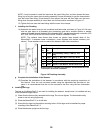
Drain Parts
Item
No.
Part
No.
Description Qty
1 110998 Hose Assembly, GHT(F) x GHT(F), 2 Ft.
Long
2
2 110977 Fitting, ½” NPT (M) x ¾”GHT (F), Brass 2
3 20229 Tee, ½” NPT, Brass 2
4 110986 Fitting, ½” NPT (M) x ¾” GHT(M), Brass 4
5
110987 Strainer, Filter Washer, Garden Hose Inlet 4
These parts are installed in the steamer, and should be left in the
units as part of the final installation.
Figure 4-8 Plumbing Assembly