INSTALLATION OPERATION MANUAL GARLAND ELECTRIC CLAMSHELL BROILER, CXBE12-1 MODEL
Part #4600670 - 2/15
Page 10
INSTALLATION, continuation
Air Supply and Ventilation
VENTILATION REQUIREMENTS MAY BE SUBJECT
TO LOCAL BUILDING AND FIRE CODES. CONSULT
LOCAL AUTHORITIES HAVING JURISDICTION.
This broiler appliance must be vented properly
to operate correctly and safely. Due to the
extremely high temperature a re safety system
should be installed. In addition, frequent
cleaning of the vent hood and the appliance
greatly reduces any re risk.
For any commercial cooking appliance, means
must be provided to exhaust combustion
waste products, steam, etc. to the outside of
the building. Proper ventilation is essential for
optimum performance.
Air movement should be checked during
installation. There must be adequate air
intake into the building to compensate for
the amount of air removed by the ventilation
system. Without a proper balance, abnormal
atmospheric pressure will occur, a ecting burner
and appliance performance. If air movement is a
concern, adjustments should be made to correct
the problem by Factory authorized service
technician.
HAVING DIFFICULTY OPENING DOORS THAT
EXIT THE BUILDING IS AN INDICATION THAT
THE BUILDING HAS A PROBLEM WITH AIR
MOVEMENT.
Do not use fans to blow air directly at the
appliance. This can create air cross-currents
and/or excessive drafts that interfere with the
operation of the unit.
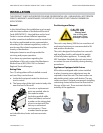
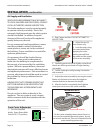
Front Caster Adjustment
1. Turn the clamshell
broiler Green Power Main
Switch OFF. ( “0” position)
ON
OFF
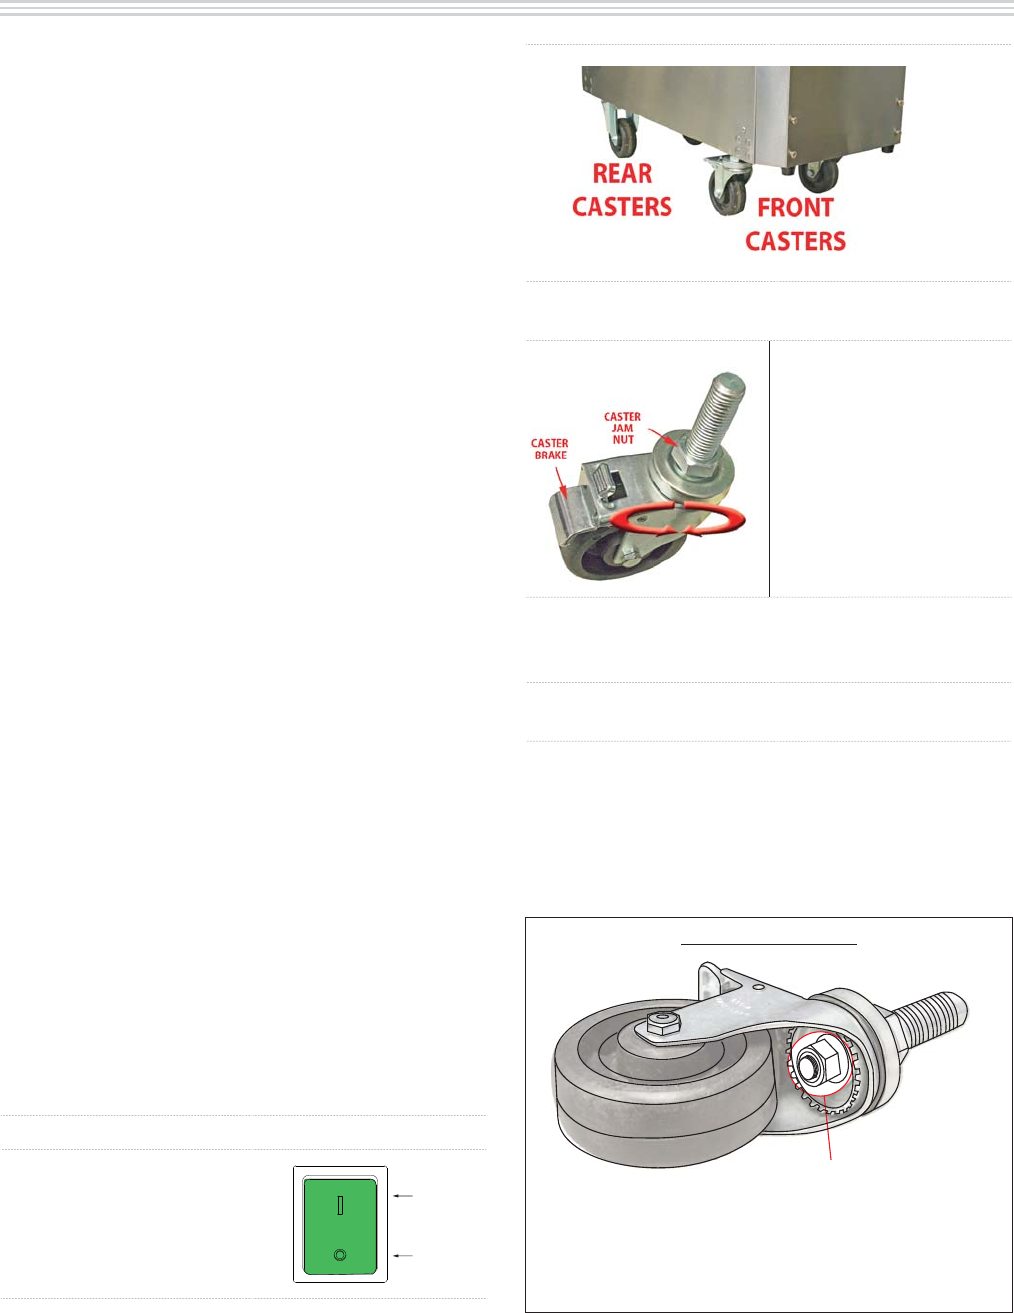
2. Rear Casters are xed - DO NOT ATTEMPT TO
ADJUST THEM.
3. Adjust the two (2)
front casters only.
4. Lock the caster using
the caster brake (Note:
applying the caster
brake system will lock
the wheel and the swivel
of the caster assembly).
5. Carefully raise front of unit slightly so that front
wheels are o the ground and no longer bearing
unit weight.
6. Loosen caster jam nut by turning it clockwise
with a wrench.
7. Adjust the caster assembly by turning the caster
(brake on) clockwise to increase the height or
counterclockwise to decrease the height.
8. After the broiler is completely level, tighten
caster jam nut to secure the caster assembly.
IMPORTANT NOTE
DO NOT TOUCH CASTER NUT
On the caster assembly shown above there is a
nut used to assemble the swivel system - do not
use wrench on this nut. This nut is intended for the
caster swiveling system only.


