


24
TroubleshootingBefore Use Operation Cleaning
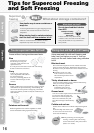
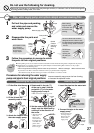
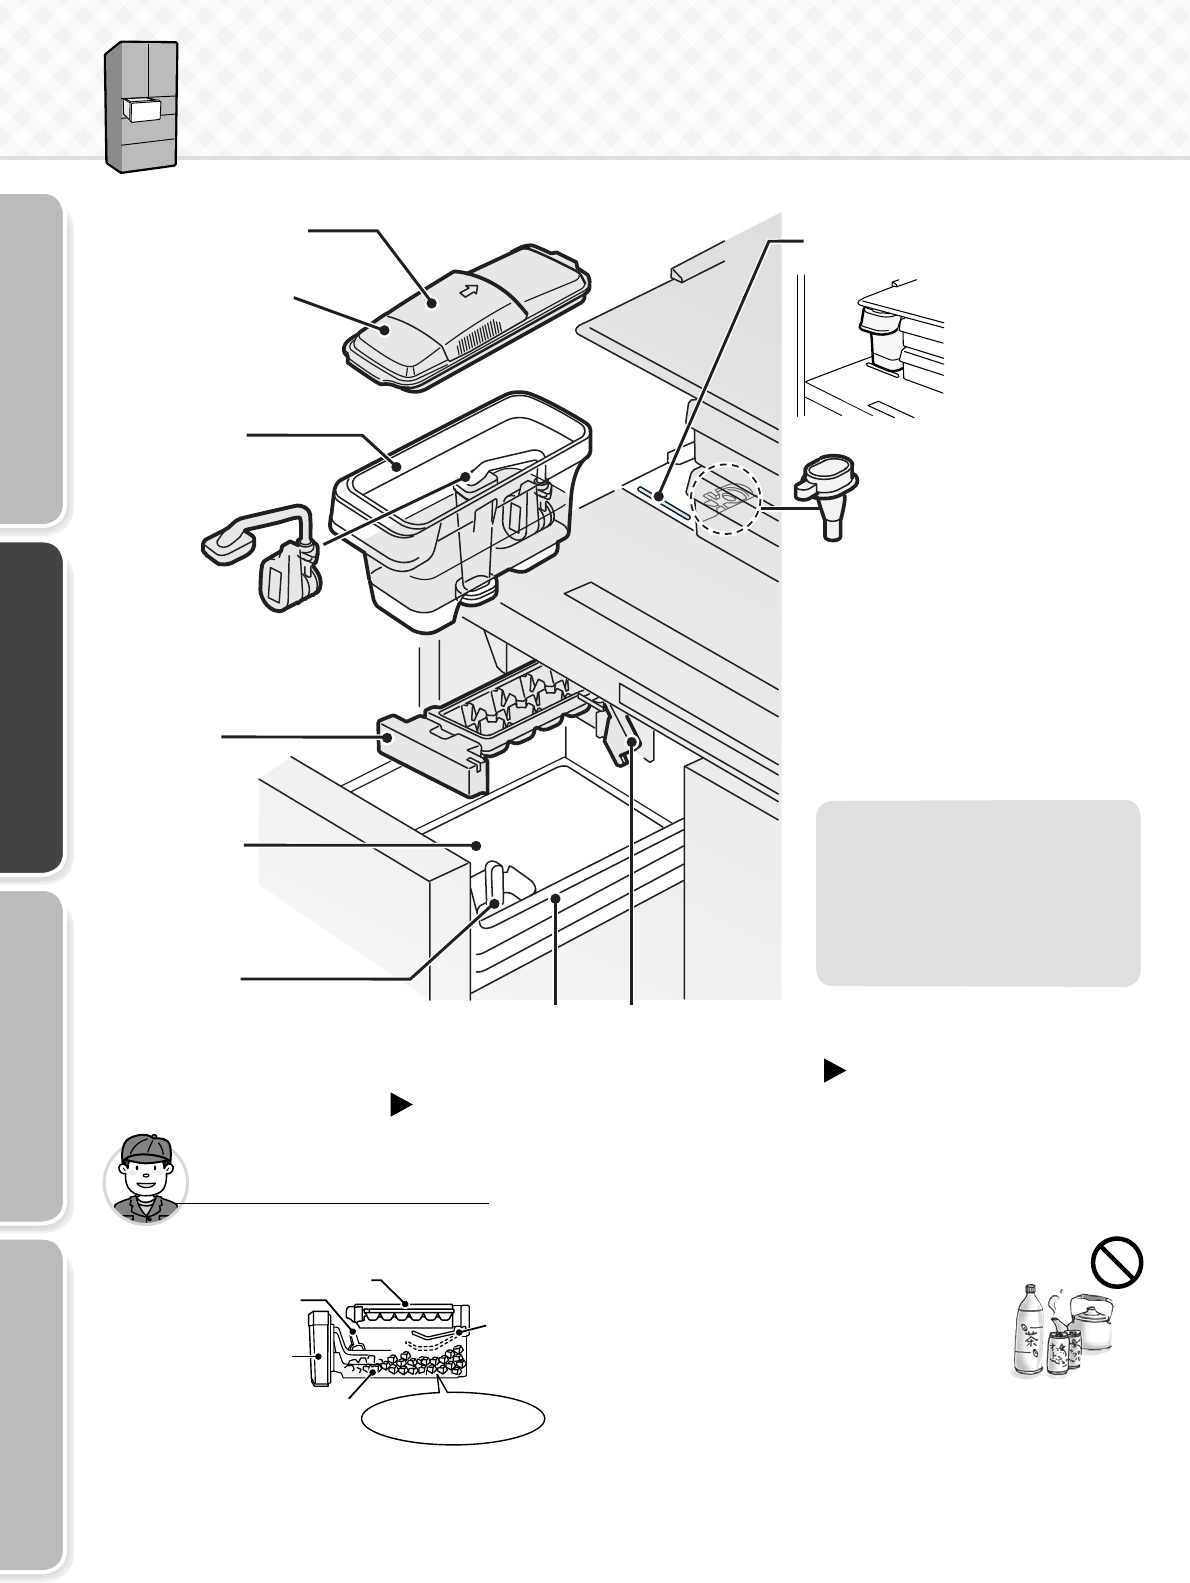
Ice making precautions
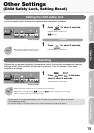
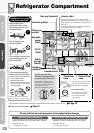
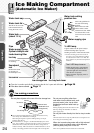
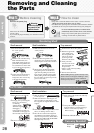
Water tank lid
Water tank cap
Water supply pipe
Ice tray
Soundproof
mat
Reduces the sound
of dropping ice.
Do not dispose of it.
It can be removed
for cleaning.
The lid can be set on the
tank in both directions,
facing the front or rear.
Water tank
(about 1.2 L)
Water tank setting
position line
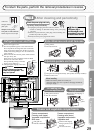
V-LED lamp
Ice storage box Ice tray lock lever
Ice server
The V-LED lamp turns on
Light is radiated on the optical catalyst
and lead-cleaning fi lter to prevent
breeding of bacteria
*
inside the water tank.
• When the refrigerator compartment
or ice making compartment door is
open (the light turns off 5 minutes
after the door is opened)
• Before and after supplying water to
the ice tray
Pipe
Water supply pump
Optical catalyst and
lead-cleaning fi lter
Do not place objects at the rear of the ice storage box.
Do not pour anything other than
cold water into the water tank, such
as warm water, juice, tea or other
liquids (the tank can resist heat up
to 60°C).
Pouring anything other than cold water into the
tank may damage the automatic ice maker or
water supply pump.
Do not pour water directly into the ice tray to make
ice.
Unfrozen water in the ice tray may fall into the ice storage box, and
the ice may join not forming cubes.
When ice is made using water with a high mineral
content, such as mineral water, white deposits
(white crystals) may form in the ice.
This is the crystallized mineral content and is not harmful.
z
Do not store food higher than the ice storage box (because it may
cause an ajar door, malfunction or damage).
When using the regular or quick ice making setting, do not put
anything other than ice.
z
The level of the ice storage is checked automatically by the sensor
lever, and ice making is stopped when the ice reaches a certain level
(about 80 to 140 ice cubes). To ensure that the ice storage level is
detected correctly, make sure that the ice is fl at and that the ice server
is kept in its storage position in the front right of the ice storage box.
z
Clean the ice maker periodically to ensure that the ice is pure and delicious.
Page 26
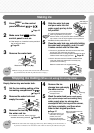
If the door alarm sounds
Page 11
Ice server
Ice storage box
Ice tray
Sensor lever
(Detects the ice
storage level.)
Door
Lay fl at
* The effect has been proven after 18 hours in
a test using a 12cm
2
fi lter bacteria-inoculated
in a sealed container with a 12 cm
2
fi lter, but
these conditions vary from the actual operation
conditions.
This is the guideline for
the water tank setting
position.
Push in the water tank
until it makes contact
with the inner side. Make
sure that the line can be
seen in front of the water
tank.
Ice Making Compartment
(Automatic Ice Maker)