25
J1
SERVICE (cont.)
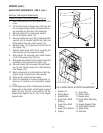
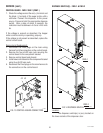
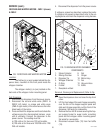
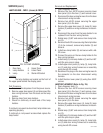
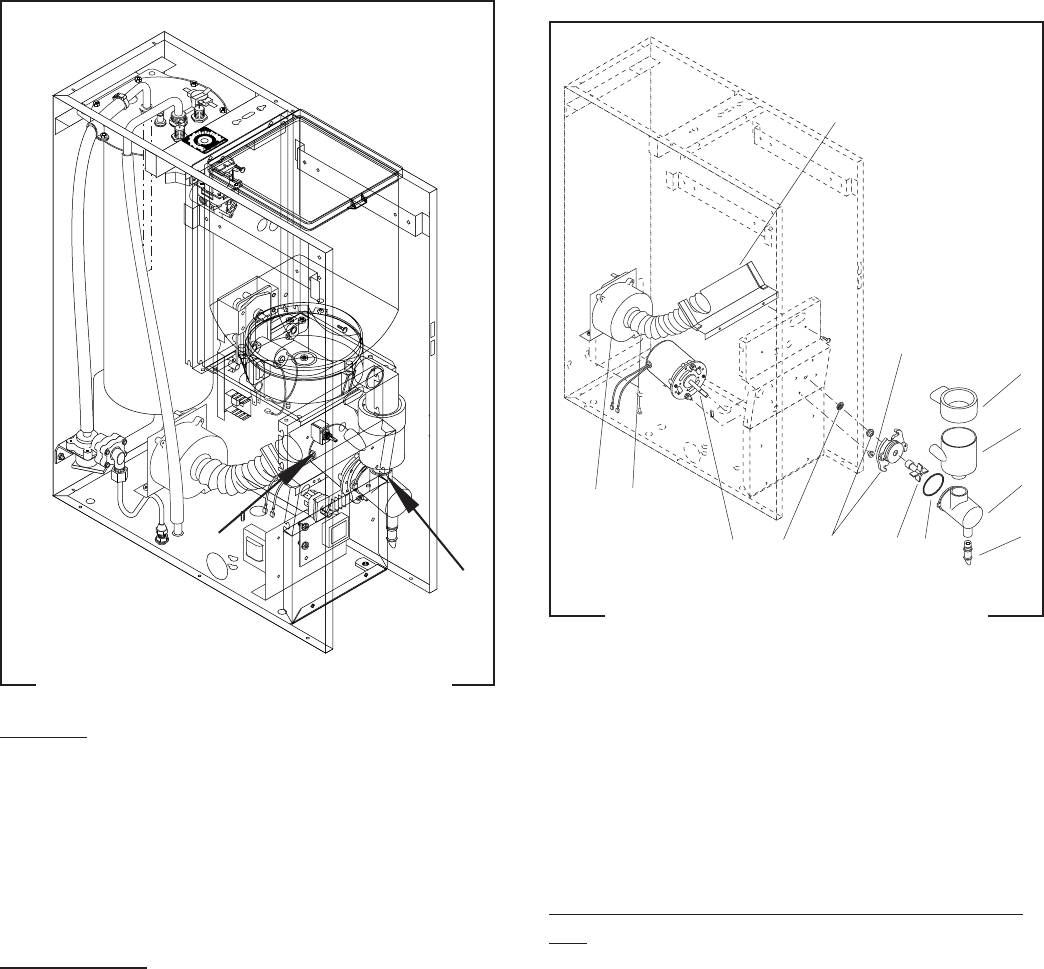
FROTHER AND WHIPPER MOTOR - FMD-1 (shown)
& FMD-2
FIG. 18 FROTHER AND WHIPPER MOTOR
Location:
The frother(s) is (are) located behind the dis-
penser door, mounted on the front panel inside the
whipper chamber.
The whipper motor(s) is (are) located on the
back side of the whipper motor mounting panel.
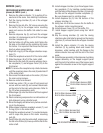
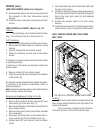
Test Procedure:
1. Disconnect the dispenser from the power source.
2. Disconnect the red and white wires (FMD-1 &
FMD-2 left motor) or orange and white wires
(FMD-2 right motor) of the main harness from the
black leads of the motor.
3. Press and hold the dispense switch and check the
voltage across the disconnected harness wires
with a voltmeter. Connect the dispenser to the
power source. The reading must be:
a) 120 volts ac for two wire 120 volt models.
b) 120 volts ac for three wire 120/208 volt or 120/
240 volt models.
4. Disconnect the dispenser from the power source.
If voltage is present as described, replace the motor.
If voltage is not present as described, refer to the wir-
ing diagrams and check the dispenser wiring harness.
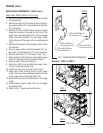
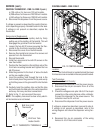
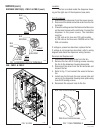
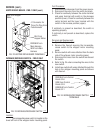
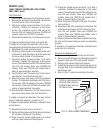
FIG. 19 MIXING/WHIPPER CHAMBER
COMPONENTS
1. Steam Collector
2. Mixing Chamber
3. Dispense Tip
4. Whipper Chamber
5. O-Ring
6. Frother
7. Receptacle w/Seal
8. Nut
9. Slinger
10. Motor Assy.
11. Fan
12. Vacuum Hose
13. Baffle
P1665
P1619
13
1
2
4
3
10 9 7 6 5
8
11 12
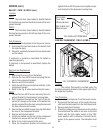
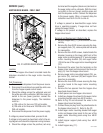
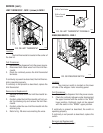
Removal, Cleaning and Replacement (Refer to Fig.
19):
1. Open the dispenser door and raise the top front
cover.
2. Lift the front edge of the each hopper assembly
over the tab on the hopper support panel and
slide each hopper assembly out the front of the
dispenser. Set aside for reassembly.
3. Remove the four #8-32 screws securing the hop-
per support panel to auger motor mounting
panel and the whipper motor mounting panel.
Set aside for reassembly.
4. Disconnect vacuum hose (12) from fan baffle
(13).
29112 101598


