6
COLD BEVERAGE SET-UP (OPTIONAL FMD-2 ONLY)
Cold beverages may be dispensed from the left dispense position as follows:
1. Disconnect the dispenser from the power source.
2. Remove the lower front access panel.
3. Locate the Hot/Cold jumper connection near the whipper panel in the main wiring harness.
4. Remove the Hot jumper connection (red jumper plug) from the main wiring harness and connect the Cold
jumper connection (blue jumper plug) to the main harness.
5. Replace the lower front access panel and reconnect the dispenser to the power source.
CLEANING
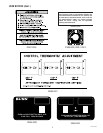
Refer to the decal on the rear of the dispenser door for cleaning recommendations and proccedures.
The use of a damp cloth rinsed in any mild, non-abrasive, liquid detergent is recommended for cleaning all surfaces
on Bunn-O-Matic equipment.
ADJUSTMENTS
The beverage solenoid is preset to dispense approximately one ounce per second. This amount can be adjusted:
1. Disconnect the dispenser from the power source.
2. Remove product hopper(s).
3. Remove the hole plug(s) in the auger motor mounting panel.
4. Rotate the control at the base of the solenoid clockwise to decrease or counterclockwise to increase the amount
of water.
5. Reinstall plug(s) and hopper(s).
HOPPER MOTOR SPEED ADJUSTMENT (FMD-1)
The hopper dispense rate is preset at the factory. With 8 tooth gear and auger wire the preset dispense rate is
approximately 3 to 5 grams per second. With 12 tooth gear and auger wire the preset dispense rate is approxi-
mately 5 to 7 grams per second. The hopper dispense rate can be adjusted to a range of dispense rates from
approximately 1.5 to 12 grams per second, as follows:
1. Set the tank heater switch to the off position.
2. Open the top front cover of the dispenser and remove the two screws securing the top cover.
3. Remove the top cover assembly and set it aside.
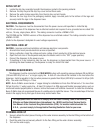
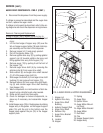
4. Locate the motor speed adjuster (leftmost) on the dispenser cabinet top cross member.
5. Using extreme care not to touch the live terminals of the tank heater, adjust the motor speed by rotating the
motor speed adjuster to the desired point, ranging from minimum (full counterclockwise) to maximum
(full clockwise.)
6. After the motor adjustment is complete, replace the top cover assembly, securing it with the two screws,
and return the tank heater switch to the on position.
29112 011906


