


4.
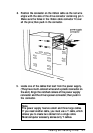
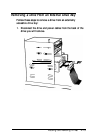
If you removed your only IDE hard disk drive, be sure to
remove the drive’s ribbon cable from its connector on the
main system board.
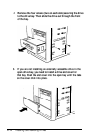
5. If you have finished installing or removing drives, replace
the computer’s cover (described in Chapter 3) and see
page 4-21 for post-installation setup instructions.
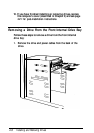
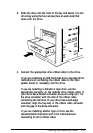
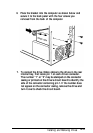
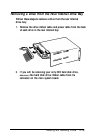
Installing a Drive in the Rear Internal Drive Bay
You can use the rear internal drive bay bracket to install up to
two, half-height drives. The illustrations in this section show
the bracket with its open side facing down, but you can also
install it with its open side facing up. Follow these steps to
install a drive in the rear internal drive bay:
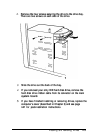
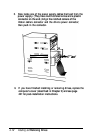
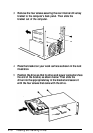
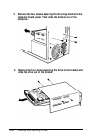
1.
If you already have a drive installed in the rear internal drive
bay, remove the ribbon cable and power supply cable from
the back of the drive so you can remove the drive bracket
from the computer.
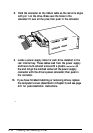
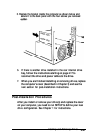
2. If you will be installing your first IDE hard disk drive, you
need to connect the hard disk drive ribbon cable to the
main system board; see the instructions on page 4-5.
Znstalling and Removing Drives
4-15