


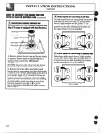
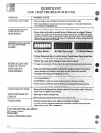

TOOLS~~~u!~~m
T-10T’orxdriver(forsealed burners)
1/2” and 3/4” open-endwrench
Flat blade screwdriver (small)
Nut drivers or wrenches: 7rnm or 5/16”
(depending on the size ofthe spuds)
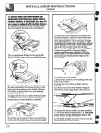
❑ PREPMEMHGE FORCOHWERSROH
(1) Twn offgas supp~ at tie wall.
(2) Tmn offtie electicd powe; to tie mgee
Ifrange has not yet been connected to gas supply,
or ifflexible connection was made, range maybe
pulled out from the wall to make conversion easier.
1sthe
eina
ation.
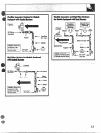
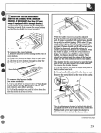
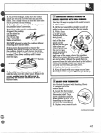
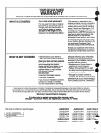
Ifit is thisregulator:
1. Usea cointo removethe capfromthe
pressureregulator.
2. Turn the capoverandhookit intothe slots.
Thetypeofgasto be used shouldnowbe visible
onthe topofthe cap.
W~G: Donot removethe pressure
regulatorfrom the range.
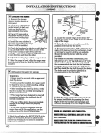
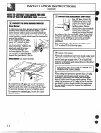
1. For models equipped with sealed burners,
remove the storage drawer, broiler drawer or
kick panel and locate the pressure regulator at
rear of the range.
RemoveScrews
AccessCover
On some models,youmayhaveto removean
accesscoveralso.
For models equipped with dual burners, remove
the cooktop and locate the pressure regulator at
right rear ofrange.
❑ 0
2. FOUOWthe directions in ~ or ~ that match
your regulator type.
(continuednextpage)
❑
Note:Onsomemodelstheshut-offvalve
maybeinadifferentlocation.
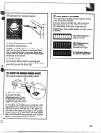
thisprotectivecap -
Cap Assembly
exceptforconversion
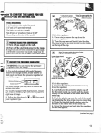
Ifit is thisregulato~
1. Unscrewthe plastic-protectedhex-nutcap
fromthe regulator.
2. Carefullypry the protectiveplasticcapoff
the threadedmetalcap.Gentlypullthe plastic
washeroffthe threads onthe othersideofthe
metalcap.
3. Pushthe plasticcapontothe end ofthe metal
capdisplayingthe typeofgas youare converting
to.Press the attachedplasticwasherontothe
threadsonthe othersideofthe metalcap.
4.
Screw the hex-nutcapbackintothe regulator.
Donot overtighten.
—