


33
Models H62 & H63 Operating Procedures
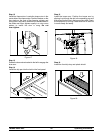
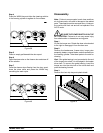
Step 4
Press the W ASH key and allow the cleaning solution
in the freezing cylinder to agitate for five minutes.
Figure 39
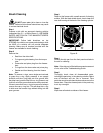
Step 5
Place an empty pail beneath the door spout.
Step 6
Open the draw valve on the freezer door and draw off
all the solution.
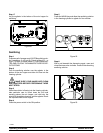
Step 7
Once the cleaner stops flowing from the door spout,
close the draw valve and press the WASH key,
cancelling the wash cycle.
Figure 40
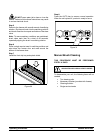
Disassembly
Note: Failure to remove parts, brush clean and then
air dry these parts, will result in damage to the related
parts. These parts must be removed every 14 days or
the machine will lock--out and will not operate in the
AUTO mode.
BE SURE THE POWER SWITCH IS IN THE
OFF POSITION. Failure to do so may cause injury
from electrocution or hazardous moving parts.
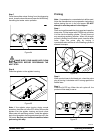
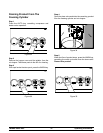
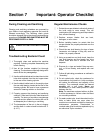
Step 1
Lift out the torque arm. Rotate the draw valve bracket
to the right to disengage it from the draw arm
Step 2
Remove the handscrews, freezer door , torque rotor
assembly, beater, scraper blades, and drive shaft from
the freezing cylinder. Take these parts to the sink for
cleaning.
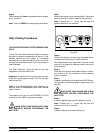
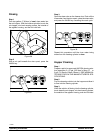
Hint: If the guide bearing is not connected to the end
of the torque rotor shaft, it is still lodged in the beater
drive shaft. To remove the guide bearing, insert the
torque arm into the side hole of the drive shaft and
push the bearing forward.
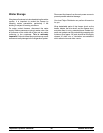
Step 3
Remove the front drip tray and splash shield.
Figure 41