


34
Model 8756Important: Operator Checklist
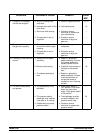
Section 7 Important: Operator Checklist
During Cleaning and Sanitizing
ALWAYS FOLLOW LOCAL HEALTH CODES.
Cleaning and sanitizing schedules are governed
by federal, state, or local regulatory agencies,
and must be followed accordingly. If the unit
has a “Standby mode”, it must not be used in
lieu of proper cleaning and sanitizing
procedures and frequencies set forth by the
ruling health authority. The following check
points should be stressed during the cleaning
and sanitizing operations.
CLEANING AND SANITIZING MUST BE
PERFORMED DAILY.
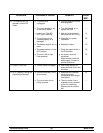
Troubleshooting Bacterial Count
j 1. Thoroughly clean and sanitize the machine
regularly, including complete disassembly and
brush cleaning.
j 2. Use all brushes supplied for thorough
cleaning. The brushes are specially designed
to reach all mix passageways.
j 3. Use the long white bristle brush to clean the
mix feed tube which extends from the mix
reservoir to the rear of the freezing cylinder.
j 4. Use the black bristle brush to thoroughly
clean the rear shell bearing located at the rear
of the freezing cylinder. Be sure there is a
generous amount of cleaning solution on the
brush.
j 5. Properly prepare the cleaning and sanitizing
solutions. Read and follow the label directions
carefully. Too strong of a solution may
damage the parts and too weak of a solution
will not do an adequate job of cleaning or
sanitizing. Sanitize the freezing cylinder for 5
minutes.
j 6. The temperature of the mix in the mix cabinet
and the walk-in cooler should be below 38_F
(3.3_C).
Regular Maintenance Checks
j 1. Replace scraper blades that are bent,
damaged or worn.
j 2. Before installing the beater, be certain that the
scraper blades are properly attached over the
pins and the beater assembly is straight.
j 3. Check the rear shell bearing for signs of wear
(excessive mix leakage in the rear drip pan)
and be certain it is properly cleaned.
j 4. Using a screwdriver and cloth towel, keep the
rear shell bearing and the female hex drive
socket clean and free of lubricant and mix
deposits.
j 5. Dispose of o-rings and seals if they are worn,
torn, or fit too loosely, and replace with new
ones.
j 6. Follow all lubricating procedures as outlined in
“Assembly”.