59
Using your Attenuator as a Variable Back Reflector
Configuring the Hardware
4.1 Configuring the Hardware
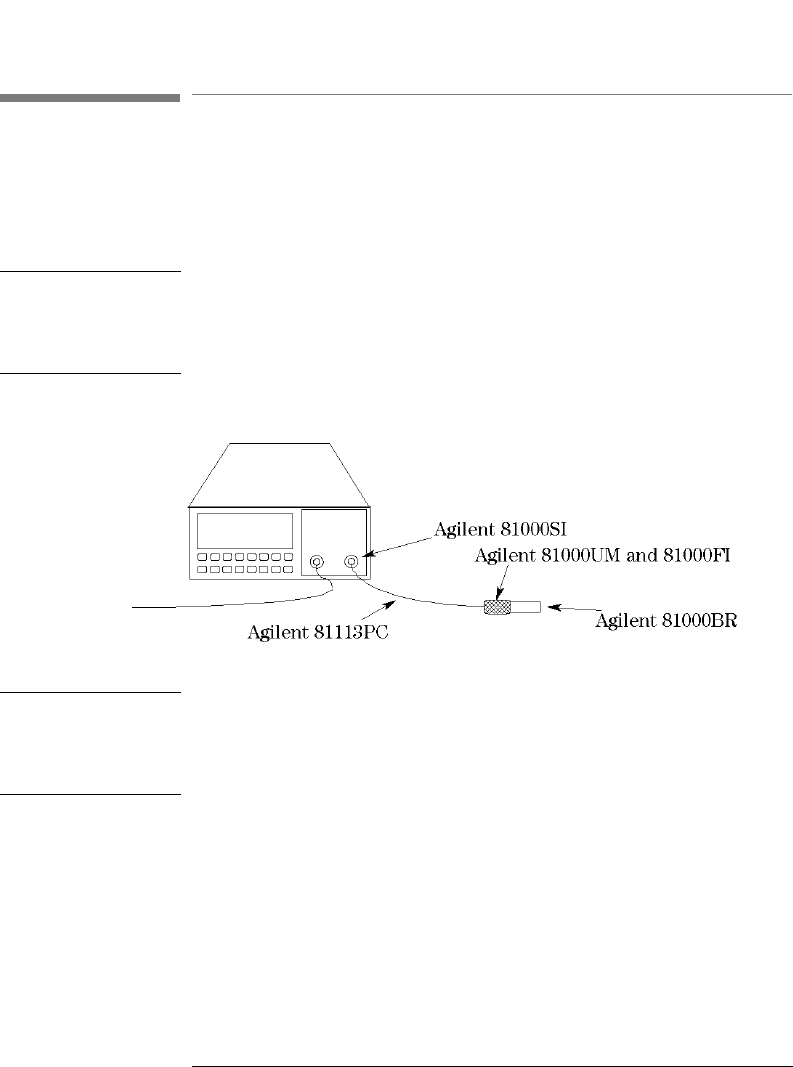
To use the attenuator as a back reflector, you need to set up the
hardware as shown in the figure below.
NOTE If this your first time to use the attenuator as a back reflector, you first
need to make some measurements. These require other setups before
setting up the hardware as shown below (see “Setting Up the Software”
on page 60).
Figure 4-1 The Hardware Configuration for the Back Reflector
NOTE Before using the instrument, you should make sure that it is properly
warmed up. The instrument is properly warmed up when it has been
switched on for a minimum of 45 minutes. Failure to do this can cause
errors of up to 0.04dB in the attenuation.
If you are not using option 201, the connector interfaces you need
depends on the connector type you are using. Option 121 or option
221 (the monitor output) is of no use when using the attenuator as a
back reflector. The disruption to the back reflection performance by
leaving this output open is negligible, though you may want to
terminate it to eliminate any small effect it might have.


