


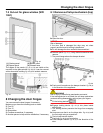

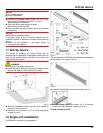
8.7 Fitting the soft stop mechanism
(bottom)
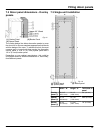
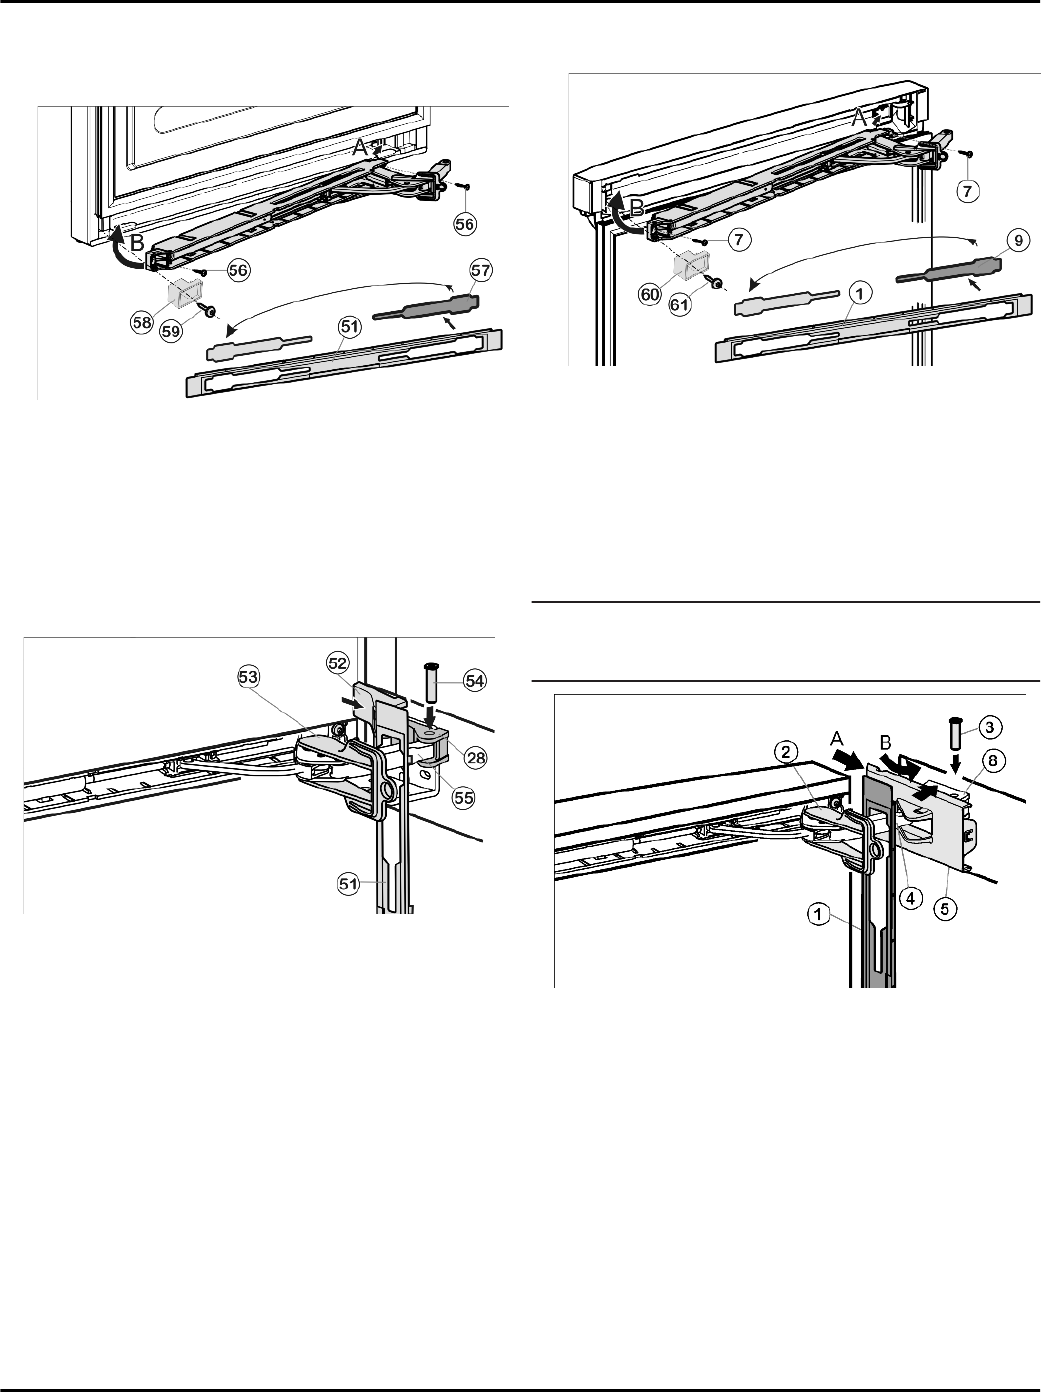
Fig. 34
u
Loosen cover
Fig. 34 (57)
from the panel
Fig. 34 (51)
and
insert on the other side.
u
With the hinge of the soft stop unit facing the door
hinge side, engage the soft stop unit (A) and swivel
inwards (B).
w
The holes on the left and right must lie exactly above
each other.
u
Tighten soft stop unit (2 x Torx 15)
Fig. 34 (56)
.
u
Screw on spacer
Fig. 34 (58)
.
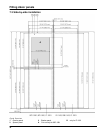
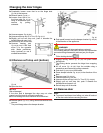
Fig. 35
u
Hook panel
Fig. 35 (51)
into the damper bracket such
that the detent hooks are pointing forward and the front
side is facing the appliance.
u
Pull damper bracket
Fig. 35 (55)
towards bearing part
Fig. 35 (28)
and insert bolt
Fig. 35 (54)
from above such
that the square is resting in the recess.
u
Place cover
Fig. 35 (52)
on top and snap into place.
w
Check that the cover is positioned correctly such that
the door can close properly and the bolt is secured.
u
Remove locking device
Fig. 35 (53)
by twisting it.
u
Snap panel
Fig. 35 (51)
into place on the door.
u
Close the door.
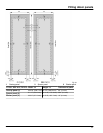
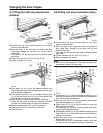
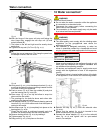
8.8 Fitting soft stop mechanism (top)
Fig. 36
u
Loosen cover
Fig. 36 (9)
from the panel
Fig. 36 (1)
and
insert on the other side.
u
With the hinge of the upper soft stop unit facing the
door hinge side, engage the soft stop unit (A) and
swivel inwards (B).
w
The holes on the left and right must lie exactly above
each other.
u
Tighten soft stop unit (2 x Torx 15)
Fig. 36 (7)
.
u
Screw on spacer
Fig. 36 (60)
.
Note
u
Follow the correct sequence. First hang the panel over
the damper bracket, then the cover.
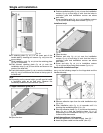
Fig. 37
u
Hook panel
Fig. 37 (1)
into the damper bracket
Fig. 37 (4)
such that the detent hooks are pointing inwards and the
front side is facing the appliance.
u
Push on cover
Fig. 37 (5)
from the outside (A) and pivot
over the bearing part
Fig. 37 (8)
(B).
u
Place cover
Fig. 37 (5)
on top and allow to snap into
place until the first notch.
w
The openings for the bolts lie above each other after
positioning the damper bracket.
u
Pull damper bracket
Fig. 37 (4)
towards bearing part and
insert bolt
Fig. 37 (3)
from above such that the square is
resting in the recess.
u
Now snap cover
Fig. 37 (5)
completely into place on the
bearing part
Fig. 37 (8)
.
w
Check that the cover is positioned correctly such that
the door can close properly and the bolt is secured.
Changing the door hinges
22