-33-
Revision 4/F3576 © Moffat Ltd, December 2004
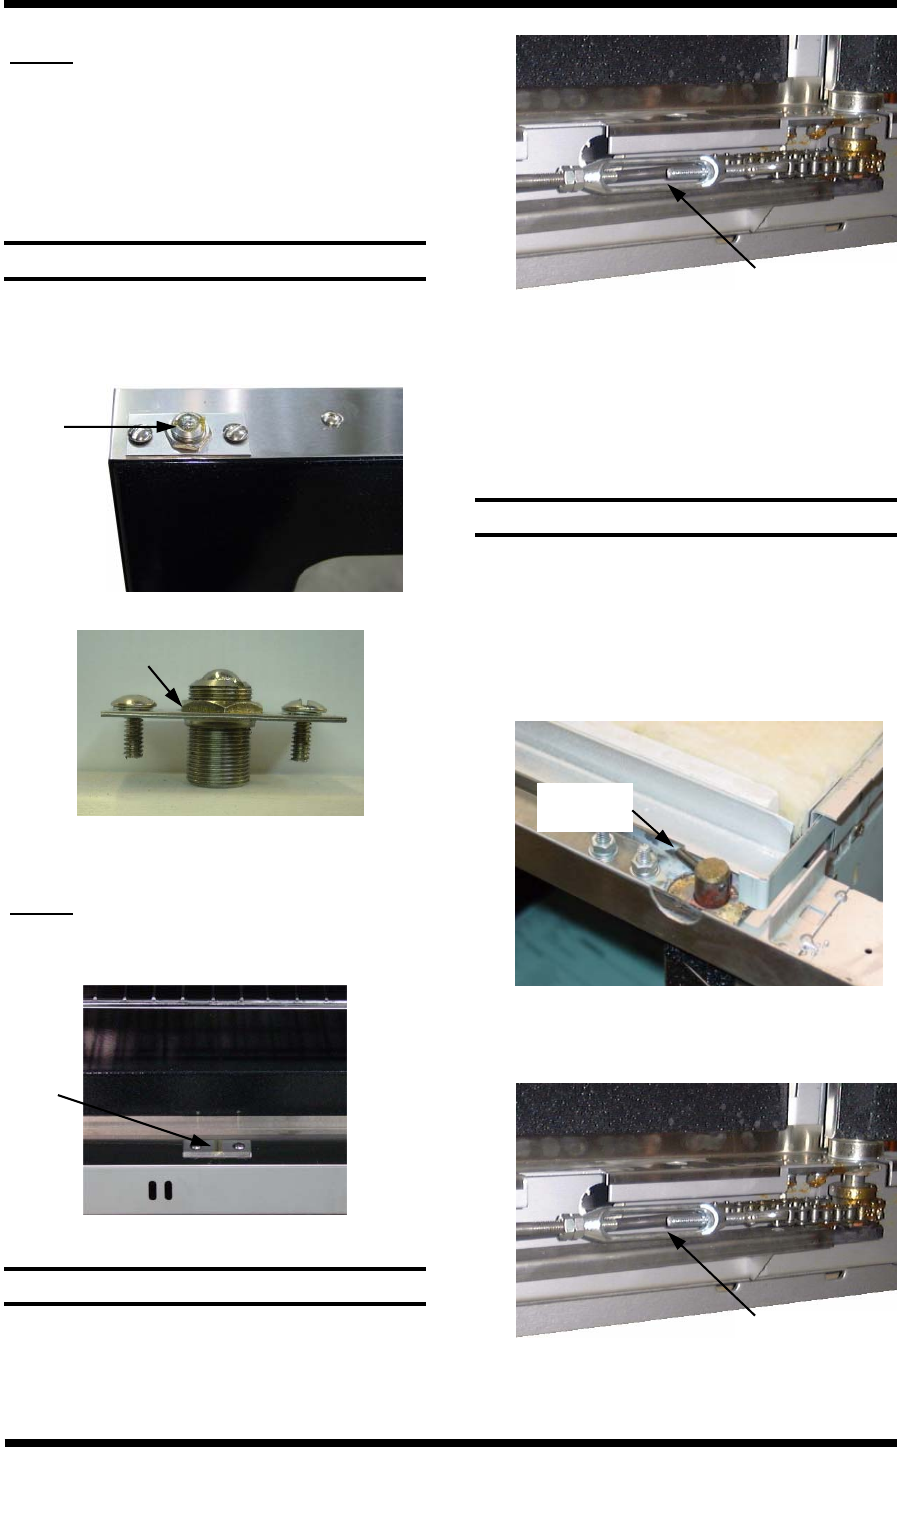
6.3.24 DOOR BALL CATCH
1) Remove the bottom lintel from the oven
(refer 6.2.5).
2) Undo both turnbuckles from the door chain
assembly.
6.3.25 DOOR LINKAGE CHAIN ASSEMBLY
3) Remove the door chain assembly and
replace the broken component.
4) Reassemble in reverse order.
5) Adjust chain such that the oven doors
close correctly (refer 6.4.1)
Figure 6.3.37
Turnbuckle
1) Open oven door.
2) Loosen the locknut securing the ball
catch, and unscrew the ball catch.
Figure 6.3.34
4) Replace and reassemble in reverse order.
NOTE: The door striker plates should also
be checked for wear and replaced if
necessary.
Figure 6.3.35
Locknut
Ball
catch
Figure 6.3.36
Striker
Plate
1) Remove the bottom lintel (refer section
6.2.5).
2) Right hand door removal only:
Remove the top lid.
Remove the microswitch actuator pin from
the door pin.
6.3.26 DOOR ASSEMBLY
Microswitch
actuator pin
Figure 6.3.38
3) Undo both turnbuckles from the door chain
assembly.
Figure 6.3.39
Turnbuckle
NOTE: The seals on the door inner and outer
must be replaced with new ones if
damaged.
6) Replace the broken pane and refit both
clean panes either side of the spacer.
7) Reassemble in reverse order.


