2-28
SECTION 2
INSTALLATION
IX. CHANGING ORIFICES
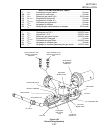
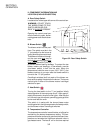
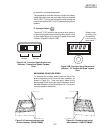
TO CHANGE MAIN ORIFICE (Refer to Figure 2-36)
1. Turn off main gas supply valve.
2. Open 3/4" union in gas supply line.
3. Remove 1/2" nuts securing gas train to the burner housing.
4. Using a 11/16" wrench remove orifice from the mounting
flange.
5. Install new orifice in reverse order.
WARNING
Before operating oven check for gas leaks!
TO CHANGE BYPASS (LOW FLAME) ORIFICE (Refer to
Figure 2-36)
1. Turn off main gas supply valve.
2. Open 3/4" union in gas supply line.
3. With 1/2" wrench loosen compression nuts securing bypass
tube to solenoid valve.
4. Remove orifice from bypass tube.
5. Install new orifice in reverse order.
X. VOLUMETRIC METHOD
WARNING
Before operating oven check for gas leaks!
IMPORTANT
During these measurements, no other gas appliance should be
in operation being supplied from the same gas meter.
To determine gas flow setting value E:
E = Liters/min.
NB = Rated input in kW
HuB = Heat (Calorific) value of gas in kW/m
3
E = NB
HuB
To determine the time of 0.1m
3
(100 liters) gas usage:
Time in minutes =100
E
The time of the gas flow through the meter should be taken
with a stopwatch.
1. Remove cover screw from the gas valve pressure (governor)
adjustment valve.
2. Open main gas supply valve and start oven according to
supplied instructions with the temperature control at
maximum setting.
3. Once oven is in operation, adjust pressure valve (governor)
to the calculated volume using the time for 100 liters of flow
through. Turning the adjustment screw clockwise will
increase the flow and counter-clockwise will reduce it.


