


4-8
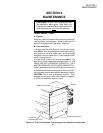
SECTION 4
MAINTENANCE
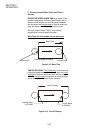
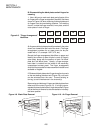
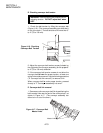
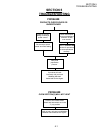
Figure 4-13. Air Finger
Parts
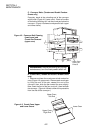
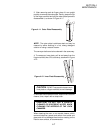
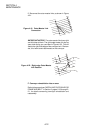
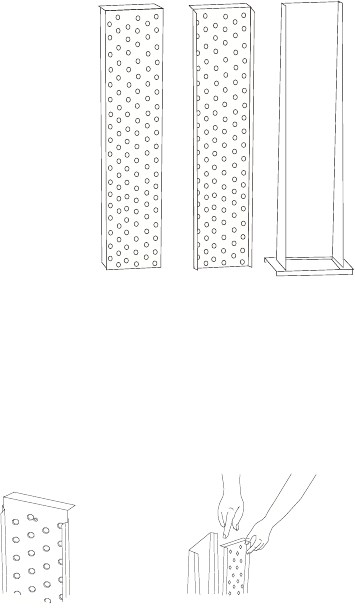
Figure 4-14. Inner
Plate Reassembly
Details
C. Reassembly and reinstallation of air fingers
Each air finger is made up of one inner plate, one outer
plate and one finger manifold (Figure 4-13). Be sure to
match the 'finger arrangement' identifier markings
(T1, T2, etc.) on all the parts of each air finger during
reassembly.
1. Reassemble the inner plate into the finger manifold
(Figure 4-14). Keep your fingers clear to avoid pinching
them.
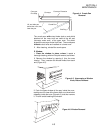
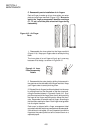
The inner plate of an air finger will only go in one way
because of its design, as shown in Figure 4-15.
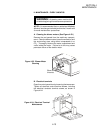
2. Reassemble the outer plate by sliding it downward in
the grooves on the side walls of the finger manifold. Keep
your fingers clear to avoid pinching them.
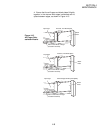
3. Reinstall the air fingers (and blank plates) into the oven
by sliding them into the channels on the rear oven wall,
using the method shown in Figures 4-9 and 4-10. Sup-
port the outer end of the finger (oven front), while pushing
the base of the finger manifold portion along the chan-
nels. Remember to reinstall each air finger, according to
the identifiers marked on them. Each finger must go back
into its original location.
Each oven is shipped with a finger arrangement label
mounted inside the machinery compartment access panel.
If this sticker is not legible, it is very important to mark the
fingers as they were pulled out and to record them on a
separate paper.