


Page
45
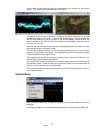
The display of the mini-pic defaults to normal, full colour mode. When using the XR in a
colorist environment, where brightly coloured displays can be a distraction for the colorist,
it may be helpful to switch the mini-pic into the monochrome mode.
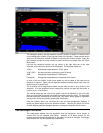
The mini-pic can also be switched into a blue or green mode, whereby the blue (or green)
data is applied to all three channels. This can be very helpful in looking for noise, or
perhaps for looking for macroblocks, which tend to be more pronounced in the chroma
channels over the luma channels, especially in HD.
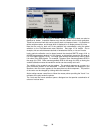
Show Closed captions is only useful if the incoming material (or test sequence) contains
closed caption source, and if the correct source has been selected, which is also done
from the Analyzer menu of the main application.
The aspect ratio of the mini-pic can be changed from its default settings to preset values,
or to a custom value, or may be forced to follow the Wide Screen Signaling values that
can be contained within PAL video.
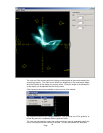
The display of the crosshair on the mini-pic window can be enabled or disabled.
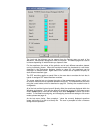
Active tooltips shows the mouse position in pixel sample number, and video line. For
interlaced video formats, the line number will be displayed based on the field selection
that has been made on the Crosshair toolbar, as described on page 33.
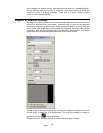
The Look & Feel brings up the common Look and Feel dialogue, directly onto the mini-pic
settings page. You can select the colour of the crosshair, and independently the colour
of the cursor.
Lastly, you can save a snapshot of the currently displayed image. This is saved as a
.BMP file.
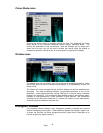
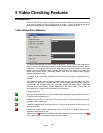
Window Controls
The waveform window, the vectorscope window, the data view window, the audio meters
window, and the mini-pic window all have drop down menus to configure how the window
contents are displayed, or the window manipulated. Not all windows have exactly the
same controls, but the following section should cover all of the available features.
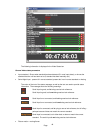
The windows all have an ‘Option’ menu. Depending on window, this will have the
following selections.
Data Change from RGB to GBR format.
Graticule Enable the display of graticule
Show graticule labels
Specify graticule as SMPTE range, or full range.
Choose graticule as 75% or 100%, for vectorscope
Choose calibration for different PPM scales, for audio levels
Crosshair Show crosshair
Aspect ratio Choose aspect ratio for mini-pic as one of a selection of standards, or
choose custom aspect ratio
Show Tooltips Gives line and sample number of point under cursor.
The windows also all have a ‘Window’ menu. This provides the following possibilities.
Full Screen Select this and the chosen window data will be displayed in a full screen
mode, without any windows artefacts present, such as toolbars, menus
etc. Press Escape to return to the standard display.
Resize Select this to change the window size to the default minimum size to suit
the data being displayed.
Snap If this choice is enabled, windows snap to points on a grid as you move
them around, which sometimes makes it easier to line them up as you
require.
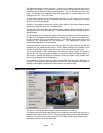
Stretch By default as windows are resized, the data remains the same, with the
extra space padded with black. By selecting this option, the data
contents are stretched to full the window, although still maintaining the
original aspect ratio.