4
INSTRUCTIONS FOR USE
BEFORE USING YOUR OSTER® MIXMASTER® STAND MIXER
Before assembling your Oster® Mixmaster® Stand Mixer, be sure the power cord is
unplugged from the power outlet and the speed control dial is in the “O” position.
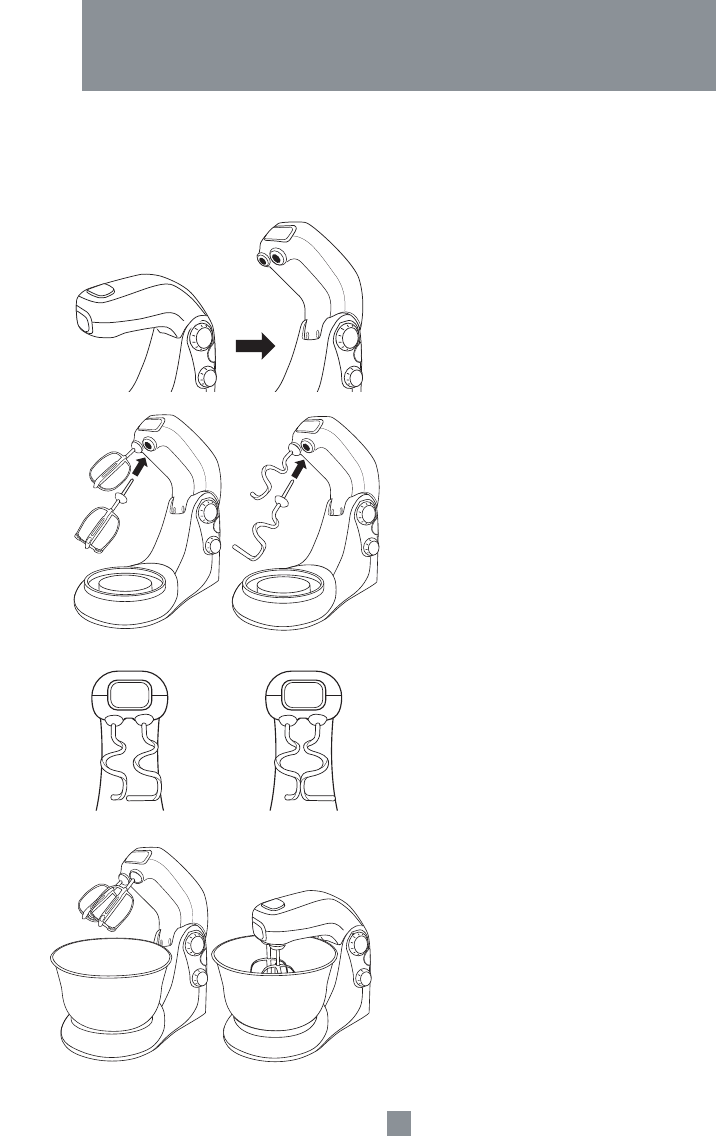
Figure 1
1. Press the tilt button located on the stand
and swing the mixer head up. The mixer
head will lock into this tilt position so you
can insert the beaters or dough hooks and
the bowl
(Figure 1).
2. Insert the beater with the round/oval shape
into the back socket and the beater with
the flat bottom shape and plastic pieces
into the front socket (the socket located on
same side as the speed controls in the
mixer) (Figure 2). To insert the dough hooks,
place the one with the shorter hook into
the back socket and the one with the
longer hook into the front socket (the
socket located on same side as the speed
controls in the mixer) (Figure 3).
Important: Please review Figure 4. The
illustration on the left is how the dough
hooks should look when correctly inserted.
However, should the dough hooks once
inserted to be touching, as they do in the
illustration on the right, then they have
been inserted incorrectly.
Note: Be sure both beaters or dough
hooks click firmly in place, you may need
to twist the attachments slightly to engage
them in position prior to pushing them into
place.
3. Place the mixing bowl onto the plate
located on the stand and lock it by turning
it clockwise (Figure 5).
4. Press tilt button to lower the head with the
attachments already in place and into the
bowl. Ensure mixer head locks into place
(Figure 6).
Figure 2 Figure 3
Figure 4
CORRECT INCORRECT
Figure 5 Figure 6


