


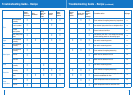

10
11
SETTING 8:
YEAST FREE
Press the ‘SELECT’ button eight times and the LCD screen will show 8 1KG MEDIUM.
To select a light or dark crust colour, press ‘CRUST’ button once for DARK, twice for
LIGHT. To select the 750g (0.75KG) size, press ‘LOAF SIZE’ button once.
Dough or batter recipes that rely on baking powder or bicarbonate of soda as the
raising agent are suitable for use on this setting.
SETTING 9:
DOUGH
Press the ‘SELECT’ button nine times and the LCD screen will show 9 1KG. To select
the 750g (0.75KG) size, press ‘LOAF SIZE’ button once.
This cycle takes 1 hour 30 minutes to complete then the dough is removed from the
bread machine, hand shaped and baked in the conventional oven. Instructions and
recipes for Pizza and Foccacia are also included in the Dough section of this book.
SETTING 10:
JAM
Press the ‘SELECT’ button ten times and the LCD screen will show 10.
This setting is designed to make home-made style jam using seasonal fresh fruit. A
variety of recipes can be found in the ‘Just Jam’ section of this book.
SETTING 11:
BAKE ONLY
Press the ‘SELECT’ button eleven times and the LCD screen will show 11.
Press the up/down ‘’/‘’ arrow buttons to select a time between 5 minutes and 2
hours.
For those who enjoy a crispier crust, this setting will extend the baking time or add
interest to the loaf with delicious topping or melt ideas.
Know your Breville Baker’s Oven continued Know your Breville Baker’s Oven continued
USING THE PRESET TIMER
The Baker’s Oven ‘PRESET TIMER’ lets you wake
to the aroma of fresh baked bread in the morning.
You can set the timer up to 13 hours in advance
before you require your baked loaf.
Recipes using perishable ingredients should
not be made using the ‘PRESET TIMER’.
Step 1
To bake a loaf of bread on the 1 (BASIC) 1KG
MEDIUM setting using the ‘PRESET TIMER’, follow
Steps 1-8 under the heading ‘Beginner’s Guide to
Baking Your First Loaf’ on pages 13-14.
Step 2
To preset the timer use the up/down ‘’/‘’
arrows on the control panel to enter the number
of hours in which you want your bread to be
ready (the amount of time shown on the LCD
screen will include the total setting time). To set
the time, press the down ‘’ arrow or up ‘’
arrow the appropriate number of times until you
see the number of hours and minutes displayed.
Each time you press the up ‘’ arrow button, the
timer advances 10 minutes. Each time you press
the down ‘’ arrow button the timer is set back
10 minutes. Hold down the up ‘’ or down ‘’
arrow buttons for speedier adjustments.
Step 3
Press ‘START’. The colon (:) in the time displayed
begins to flash, letting you know the ‘PRESET
TIMER’ has started. The remaining time will count
down in one minute increments. When the time
on the LCD SCREEN indicates ‘0:00’, baking is
complete. If you make an error during or after your
selection, press and hold the ‘STOP’ button and
you can begin your selection again.
Example:
Before leaving for work at 8.00am, you decide
to make a loaf of white bread and wish to have
it ready for dinner at 6.00pm (10 hours later).
Press the up ‘
’ arrow until 10:00 appears on
the LCD SCREEN. Press ‘START’.
Your Baker’s Oven will begin making your
bread at the appropriate time for it to be ready
at exactly 6.00pm.
Note
The ‘PRESET TIMER’ cannot be used with the
‘JAM’ or ‘BAKE ONLY’ settings.
Note
The ‘PRESET TIMER’ cannot be used for all
recipes. Individual recipes will specify if not
suitable.
Note
It is advisable, before using the ‘PRESET
TIMER’ for the first time, to test the recipe.
It is also advisable to weigh and measure
ingredients accurately to ensure the correct
ratio of flour/water and other ingredients is
used.
Note
To ensure the efficient operation of the bread
machine, use in an area not affected by
extremes of heat or coldness.
Note