3-2
Installation 3
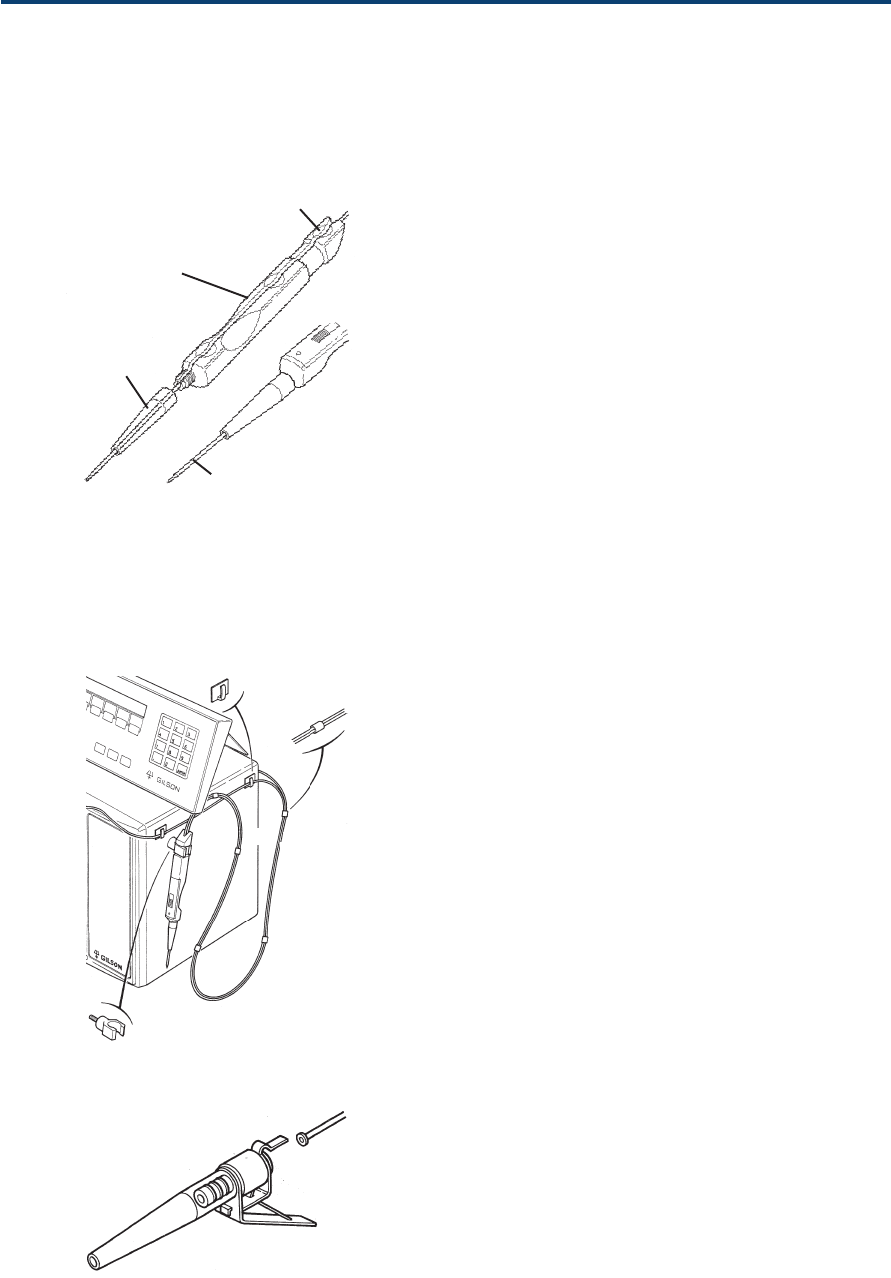
Assembling the Probe
For Standard Use
In standard use the probe is used with the 2 mL
tapered transfer-tubing (see opposite figure).
1. Thread the tapered end of the transfer-tubing
through the plastic ‘tunnels’ in each of the 5 pre-
mounted cable supports (see figure below).
2. Lay the tubing on the probe’s groove such that
about 4 cm of the tapered end protrudes from
the end of the probe.
3. Push the tubing into the groove in the probe at
the 3 round access points using (for example)
the rounded end of a pencil. Do not press on the
tubing with your fingernail.
4. Push the tapered end of the tubing through the
standard tip, then screw the tip onto the end of
the probe.
5. Plug the end of the control cable into the socket,
labeled ‘PROBE’ at the back of the 402.
6. Fit the clamp for probe at the right-hand side of
the 402 (see opposite figure).
7. Mount the probe on the clamp.
8. Connect the other end of the tubing to the outlet
of the Valve (Single-syringe) or the Tee-junction
(Dual-syringe).
9. Use the 402 Software to check (and change, if
necessary) the configuration using the Conf
(Vol) menu.
Adapter Kit for Disposable Tips
The ability to use Diamond Tips will extend the use
of your 402 into the biological field, where protec-
tion against cross-contamination is important, and
in the chemical field to protect the tubing from
corrosive liquids.
You must fit a tip-holder to the probe when you
want to use Gilson’s Diamond tips. An adapter kit
(reference F4015015) is available to permit you to
fit them to the probe. The kit includes two sizes of
tip-holder (with built-in tip ejector), and a special
non-tapered 2 mL transfer tubing, as follows.
Assembling the Probe
When you want to increase the
length of tubing protruding
from the probe, you must first
carefully lift the tubing out of
the handle, otherwise you will
damage the tubing.
Access Point
Transfer Tubing
Probe
Probe
Nozzle


