


3-3
Installation 3
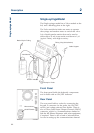
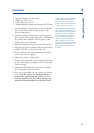
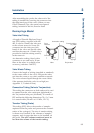
2 Special adapters for the probe
1 D200 tips, pack of 10
1 D1000 tips, pack of 10
1 Transfer-tubing (outlet) non-tapered, FEP (2 mL)
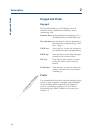
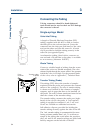
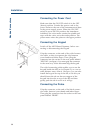
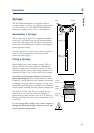
1. Lay the tubing on the probe’s groove such that
the end with the small washer is just at the
orifice of the probe.
2. Push the tubing into the groove in the probe at
the 3 round access points using the rounded end
of a pencil (for example). Do not press on the
tubing with your fingernail.
3. Screw the tip-holder onto the end of the probe.
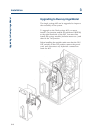
4. Plug the end of the control cable into the socket,
labeled ‘PROBE’ at the back of the 402.
5. Fit the clamp at the right-hand side of the 402
(see on the previous page).
6. Mount the probe on the clamp.
7. Connect the other end of the tubing to the outlet
of the valve (Single-syringe) or the Tee junction
(Dual-syringe).
8. Inform the 402 Software of the new configura-
tion using the Conf (Vol) menu.
9. Fit a tip to the holder. In use, when you change
a tip, wipe the end of the tip-holder first, to
remove any liquid from the orifice. Do not
twist the probe to the left, when fitting a tip,
otherwise the tip-holder will unscrew itself.
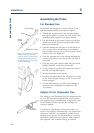
Assembling the Probe
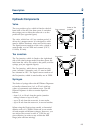
(1) The small washer is important
in that it helps to ensure that
fluid does not leak from the
junction between the tip-holder
and the orifice of the probe.
(2) The special ‘S’ shaped metallic
clips, which are pre-mounted, are
for supporting the tubing on the
black control cable. The tubing
for use with the tip-holder will
not pass through the plastic
‘tunnels’ in the pre-mounted
cable supports. However, to
make the metallic clip easier to
attach, you can push these black
tubing-supports to the end of
the cable.