


40
Models C709 & C717Operating Procedures
140722
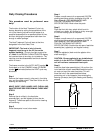
Daily Closing Procedures
This procedure must be performed once
daily!
The function of the Heat Treatment Cycle is to
destroy bacteria by raising the temperature of the
mix in the freezing cylinder and the hopper to a
specified temperature for a specified period of time,
and then bringing the temperature back down low
enough to retard spoilage.
The Heat Treatment Cycle will start at the time
designated in the Auto Heat Time.
IMPORTANT: The level of mix in the mix
hopper(s) must be up to the fill line on the
agitator paddle(s). (The mix low light must not be
on.) Note: If the BRUSH CLEAN COUNTER display
has counted down to one day, do not add mix. The
machine must be disassembled and brush cleaned
within 24 hours.
The freezer must be in the AUTO (AUTO symbol
illuminated) or in the STANDBY mode (STANDBY
symbol
illuminated) before the HEAT cycle may
be started.
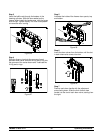
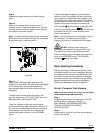
Step 1
Remove the hopper cover(s), drip pan(s), front drip
tray, and the splash shield. Take them to the sink for
cleaning and sanitizing.
MAKE SURE YOUR HANDS ARE CLEAN AND
SANITIZED BEFORE PERFORMING THESE NEXT
STEPS.
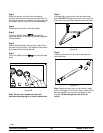
Step 2
Remove the air orifice(s), the feed tube
assembly(lies), and the agitator(s) from the mix
hopper(s). Take these parts to the sink for cleaning
and sanitizing.
Step 3
Rinse these parts in cool, clean water.
Step 4
Prepare a small amount of an approved 100 PPM
cleaning/sanitizing solution (examples: Kay-5® or
Stera-Sheen®). USE WARM WATER AND
FOLLOW THE MANUFACTURER'S
SPECIFICATIONS. Brush clean the parts.
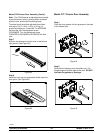
Step 5
Place the front drip tray, splash shield, and air
orifice(s) on a clean, dry surface to air-dry overnight
or until the heating cycle is complete.
Step 6
Prepare a small amount of an approved 100 PPM
cleaning/sanitizing solution (examples: Kay-5® or
Stera-Sheen®). USE WARM WATER AND
FOLLOW THE MANUFACTURER'S
SPECIFICATIONS. Sanitize the drip pans, feed tube
assembly(ies), agitator(s) and hopper cover(s).
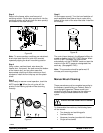
Step 7
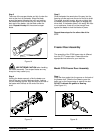
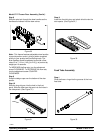
Install the agitator(s) back onto the agitator drive
shaft housing(s).
CAUTION: Be sure agitator(s) are installed and
switch is in the AUTO or STANDBY mode or the
unit will not have a successful heat cycle.
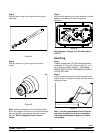
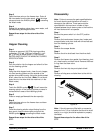
Step 8
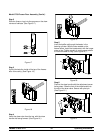
Install the feed tube assembly(ies). Lift and turn the
inner feed tube of each assembled feed tube so the
pin rests on top of the outer feed tube. This will
close the hole in the assembled feed tubes,
preventing mix in the hopper(s) from entering the
freezing cylinder(s) during the Heating and Standby
process.
Figure 44