


44
Models C709 & C717Operating Procedures
080227
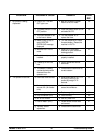
Step 3
Open the draw valve on the freezer door. Drain all
the rinse water from the door spout, close the draw
valve and touch the WASH symbol,
/ cancelling
the Wash mode.
Step 4
Repeat this procedure using clean, warm water, until
the water being discharged is clear.
Repeat these steps for the other side of the
C717.
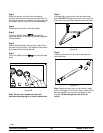
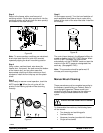
Hopper Cleaning
Step 1
Prepare an approved 100 PPM cleaning solution
(examples: 2-1/2 gal. [9.5 liters] of Kay-5R or 2
gal. [7.6 liters] of Stera-SheenR). USE W ARM
WATER AND FOLLOW THE MANUFACTURER'S
SPECIFICATIONS.
Step 2
Pour the solution into the hopper and allow it to flow
into the freezing cylinder.
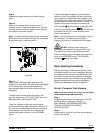
Step 3
Using the white hopper brush, clean the mix hopper,
mix level sensing probes and the outside of the
agitator drive shaft housing. Using the double ended
brush, clean the mix inlet hole. (Note: Do not brush
clean the mix inlet hole while the machine is in the
Wash mode.)
Step 4
Touch the WASH symbol
/ . This will cause the
cleaning solution in the freezing cylinder to come in
contact with all areas of the freezing cylinder.
Step 5
Place an empty pail beneath the door spout(s).
Step 6
Open the draw valve on the freezer door and draw
off all the solution.
Step 7
Once the cleaning solution stops flowing from the
door spout, close the draw valve and touch the
WASH symbol
/ , cancelling the Wash mode.
Repeat these steps for the other side of the
C717.
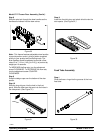
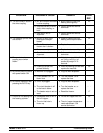
Disassembly
Note: Failure to remove the parts specified below
for brush cleaning and lubrication will result in
damage to the machine. These parts must be
removed within the maximum number of days
allowed between brush clean cycles or t he machine
will hard lock and will not operate.
Step 1
Be sure the power switch is in the OFF position.
Step 2
Remove the handscrews, freezer door, beater and
scraper blades, and drive shaft with drive shaft seal
from the freezing cylinder.
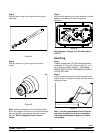
Step 3
Remove the scraper blades.
Step 4
Remove the drive shaft seal from the drive shaft.
Step 5
Remove the freezer door gasket, front bearing, pivot
pin, draw handle, and draw valve. Remove the three
o-rings from the draw valve.
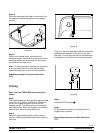
Step 6
Remove the front drip tray and splash shield.
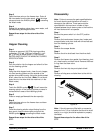
Step 7
Remove all drip pans and take them to the sink for
cleaning.
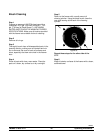
Figure 52
Note: If the drip pans are filled with an excessive
amount of mix, it is an indication that the drive shaft
seal(s), or o-ring(s) should be replaced or properly
lubricated.
Repeat these steps for the other side of the
C717.