41
Models C709 & C717 Operating Procedures
080227
Step 9
Replace the hopper cover(s) and install the drip
pans.
Step 10
Return to the freezer with a small amount of
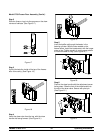
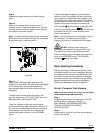
cleaning solution. Dip the door spout brush into the
cleaning solution and brush clean the door spout(s)
and bottom of the draw valve(s).
Note: To assure sanitary conditions are maintained,
brush each item for a total of 60 seconds, repeatedly
dipping the brush in cleaning solution.
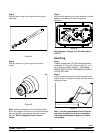
Figure 45
Step 11
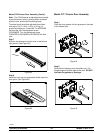
Using a clean, sanitized towel, wipe down the
freezer door, front panel, the area around the bottom
of the freezer door, and any other areas that
demonstrate a build-up of either moisture or food
substance.
The heat cycle will start when the clock on the
machine reaches the AUTO HEAT TIME set in the
Manager's Menu (see pageNO TAG).
There are 3 phases of the heat cycle: Heating,
Holding and Cooling. Each phase has a time limit. If
any one of the three phases fail to reach the proper
temperatures within the time limit, the cycle will
automatically abort and return to the STANDBY
mode.
A failure message will appear on the fluorescent
display to inform the operator that the machine did
not successfully complete the heat treatment cycle.
The product may not be safe to serve. The freezer
will be locked out (softlock) of the AUTO mode. The
operator will be given the option of selecting the
HEAT symbol
which will begin a new heat cycle,
or touching the WASH symbol
/ which will place
the freezer into the OFF mode to allow a brush
clean of the machine.
Note: Once the heating cycle has started, it cannot
be interrupted. The heating cycle will take a
maximum of 4 hours to complete with full hoppers.
DO NOT attempt to draw product or
disassemble the machine during the HEAT cycle.
The product is hot and under extreme pressure.
When the heating cycle is complete, the control will
return to the STANDBY mode. The STANDBY
symbol(s)
will be illuminated.
Daily Opening Procedures
Before performing the opening procedures, check
the display panel for any error messages. Normally
the display is blank unless an operational fault has
occurred. If a fault has been detected, investigate
the cause and follow the instructions on the display
before proceeding with the opening procedures.
(See Failure Messages, starting on page 27.)
Set-Up - Complete T h e Follo win g
Make sure your hands are clean and sanitized
before performing these next steps.
Step 1
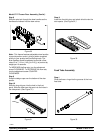
Prepare a small amount of an approved 100 PPM
sanitizing solution (examples: Kay-5® or
Stera-Sheen®). USE WARM WATER AND
FOLLOW THE MANUFACTURER'S
SPECIFICATIONS.
Step 2
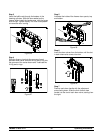
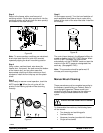
Sanitize the air orifice(s), front drip tray and splash
shield in this solution.


