


10
PAGE HEADER.....
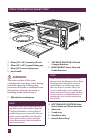
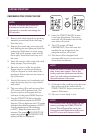
PREPARING THE OVEN
(A ONE-TIME PROCESS)
In order to remove any protective
substances inside the oven, it is necessary to
run the oven empty for 20 minutes.
1. Place the oven on a flat, dry surface.
Ensure there is a minimum distance
of 20cm of space on both sides of the
appliance, there are no items on top, and
the crumb tray has been inserted.
2. Unwind the power cord completely and
insert the power plug into a grounded
wall outlet.
3. The oven alert will sound twice and the
LCD screen will illuminate blue. The
function options will appear with an
indicator on the preset BAKE function.
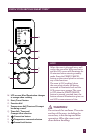
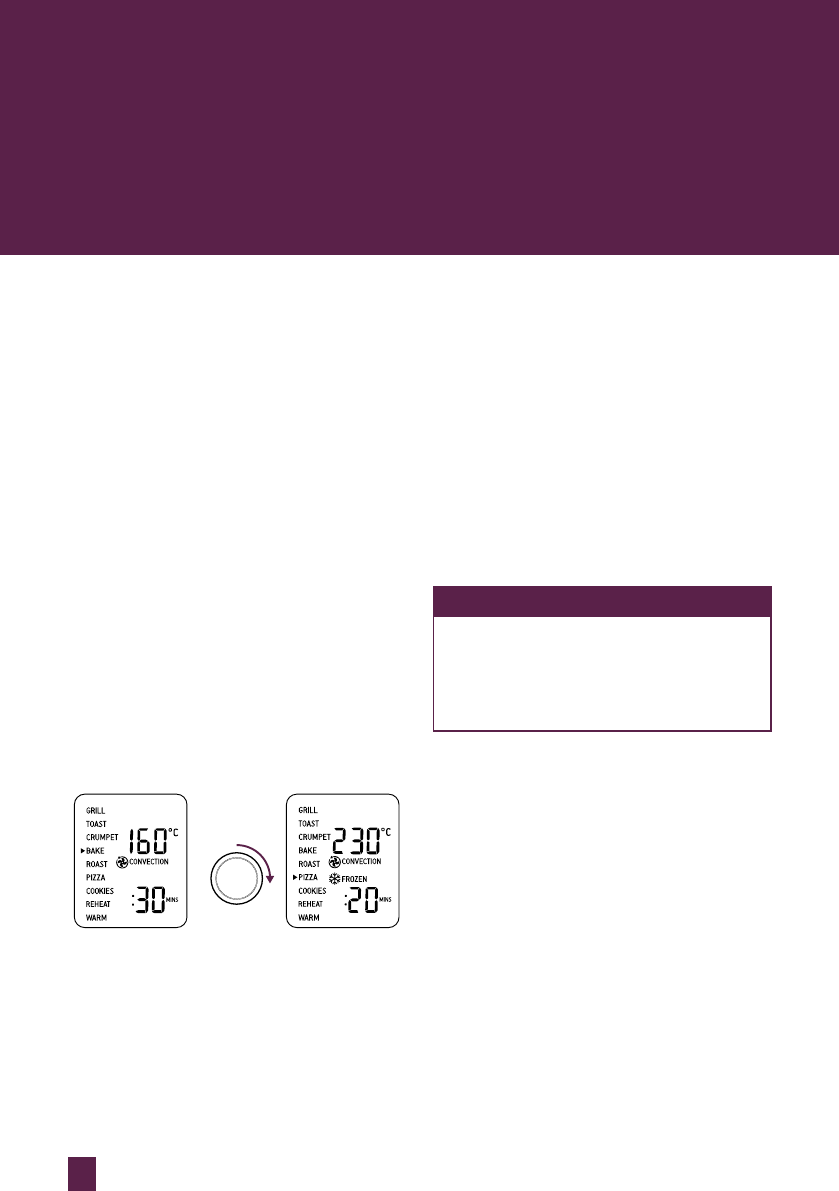
4. Turn the FUNCTION dial to the right
until the indicator reaches the PIZZA
function. The LCD screen will indicate
the preset PIZZA setting.
ROTATE
FUNCTION
DIAL
5. Press the START/CANCEL button.
The oven alert will sound, the button
surround will illuminate red and the
LCD screen will turn orange.
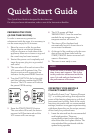
Quick Start Guide
This Quick Start Guide is designed for first time use.
For safety and more information, refer to rest of the Instruction Booklet.
6. The LCD screen will flash
‘PREHEATING’. Once the oven has
reached the set temperature, the
temperature alert will sound.
7. The timer will be displayed and
automatically begin to count down in
one minute increments.
8. At the end of the cooking cycle, the oven
alert will sound three times and the
START/CANCEL button surround will
cease to illuminate.
9. The oven is now ready to use.
NOTE
When the oven is turned on for the first
time, it may emit vapours. This is due
to the protective substances inside the
oven. It is safe and not detrimental to
the performance of the oven.
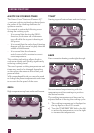
OPERATING YOUR BREVILLE
COMPACT SMART OVEN™
The Breville Smart Oven™ features Element
IQ™ - a cooking technology that adjusts the
power of the heating elements to cook food
more evenly and quickly. Each of the oven’s
functions are preset with our recommended
settings, however we suggest experimenting
with these depending on the recipe, amount
of food and your personal taste.
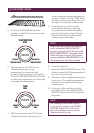
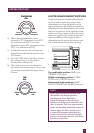
1. Insert the wire rack into the recommended
rack height position. These are
conveniently printed on the right hand
side of the oven door’s glass window. The
wire rack should be positioned with the
spokes facing upwards.