


43
Models C708 & C716 Operating Procedures
080222
Daily Closing Procedures
This procedure must be performed once
daily!
The function of the H eat Treatment Cycle is to
destroy bacteria by raising the temperature of the
mix in the freezing cylinder and t he hopper to a
specified temperature for a s pecified period o f time,
and then bringing t he t emperature back down l ow
enough to retard spoilage.
The Heat Treatment Cycle will start at the time
designated in the Auto H eat Time.
IMPORTANT: The level of mix in the hoppers
must be high enough to cover the agitator
paddles. Note: If the BRUSH C LEAN COUNTER
display has counted down t o one day, do not add
mix. The machine must be disassembled and brush
cleaned within 24 hours.
The freezer must be in the AUTO (AUTO symbol
illuminated) or in the STANDBY mode (STANDBY
symbol
illuminated) before the HEAT cycle may
be started.
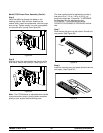
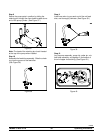
Step 1
Remove the hopper cover(s).
MAKE SURE YOUR HANDS ARE CLEAN AND
SANITIZED BEFORE PERFORMING THESE NEXT
STEPS.
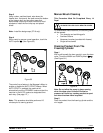
Step 2
Remove the agitator(s) from the mix hopper(s).
Step 3
Remove the design caps (C716 only).
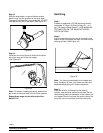
Step 4
Take the agitator(s), hopper cover(s) and design
cap(s) to the sink for further cleaning and sanitizing.
Step 5
Rinse these parts in cool, clean water.
Step 6
Prepare a small amount of an appr oved 100 PPM
cleaning/sanitizing solution (example: Kay-5® or
Stera-Sheen®). USE WARM WATER AND FOL-
LOW THE MANUFACTURER'S SPECIFICATIONS.
Brush clean t he agitator(s) and the hopper c over(s).
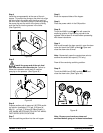
Step 7
Prepare a small amount of an appr oved 100 PPM
cleaning/sanitizing solution (example: Kay-5® or
Stera-Sheen®). USE WARM WATER AND FOL-
LOW THE MANUFACTURER'S SPECIFICATIONS.
Sanitize the agitator(s) and hopper cover(s).
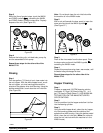
Step 8
Install the agitator(s) back onto the agitator drive
shaft housing(s). Replace the hopper cover(s).
IMPORTANT: If you do not install the agitator(s)
correctly, the machine will fail the heat cycle and
lock out in the morning.
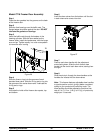
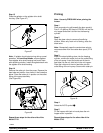
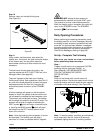
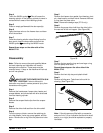
Step 9
Return to the freezer with a small amount of
cleaning solution. Dip the door s pout brush into the
cleaning solution and br ush clean the door spout(s)
and bottom of the draw valve(s).
Note: To assure sanitary conditions are maintained,
brush each item for a total of 60 seconds, repeatedly
dipping the b rush in cleaning solution.
(See Figure 50.)
Figure 5 0