63
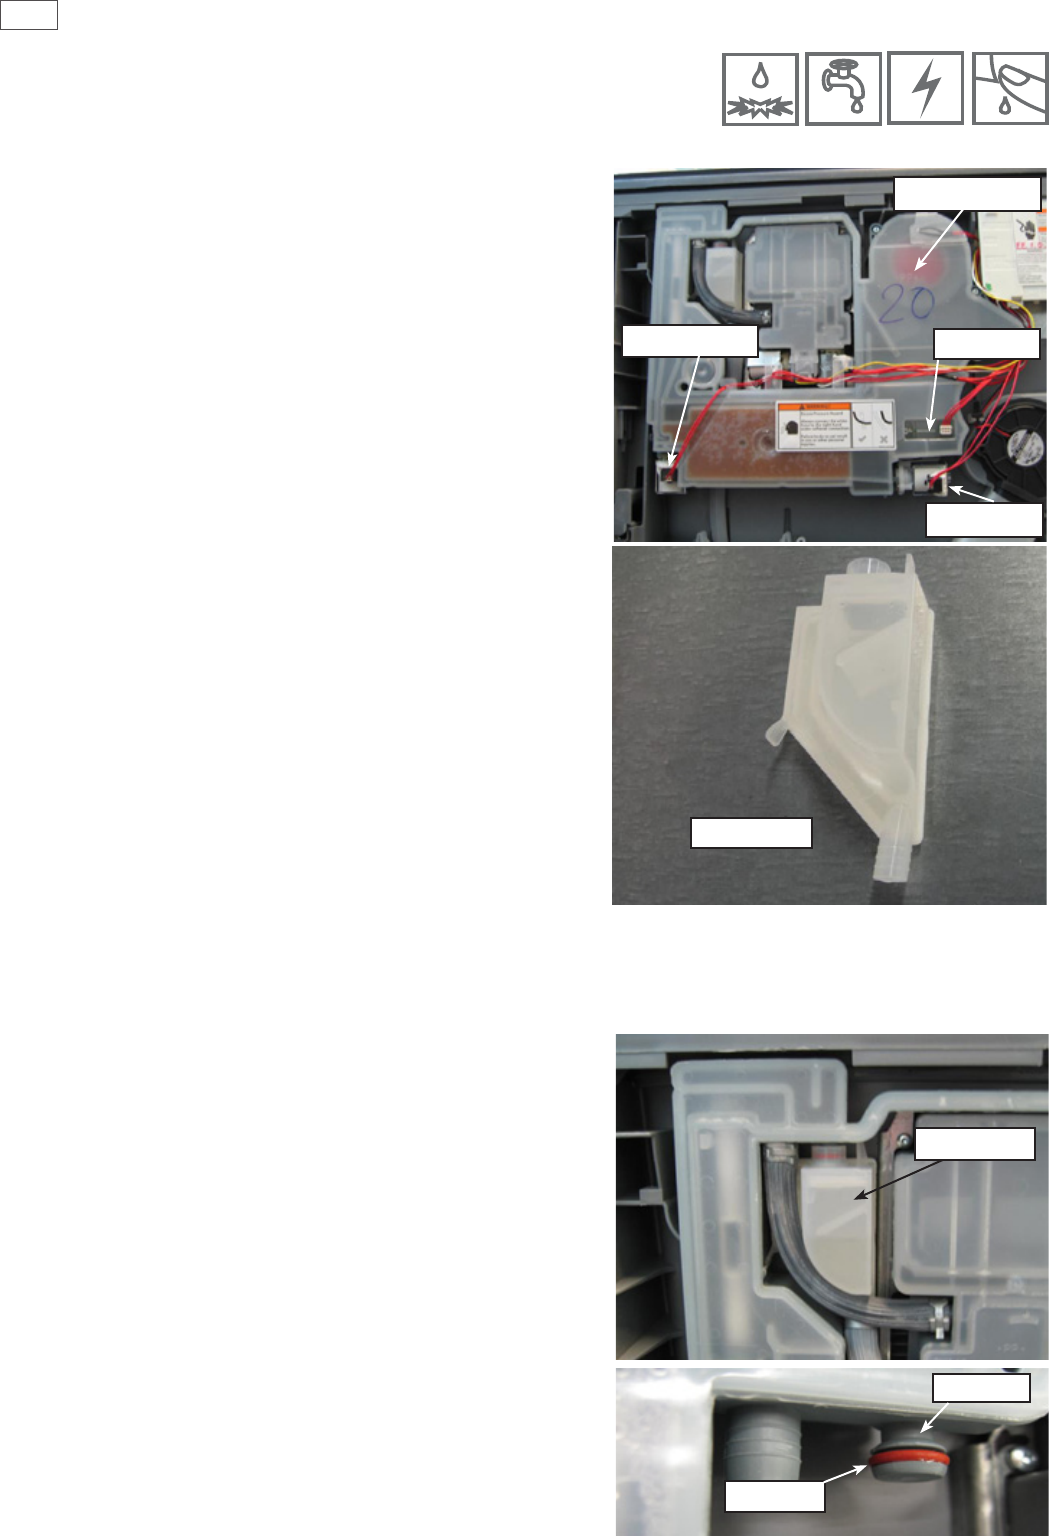
9.13 Water Softener (if fitted)
1. Remove the drawer front (refer Section 9.2).
2. Disconnect the wiring loom connections to the water
softener diverter valve, brine pump and salt level
detector, and remove the dispenser wiring loom
connection to the electronic controller.
3. Use a at blade screwdriver to open the salt level
indicator LED cover, and remove the LED from the
water softener.
4. Unclip the ll hose to strainer and remove the
dispenser hose from the water softener.
5. Remove the four T10 torx drive screws securing the
water softener to the tub. The water softener can now
be removed from the product.
6. To ret, place the overow ‘O’ ring on the water
softener and lubricate the tub overow with a
water-soluble lubricant e.g. Glycerol or similar.
7. Place the salt tank ‘O’ ring in the tub. Lubricate the salt
tank ange on the water softener. Pass the dispenser
wiring loom through the water softener and plug it
into the electronic controller.
8. Place the water softener in the tub and apply enough
pressure to seat the ‘O’ rings.
9. The overow should sit almost ush with the inside
of the tub. The salt tank should be recessed by approx
1mm (1/32 inch) from the inside of the tub
10. Ret the screws, strainer, hoses, harness connectors
and LED.
1. Remove the water softener hose from the detergent
dispenser spigot.
2. Place screwdriver under clip and use lever action to
disengage the clip.
3. When clip is disengaged, the strainer can be pushed
down o the water softener spigot.
4. After removing the hose clamp, the strainer can now
be removed from the DishDrawer.
5. Fit new strainer & position hose clamp. Manoeuvre
strainer into place.
6. Slide into spigot using a force applied in an upwards
movement. Lock into place, and ensure correct tting.
7. Fit dispenser hose to detergent dispenser spigot.
9.14 Strainer (if fitted)
Strainer
Water Softener
Strainer
Salt Sense
Brine Pump
ByPass Valve
Spigot
O-Ring
D
D
D
D


