69
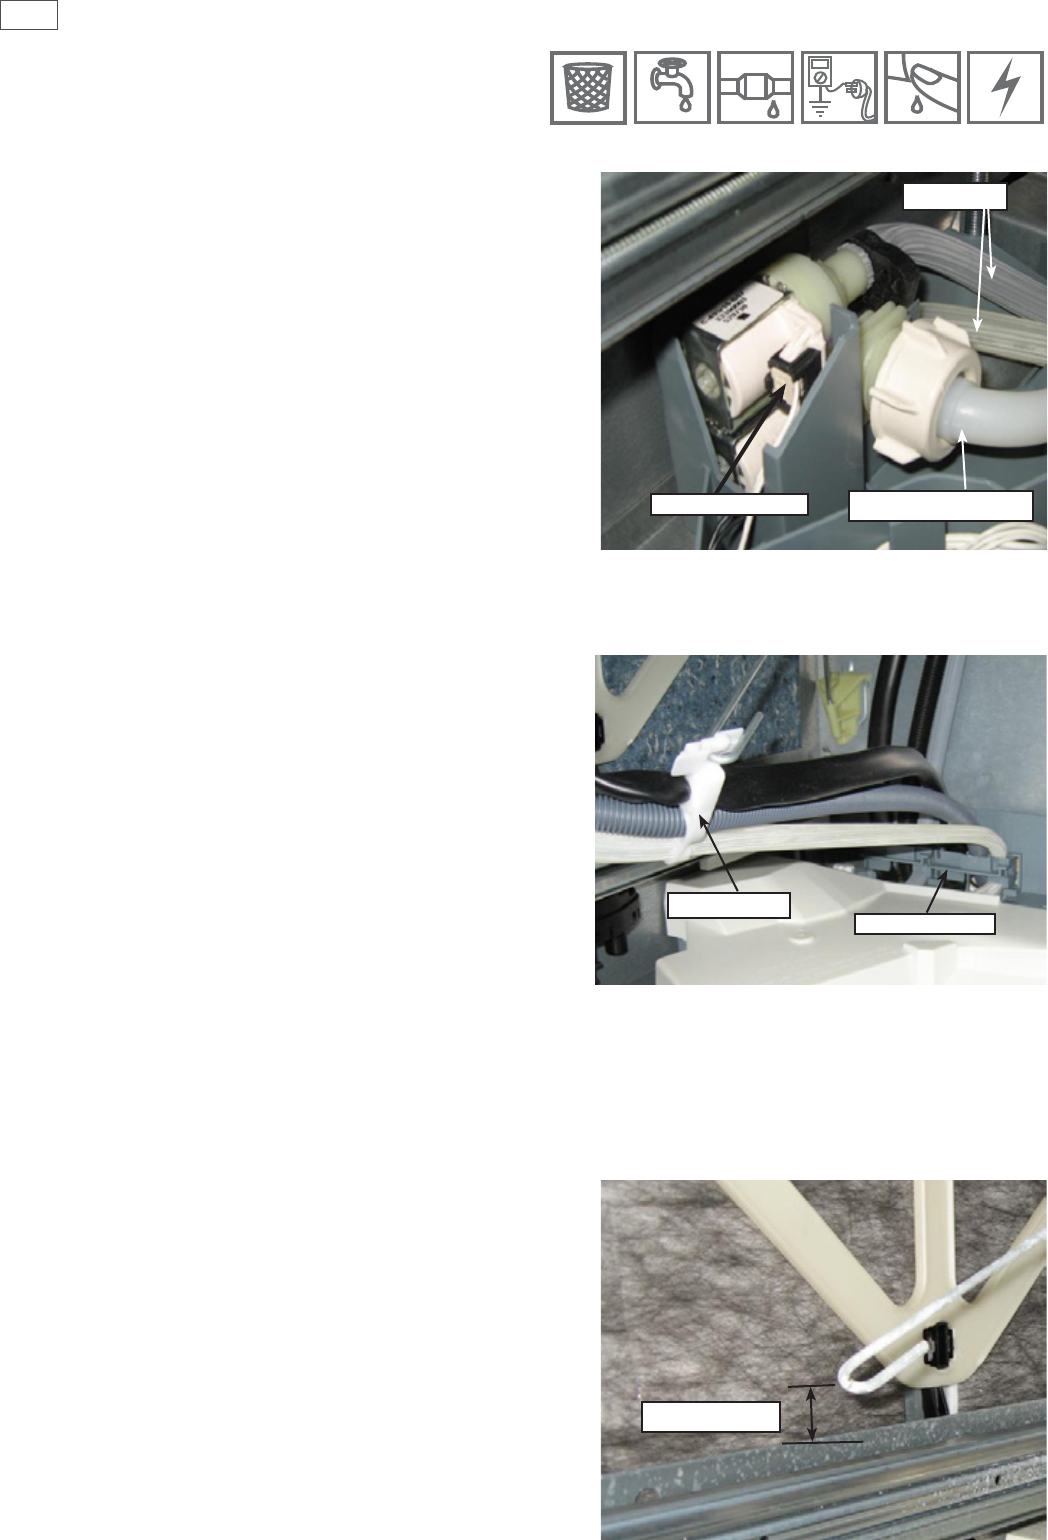
9.24 Water Inlet Valve
1. Remove the lower tub, refer section 9.6.
2. Remove the mains lter cover, refer section 9.23.
3. Partially lift the inlet valve up out of the housing.
4. Disconnect the water inlet hose connection,
CAUTION - water will drip.
5. The water valve can now be removed up and out of
the housing.
6. Remove the wire harnesses, and mark which ll hose
goes to the top on a double product. Unclip the hose
clips by pushing the ends apart sideways, then
remove the hoses from the valve.
7. Ret in reverse manner.
Water Inlet Hose
Fill Hoses
9.25 Fill Hose, Drain Hose, Wiring Harness Replacement
1. Remove the tub and turn it over by rotating it
anticlockwise (refer section 9.6).
2. Remove the wiring cover, refer section 9.15.
3. Disconnect the component you need to replace (e.g.
ll hose, drain hose, wiring harness) from the tub.
4. Undo the link clips and chassis clips, do this one
clip at a time, marking the position of the hoses
and harnesses at each clip and re-closing it after
the component is removed to keep the other two
components in their correct positions. The faulty
component can now be disconnected from the
chassis end and removed.
5. Ret in reverse manner, ensuring the link and chassis
clips are clamping the components in their correct
location.
Wiring Harness
Link Clip
Chassis Clip
9.26 Link Support Wire Position
1. If the latches are resetting, this can be caused by
the link support wire being positioned too low and
allowing the hoses and harnesses to get between the
tub and the latch.
2. To check the position of the wire, remove the tub, and
remove the centre link clip from the wire. Swing the
wire to the left hand side of the chassis.
3. It should rest approx 15mm (3/4”) above the slide
mounting bracket. If not, then carefully bend the wire
while supporting it at the rear so as not to stress the
mounting bracket.
15mm (3/4”)
D
D
D
D
D
D


