


18
ENGLISH
I. MAINTENANCE - DAILY
1. Check that the oven is cool and the power is disconnected,
as described in the warning on Page 17.
2. Clean the outside of the oven with a soft cloth and mild
detergent.
3. Temporarily remove the rear cool panels.
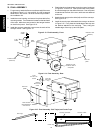
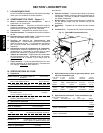
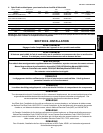
4. Clean ALL of the cooling fan grills and vent openings with
a stiff nylon brush. Refer to Figure 4-1 for the locations of
the grills and vents.
5. Check that ALL cooling fans are operating properly.
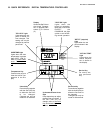
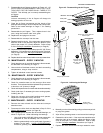
Figure 4-1 - Cooling Fan/Vent Locations
CAUTION
If a cooling fan is not operating correctly, it must be replaced
IMMEDIATELY. Operating the oven without adequate cool-
ing can seriously damage the oven's internal components.
6. Replace the rear cool panels.
7. Clean the conveyor belt with a stiff nylon brush. This is
more easily accomplished by allowing the conveyor to
run while you stand at the exit end of the conveyor. Then,
brush the crumbs off the conveyor as it moves.
8. Remove and clean the crumb trays. Be sure to replace
the trays in the same positions from which they were
removed, because they are NOT identical.
SECTION 4 - MAINTENANCE
FRONT
REAR
2 rear fans
Vents in floor
of oven
2 fan grilles in
rear cool panels
Rear cool panels
removed
II. MAINTENANCE - MONTHLY
NOTE: When removing the conveyor, refer to the drawings on
Pages 8-9 in the Installation section.
1. Check that the oven is cool and the power is disconnected,
as described in the warning on Page 17.
2. Remove the drive motor shroud and conveyor extension
covers from the oven.
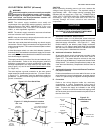
3. Disconnect the drive chain from the sprocket on the drive
shaft of the conveyor. If two people are available, one
person should lift the idler (right) end of the conveyor as the
second person presses down on the drive (left) end. This
will create enough slack in the chain to remove it.
If this procedure will not free the chain, or if only one person
is available, perform the following steps:
Loosen the two hex head screws that fasten the
conveyor motor's mounting bracket to the oven. See
Figure 2-10 (on Page 9).
Raise the motor to free the chain from the sprocket.
Disconnect the drive chain.
4. Slide the conveyor out of the oven.
NOTE: The conveyor can only be removed from the end of
the oven with the drive motor (left end).
5. Remove the end plugs from the oven. The end plugs are
shown in Figure 1-1, on Page 4 of this Manual.
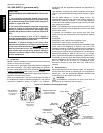
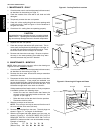
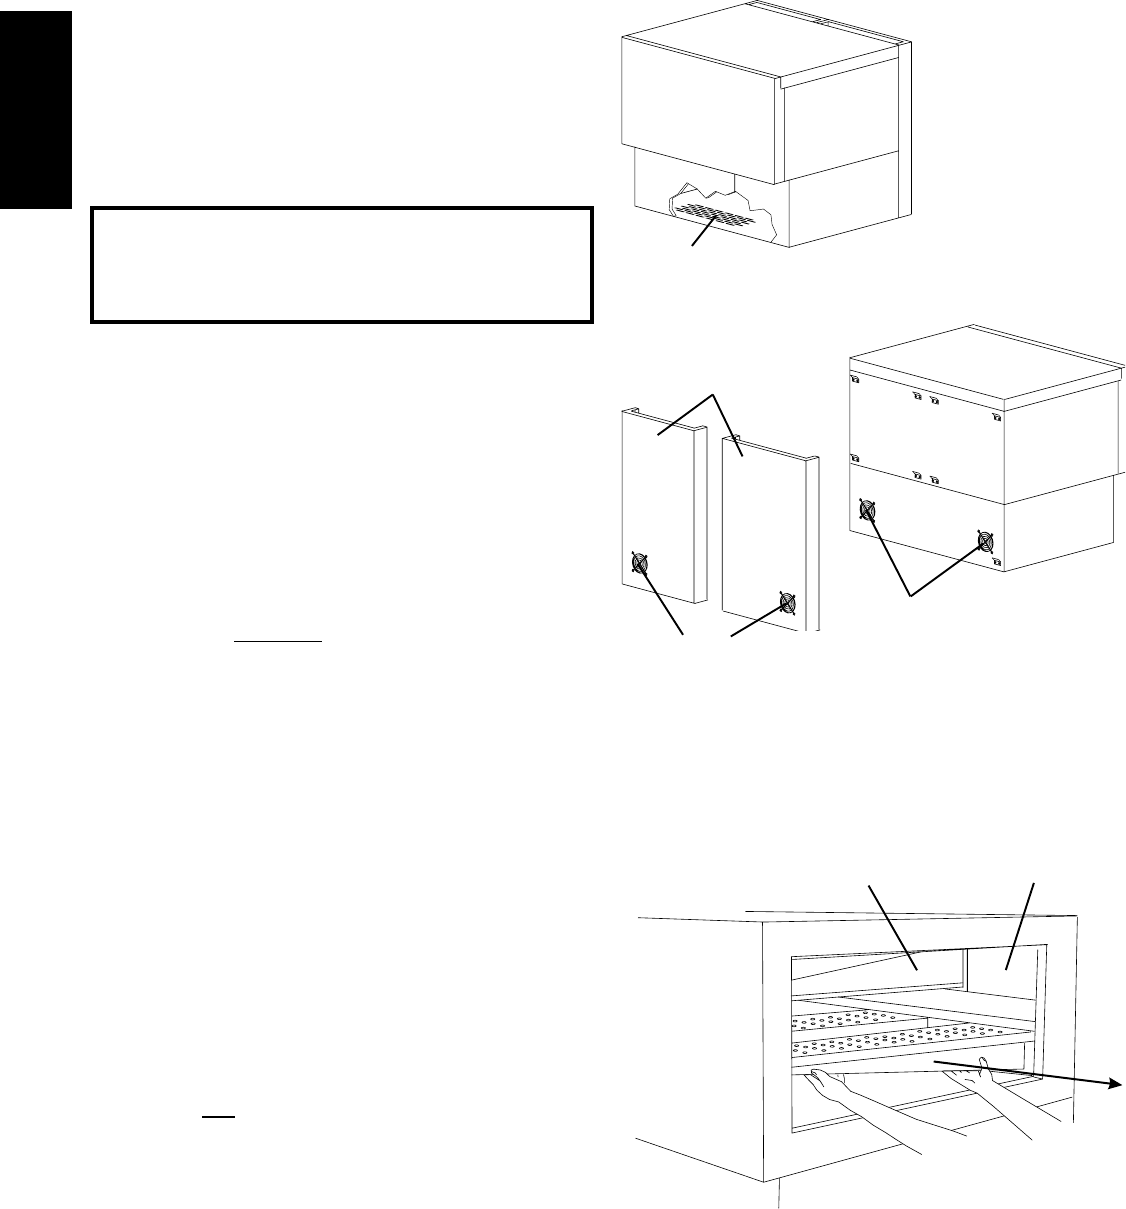
6. Slide the air fingers and blank plates out of the oven, as
shown in Figure 4-2. AS EACH FINGER OR PLATE IS
REMOVED, WRITE A "LOCATION CODE" ON IT WITH A
MARKER to make sure that it can be reinstalled correctly.
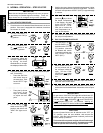
Example of markings:
(Top Row) T1 T2 T3 T4 T5 T6
(Bottom Row) B1 B2 B3 B4 B5 B6
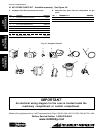
Figure 4-2 - Removing Air Fingers and Plates
Blank PlateAir Finger