


37
Models 345, 346, 349, 355 Operating P rocedures
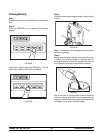
Step 4
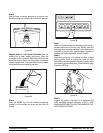
Remove the right side panel and take the r ear, white
drip pan to the sink for further cleaning.
Step 5
Remove the following parts: seals and o-rings from the
drive shafts, drive shaft seal bushings from drive shaft
seals, caps and springs from freezer doors, screws
and draw handle slides from freezer door s, pivot pins
from draw valves, draw valve handles from freezer
doors, draw valves from freezer doors, o-rings from
draw valves, prime plugs from freezer doors, o-rings
from prime plugs, o-rings and front bearings from
freezer door s, o-rings from mix hopper covers.
Discard all o-rings and replace them with new ones .
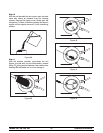
Note: To remove o-rings, usea singleservice towel to
grasp the o-ring. Apply pressure in an upward direction
until the o-ring pops out of its groove. With the o ther
hand, push the top of the o-ring forward. It will roll out
of the groove and can be easily removed. If there is
more than one o-ring to be r emoved, always r emove
the rear o-ring first. This will allow the o-ring to slide
over the forward rings without falling into the open
grooves.
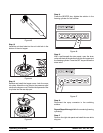
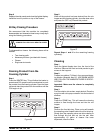
Step 6
Using a single service towel, wipe the lubricant off the
parts. Brush-clean all disassembled parts in the
cleaning solution. Make sure all lubricant and syrup is
removed. Place all the cleaned parts on a clean, dry
surface to air-dry.
Step 7
Wipe clean all the exterior surfaces of the freezer .