


20
7-INSTALLATION (continued)
2011 July
700r-NA
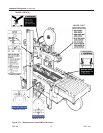
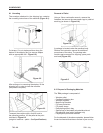
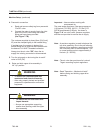
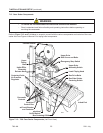
7.5 Removal of Plastic Ties
Cut the plastic which attaches the top head to the
frame and remove the polystyrene blocks (Figure 7-4).
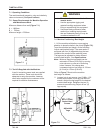
Cut the plastic strap which attaches the strip and the
EMERGENCY STOP cable to the frame
(Figure 7-5).
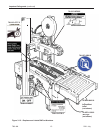
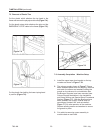
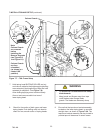
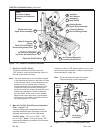
Cut the plastic ties holding the lower taping head
in position
(Figure 7-6).
Figure 7-4
Figure 7-5
Figure 7-6
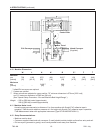
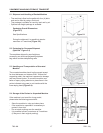
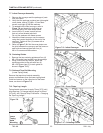
7.6 Assembly Completion / Machine Setup
1. Install the upper tape drum bracket on the top
crossbar as shown in Figure 7-7A.
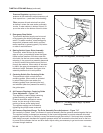
2. The column guards, shown in Figure 7-7 have
been installed upside down for shipping. Remove
and retain the screws and washers holding the
guards on the columns for re-installation after
the Bumper Supports have been mounted (see
Column Bumper Installation in the Installation
and Setup Section and Special Setup Procedures
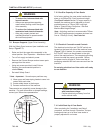
Section / Figure 7-7). After the Bumpers have
been installed, the Column Guards must be
repositioned (rotated 180° and re-installed -
Figure 7-7) for safe operation of the machine.
Replace existing screws and washers to secure
the guards in place.
3. Cut cable ties securing upper assembly to
machine bed on each side.