


150
9
11
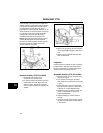
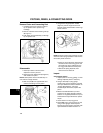
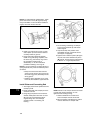
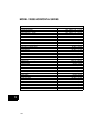
NOTE: For Vertical Model 120000 ONLY, install
piston with notch or arrow (A, Figure 8) facing
away from “MAG” on the rod. When installed in
engine, the notch will face the PTO.
Figure 8
3. Install a pin retainer into groove on open
side of piston pin bore. Ensure retainers
are firmly seated in grooves.
4. Using Piston Ring Expander #19340,
install oil ring and spring expander, then
the center ring, then the top ring. Follow
the orientation noted at time of
disassembly, or use the instructions
provided if installing a new ring set.
NOTE: If oil ring consists of two steel rails and a
spring expander, they must be installed by hand
as follows:
• Grasp one end of lower steel rail and
wind it over the top ring groove, then into
the center ring groove, and finally into the
oil ring groove.
• Install the spring expander on top of the
lower rail, then install the upper steel rail.
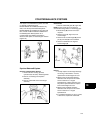
Install Piston and Connecting Rod
1. Thoroughly clean and oil cylinder bore and
crankpin journal.
2. Rotate crankshaft until crankpin journal is
at bottom of stroke.
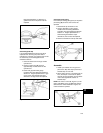
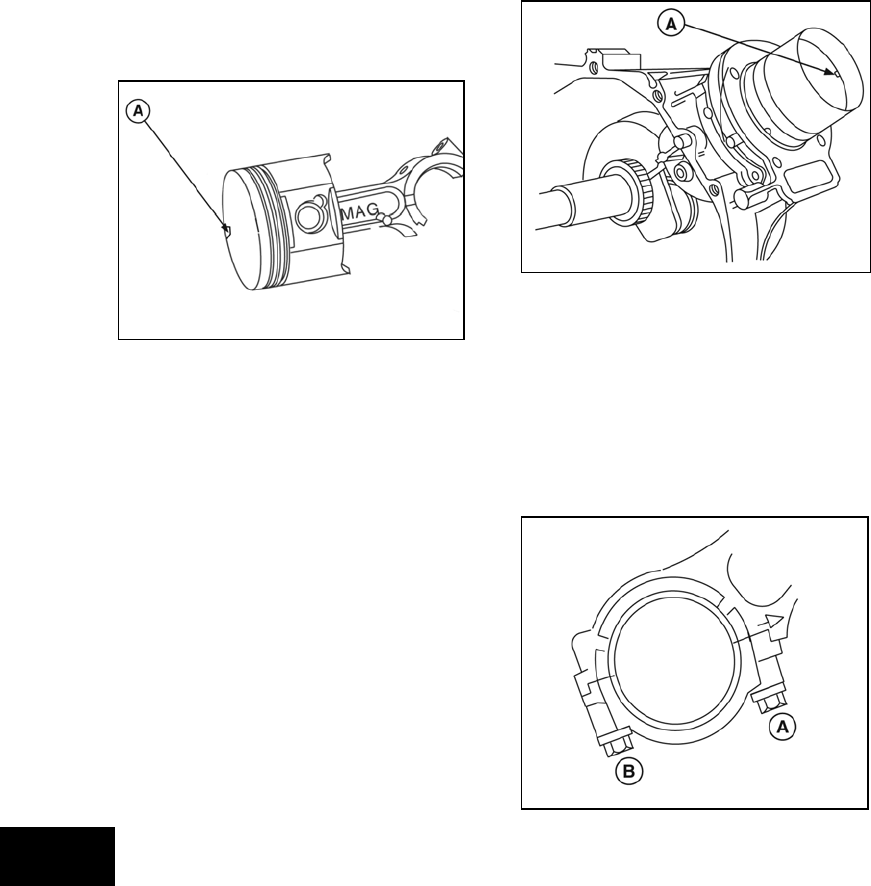
3. Using Ring Compressor Tool #19070 or
#19230, install piston with notch or arrow
(A, Figure 9) toward flywheel side of
engine, taking care not to damage
crankpin journal or connecting rod
bearing.
Figure 9
4. Fit connecting rod bearing on crankpin
journal, then install rod cap with match
marks aligned.
5. Cap should snap into position when
assembled correctly. Install rod screws
(and dipper, if equipped).
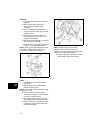
6. Tighten screw closest to piston (A, Figure
10) first, then screw farthest from piston
(B) second. Torque screws to values listed
in Section 12 - Engine Specifications.
Figure 10
NOTE: Failure to use a torque wrench can result
in loose rods causing breakage, or over-
tightened rods causing scoring.
7. Rotate crankshaft two revolutions to
ensure crankpin and rod do not bind.
8. Move connecting rod sideways to ensure
rod has clearance on crankpin side.