


69
4
4
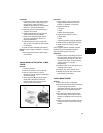
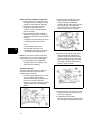
Figure 13
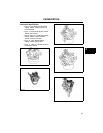
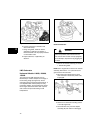
Figure 14
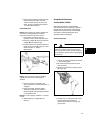
4. Remove two carburetor mounting screws.
5. Pull carburetor away from the control
bracket assembly and rotate it to
disengage the governor link from the
grommet on top of the throttle shaft lever.
NOTE: On early production models, the
mounting screws also retained the control
bracket. Reinstall these screws to retain the
bracket until the carburetor is reinstalled.
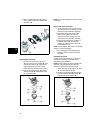
6. Remove the spacer, o-ring, and gasket, if
equipped. Discard the o-ring and the
gasket.
Disassemble Carburetor
1. Remove the fixed main jet (bowl nut) and
fiber washer, then remove the fuel bowl
and the bowl gasket from the carburetor
body. Discard the fiber washer and the
gasket.
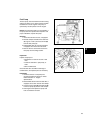
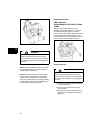
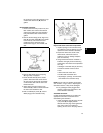
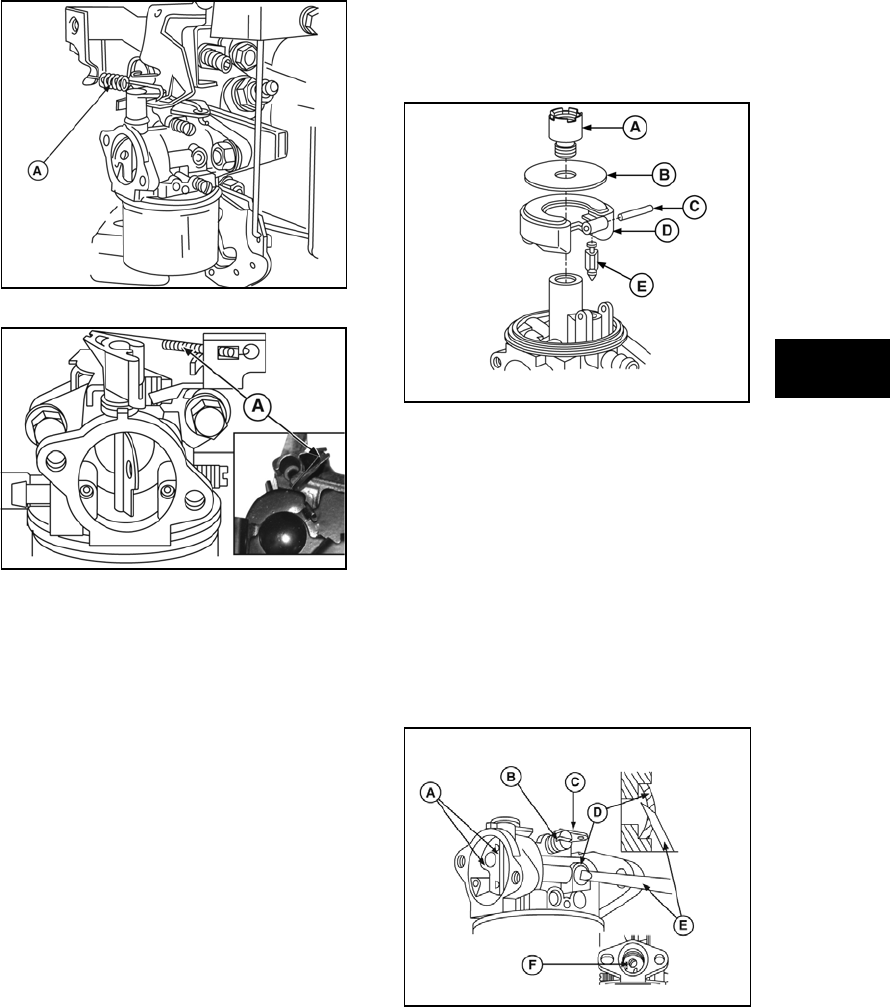
2. Remove the float hinge pin (C, Figure 15),
float (D), and inlet needle (E). If the needle
has a metal tip, also remove the soft
needle seat in the carburetor body.
Discard the hinge pin, inlet needle, and
seat.
NOTE: On Model 97700, remove the main jet (A)
and float disc (B) before removing the hinge pin,
float, and needle.
Figure 15
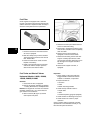
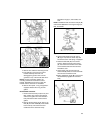
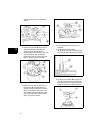
3. Remove idle speed screw with spring
(B, Figure 16). Remove limiter cap and
idle mixture screw with spring, if equipped.
4. Rotate throttle shaft (C) to the closed
position. Remove throttle valve screws
(F), then remove the throttle valve. Slide
out the throttle shaft with the foam seal.
Discard the seal.
5. Grasp choke valve and remove from
choke shaft (A). Slide out choke shaft with
the foam seal. Discard the seal.
6. With a modified pin punch (E), remove and
discard Welch plug (D) from carburetor
body.
Figure 16