71
4
4
Figure 20
6. Install new inlet needle (E, Figure 21) on
float (D), then position float in carburetor
body. Secure with new hinge pin (C) and
center the pin between the float bosses.
NOTE: On Model 97700, install the flat disc (B)
and main jet (A).
Figure 21
7. Place new bowl gasket on carburetor body
and install fuel bowl. Place new fiber
washer on fixed main jet (bowl nut) and
install. Torque to values listed in Section
12 - Engine Specifications.
Install Carburetor
NOTE: Always replace air cleaner gaskets and
carburetor mounting gaskets any time the
carburetor has been removed for service.
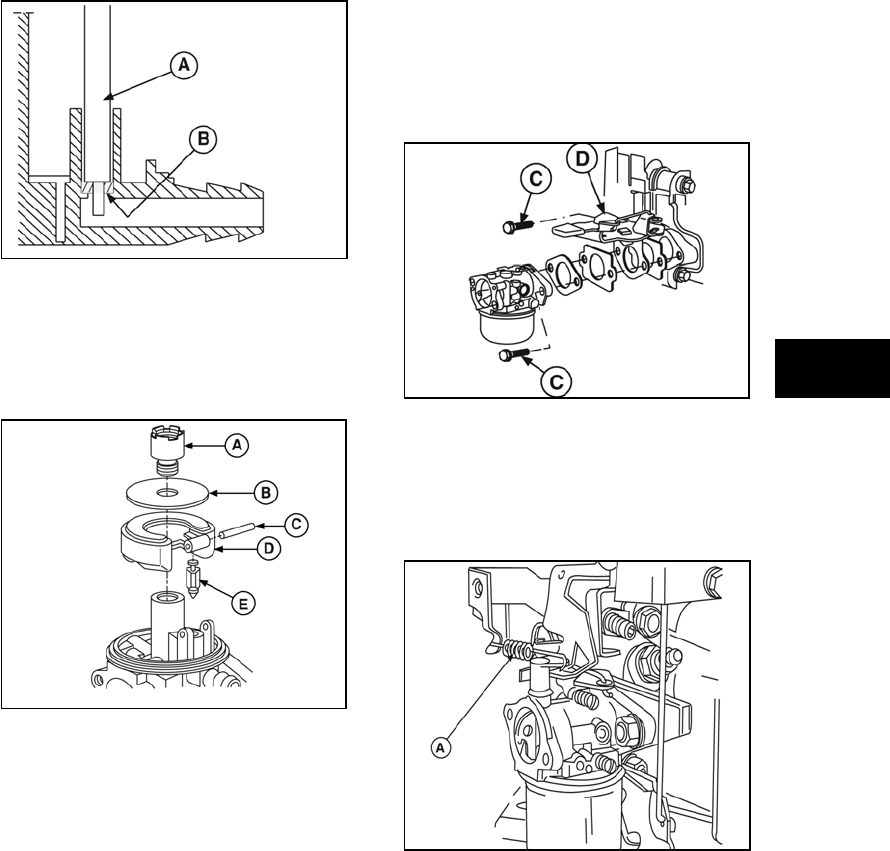
1. Remove mounting screws from control
bracket, if reinstalled.
2. Hook z-bend of governor link into grommet
on top of the throttle shaft lever.
3. Place new gaskets or o-rings between
control bracket (D, Figure 22), adapter (if
equipped), and carburetor.
4. Position carburetor on control bracket or
adapter and install screws (C). Torque to
value listed in Section 12 - Engine
Specifications.
Figure 22
NOTE: Use new screws or apply Loctite® to
original screws to prevent loosening from
vibration.
5. Connect the Choke-a-Matic® spring (if
equipped) to choke lever
(A, Figure 23, Figure 24).
Figure 23


