


Viper Service Manual
© 2010, IMI Cornelius Inc. - 21 - Publication Number: 621360041TBSER
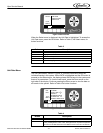
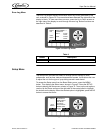
To set the date, perform the procedure in Table 12 and refer to Figure 14.
Setting Daylight Sav-
ings Time
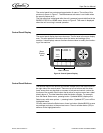
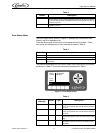
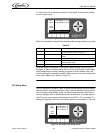
Once the date and time are set properly, daylight savings time settings can be
done. The Daylight Savings Time menu is shown in Figure 15. If daylight
savings time is off, press the + button to activate it. The button functions are
described in Table 13. To set daylight savings time, perform the procedure in
Table 14.
NOTE: Default daylight savings settings are for the U.S.
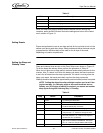
Figure 15. Daylight Savings Setup Screen
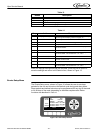
3
Set correct hour Use the + or - buttons at the bottom of the display to
set the proper hour.
4
Select minute field Use the left and right arrows to select minute field.
5
Set correct minute Use the + or - buttons at the bottom of the display to
set the proper minute.
6
Select AM/PM field If the 12 hour clock option is selected, use the left and
right arrows to select the AM/PM field.
7
Set AM/PM Use the + button at the bottom of the display to set the
AM/PM setting.
Table 12
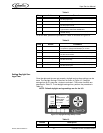
Step Action Procedure
1
Set date Use up and down arrows on the right side of the con-
trol panel to highlight DATE display on screen.
2
Select month field Use the left and right arrows to select month field
3
Set correct month Use the + or - buttons at the bottom of the display to
set the correct month.
4
Select day field Use the left and right arrows to select day field.
5
Set correct day Use the + or - buttons at the bottom of the display to
set the correct day.
6
Select year field Use the left and right arrows to select year field.
7
Set correct year Use the + or - buttons at the bottom of the display to
set the correct year.
Table 11
Step Action Procedure
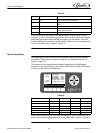
Table 13
Button Description
BACK Returns the display to the Select menu
CLOCK
SETUP
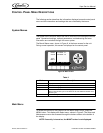
12:51P
MAR 04
DST: ON
SPRING MONTH: MAR
SPRING WEEK: 1
FALL MONTH: OCT
FALL WEEK: L
BACK CLOCK DST - +