


Viper Service Manual
Publication Number: 621360041TBSER - 24 - © 2010, IMI Cornelius Inc.
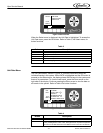
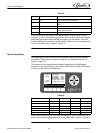
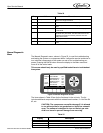
When the sleep and wakeup settings are complete, press the BACK button to
save the settings and return to the Select menu, shown in Figure 13.
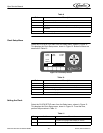
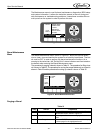
Setting Defrost Lockout
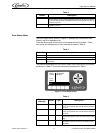
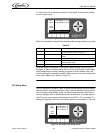
From the Barrel Status menu, shown in Figure 8, press the MENU button and
then press the SETUP button to display the Setup menu. Use the up and down
arrows on the right of the control to highlight the Events Setup menu, then press
GO to enter the menu (Figure 16).
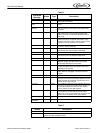
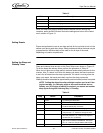
The lockout can also be set day by day or for all days with up to three lockout
periods of four hours each per day. These lockout periods may be overlapped to
provide from four to 12 hours of defrost lockout, if desired. When the periods are
overlapped, it is recommended that the defrost lockouts for sequential lockout
periods be overlapped by 15 minutes. The defrost lockout affects all barrels in
the unit. To set the defrost lockouts, perform the procedure in Table 17.
When the defrost lockout settings are complete, press the BACK button to save
the settings and return to the Select menu, shown in Figure 13.
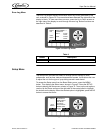
Viscosity Setup Menu
The viscosity maintained in the freeze barrels depends on the type of product
being served. Some products are served best at a higher viscosity, while others
require a lower viscosity for best quality. The Viscosity menu, shown in Figure
9
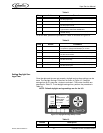
Select WAKEUP Use the up and down arrows to highlight
WAKEUP and repeat Steps 5 through 7 to set the
WAKEUP times.
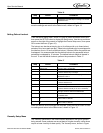
Table 16
Step Action Procedure
Table 17
Step Action Procedure
1
Set defrost lockout Open Events Setup menu, shown in Figure 16
2
Select DAY The DAY field is highlighted.
3
Set DAY Use the + and - buttons at the bottom of the display
to set the desired day or all days.
4
Select DEFROST LOCK
1
Use the up and down arrows to highlight
DEFROST LOCK 1.
5
Set hour field Use left and right arrows to select hour field
6
Use the + and - buttons at the bottom of the display
to set the desired hour.
7
Set minute field Use left and right arrows to select minute field
8
Use the + and - buttons at the bottom of the display
to set the desired minute (in 15 min. increments).
9
Select AM/PM field If the 12 hour clock option is selected, use the left
and right arrows to select the AM/PM field.
10
Use the + button at the bottom of the display to set
the AM/PM field.
11
Select DEFROST LOCK
2
Repeat Steps 2 through 10 for the DEFROST
LOCK 2 time, if desired.
12
Select DEFROST LOCK
3
Repeat Steps 2 through 10 for the DEFROST
LOCK 3 time, if desired.