on the wet bulb vacuum indicator. At this temperature/pressure, isolated pockets of mois-
ture can turn into ice. The slow rate of evaporation (sublimation) of ice at these low temper-
atures/pressures greatly increases dehydration time.
5. Valve off the vacuum pump, stop the pump, and record the instrument reading.
6. After a 2-hour wait, take another instrument reading. If the reading has not changed,
dehydration is complete. If the reading indicates vacuum loss, repeat Steps 4 and 5.
7. If the reading continues to change after several attempts, perform a leak test up to the
maximum 180 psig (1241 kPa) pressure. Locate and repair the leak, and repeat
dehydration.
Inspect Water Piping
Refer to piping diagrams provided in the certified drawings, and the piping instructions in the
17/19EX Installation Instructions manual. Inspect the piping to the cooler and condenser. Be
sure that flow directions are correct and that all piping specifications have been met.
Piping systems must be properly vented, with no stress on waterbox nozzles and covers.
Water flows through the cooler and condenser must meet job requirements. Measure the
pressure drop across cooler and across condenser.
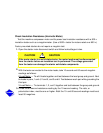
Click here for Figure 29 — Dehydration Cold Trap


