


4
• En
g
lis
h
Ste
p
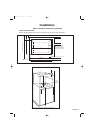
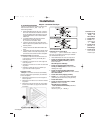
4: Connect E
l
ectri
c
4. Connect E
l
ectri
c
Veri
f
y that electric to the
j
unction box has been turned
off
be
f
ore beginning this step
.
Genera
l
Instructions
:
•
Use copper wire ONLY. Wire size and connections
must be suitable
f
or the rating o
f
the appliance per
t
h
e Nationa
l
E
l
ectrica
l
Co
d
e requirements or t
h
e
Canadian Electric Code requirements.
•
T
he
fl
exible conduit extending
f
rom the oven
s
h
ou
ld
b
e connecte
d
d
irect
l
y to t
h
e
j
unction
b
ox
.
• D
o
n
o
t sh
o
rten
fl
exi
b
le c
o
n
du
it
.
•
T
he junction box should be located to allow as
muc
h
s
l
ac
k
as possi
bl
e
b
etween t
h
e
j
unction
b
ox
a
n
d
the
o
ven.
•
A UL listed conduit connector must be
p
rovided at
each end of the power supply cable.
•
T
he
fou
r wire
b
r
a
nch circ
u
it c
o
nnecti
o
n is
p
re
f
erred, but where local codes
p
ermit, a three
wire
b
ranc
h
circuit connection is a
l
so accepta
bl
e
.
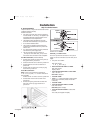
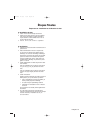
F
our Wire Connectio
n
(Pre
f
erred Method
)
:
1
. Connect green ground wire from oven to green (or
bare)
g
round wire in
j
unction box
.
2.
Connect red wire
f
rom oven to red wire in junction
box.
3
. Connect black wire from oven to black wire in
junction box
.
4
. Connect white wire from oven to white (or gray)
neutra
l
wire in
j
unction
b
ox
.
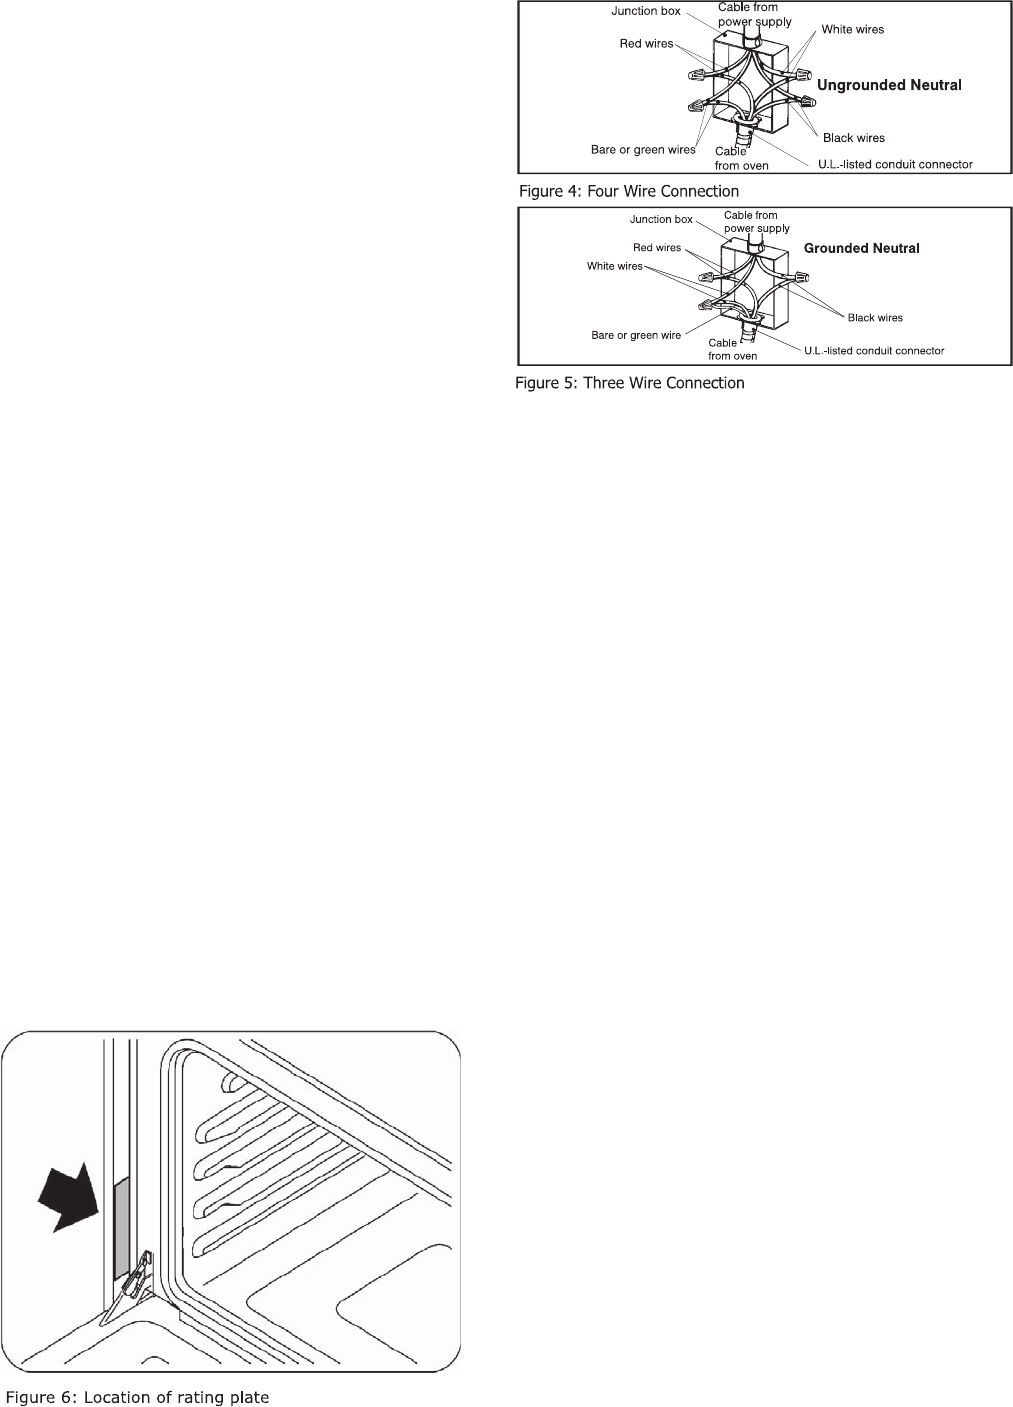
T
hree Wire C
o
nnecti
o
n
:
N
ote
:
The four wire connection is
p
referred, bu
t
w
h
ere
l
oca
l
co
d
es permit, t
h
e t
h
ree wire connection is
a
lso acce
p
table
.
1
.
Connect red wire
f
rom oven to red wire in junction box.
2. C
o
nnect
b
l
a
ck wire
f
r
o
m
o
ven t
o
b
l
a
ck wire in
junction
b
ox
.
3
. Connect
b
ot
h
g
reen
g
roun
d
wire an
d
w
h
ite wire
f
rom oven to white (or
g
ray) neutral wire in
junction
b
ox
.
Installation
C60T265A6 12/1/06 17:34 Página 6
Connectin
g
to a 208 V circuit
:
T
he oven is pre-wired
f
or connection to 240 V, 60 Hz
su
pp
l
y
, but can be converted
f
or use with 208 V, 60 Hz
supp
l
y
.
1
. Turn
p
ower on a breaker
.
2.
Press and hold SET CLOCK
and
K
TIMER
for at
R
l
east t
h
ree secon
d
s
.
Se
l
e
d
E
G
a
pp
ears in dis
p
la
y.
3
.
P
ress an
d
hold
STOP TIME an
d
TIMER
for at
R
l
east t
h
ree secon
d
s
.
Display is blank.
4
.
P
ress and h
o
ld COOK TIME
a
n
d
for at
R
l
east t
h
ree secon
d
s
.
V
O
LT
2
4
0
is
d
isp
l
aye
d.
5
.
P
r
ess
SET CL
O
CK.
6
.
P
ress
+
o
r
-
to select appropriate voltage (choose
208 for 208 V connection
;
choose 240 to 240 V
connection)
.
7
.
P
ress SET
C
L
OC
K
.
8
.
P
ress an
d
hold
STOP TIME an
d
TIMER
for at
R
le
a
st three sec
o
n
d
s
.
Se
l
e
d
EG a
pp
ears in
d
is
pl
a
y
9
.
Press and hold SET CLOCK
for at least three
K
sec
o
n
d
s.
Time o
f
da
y
clock a
pp
ears in dis
p
la
y.
STOP TIME