6. Web Interface
The content of the file is checked and when valid (format and size), the file is uploaded (6).
The message Success fully applied changes is displayed on top of the page.
5. Follow now the wall paper selection procedure to activate the personalized wallpaper.
Remove personalized wallpaper
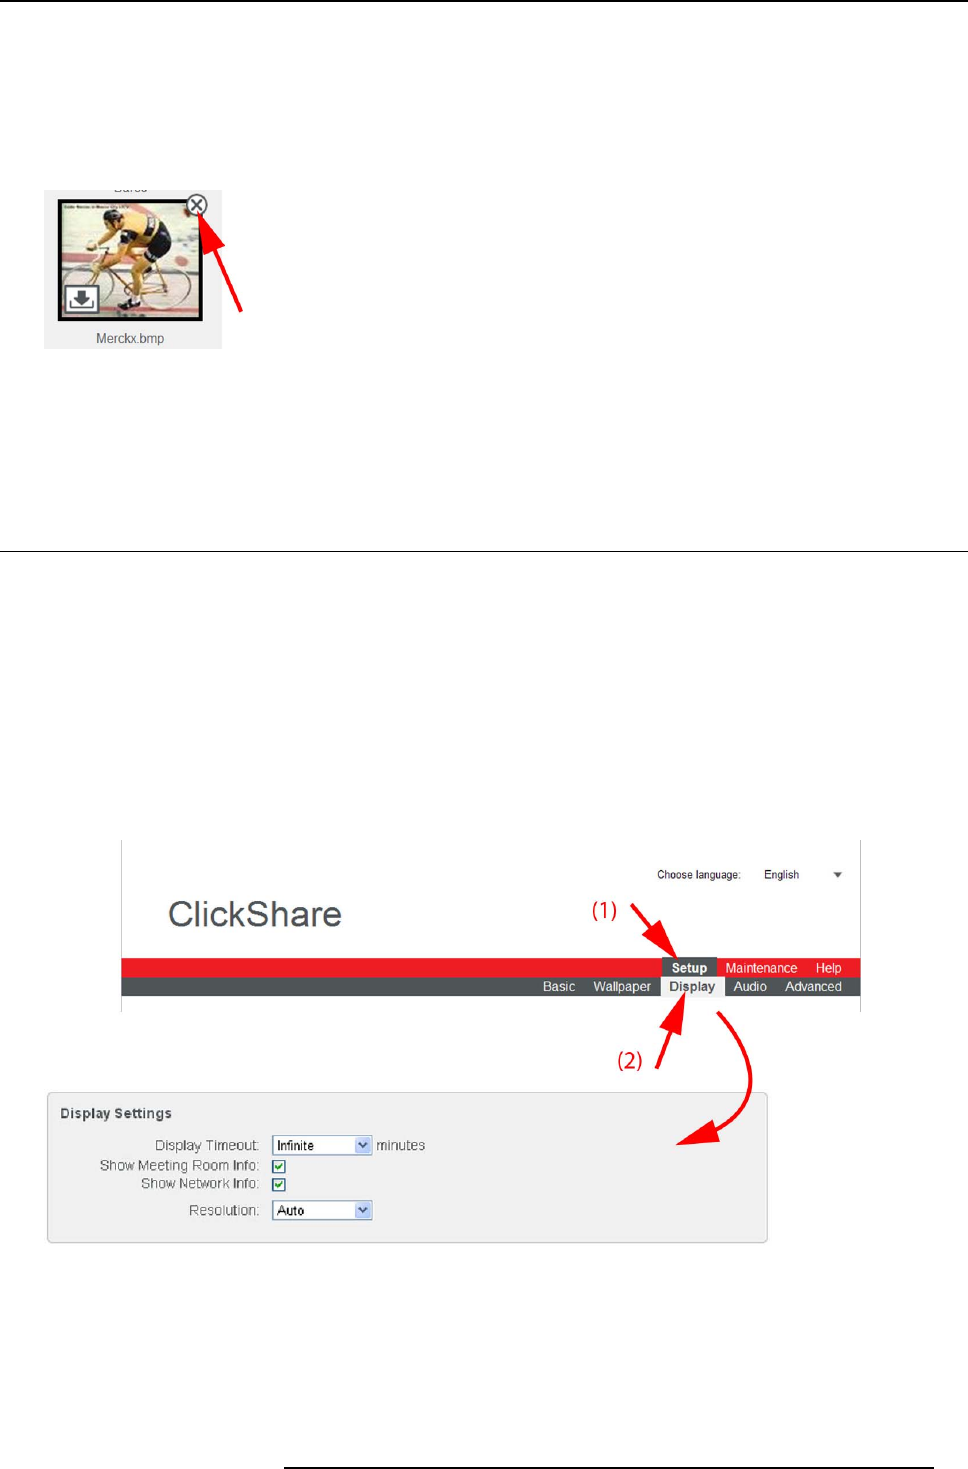
1. While the wallpaper tab is open, hover the mouse over the selection.
Image 6-9
The image shows an extra delete button.
2. Click on the delete button t o delete the wallpaper.
The message Success fully applied changes is displayed on top of the page.
6.7 Display settings
About display settings
The following settings can be configured for the display(s):
• Standby timeout. Time between the last action and moment the system goes into standby.
• Meeting room and network information on th e startup screen can be displayed or ca n be hidden.
• Resolution of the display can be set.
To change
1. Login to the ClickShare web interface.
2. Click the Setup tab (1) and then the Display tab (2).
The content of the Display tab is shown. The first pane shows the Display Settings.
Image 6-10
Display settings
3. Display Timeout setup. Click on the drop-down list and select the time interval of inactivity after wh ich the display o utput is
disabled (standby mode).
By default, the display time-out is set t
o’Infinite’.
4. To show the meeting room and network info on the meeting room display, check the check box beh ind the c orresponding item.
R5900004 CLICKSHARE 28/03/2013
43
