OPERATION AND SERVICE PROCEDURES
(Models RST359, 361, 362, 365, 399)
57 RC231002 Rev. 3
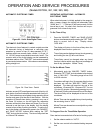
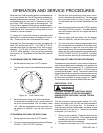
3. Momentarily press the "BAKE HOURS" button until
"Ñ" and "0:00" are displayed. Rotate the "SET TIME"
knob clockwise to the desired amount of baking time.
The setting range is from one (1) minute to eleven
(11) hours, fifty-nine (59) minutes.
During cooking: " ", "Ñ" (BAKE HOURS) and the
time remaining (HOURS:MINUTES) will be displayed.
A flashing stop time arrow "Ñ" will also be displayed.
The cook time can be changed at any time by rotating
the set time knob to the desired amount of baking
time. NOTE: The oven has a separate oven
indicator (neon) which will cycle on whenever the
oven thermostat is calling for heat.
The alarm will sound at the end of the cooking period,
one (1) second ON / one (1) second OFF, for one (1)
to two (2) minutes and the oven will turn off. Momen-
tarily pressing any one (1) of the three (3) left most
buttons will turn off the alarm before the one (1) to two
(2) minutes is up.
4. After cooking cycle is over, set selector switch to
"MANUAL" and the oven control to "OFF".
To Program the Oven for Delayed Time Bake
Oven starts at a later time and shuts off at the end of the
cooking cycle.
1. Set selector switch to "AUTO".
2. Set the oven control to the desired baking tempera-
ture.
3. Momentarily press "BAKE HOURS" button until "Ñ"
and "0:00" are displayed. Rotate the set time knob
clockwise to the desired amount of baking time. The
setting range is from one (1) minute to eleven (11)
hours, fifty-nine (59) minutes. NOTE: The oven will
now turn on until the stop time is set.
4. Momentarily press the "STOP TIME" button. The
display will show the end of the cook period if no
delayed start is selected (present time of day).
5. Rotate the "SET TIME" knob clockwise to set the
desired stop time. The stop time can be set up to
eleven (11) hours and fifty-nine (59) minutes from the
present time of day.
During the delay period the cookpot, " " will remain
off. At the appropriate start time (stop time minus set
cook time) the cookpot " " will light and the range
will cook up to the programmed stop time.
Momentarily pressing the "BAKE HOURS" button will
display the remaining cooktime.
The alarm will sound at the end of the cooking period.
6. After the cooking cycle is over, turn the selector
switch to "MANUAL" and the oven control to "OFF".
To Set Alarm Clock Feature:
1. Press "STOP TIME" button. "STOP TIME" arrow will
be displayed and "BAKE HOURS" arrow will flash.
Set stop time to desired alarm time.
2. Momentarily press "BAKE HOURS" button. "0:00"
and "BAKE HOURS" arrow will be displayed. "STOP
TIME" arrow will flash signalling the alarm feature is
programmed. The display will then return to the time
of day.
The alarm will sound at the programmed stop time.
To cancel the alarm function, press the "STOP TIME"
button and rotate the "SET TIME" knob until "0:00" is
displayed.
To Program the Oven for Self-Clean:
1. Set the selector switch to "AUTO".
2. Turn the oven control knob counterclockwise until it
stops ("CLEAN - TURN TO STOP" position).
3. Move the latch lever from the left (COOK) position to
the right (CLEAN) position. The clean indicator will
come on.
4. To set the timer, momentarily press the "SELF-
CLEAN" button. The display will show " ", "C3:00",
flashing STOP TIME arrow, and solid SELF-CLEAN
arrow, indicating a 3:00 hour cleaning duration, to
start immediately. The oven indicator will come on to
signal the beginning of the clean cycle.
The cleaning duration can be changed from "C3:00"
up to "C4:00" and down to "C0:00" (i.e., OFF), by
rotating the set time knob while displaying the clean
mode.
Delayed cleaning can be programmed by momen-
tarily pressing the "STOP TIME" button and rotating
the "SET TIME" knob to desired stop time up to
eleven (11) hours, fifty-nine (59) minutes from the
present time of day.


