


OPERATION AND SERVICE PROCEDURES
61 RC231002 Rev. 3
While the Auto Timer is counting down in minutes/seconds
or in hours/minutes the Time-of-Day can be presented by
depressing the set button one time. The "Time-of-Day" will
be displayed with the word "AUTO" indicators on and the
auto Timer "TIME" counting down in the background. The
Time-of-Day is displayed until the key is depressed again.
If the key is depressed, the clock/timer changes back to
displaying the Auto Timer setting counting down in hours/
minutes or minutes/ seconds.
To change the Time-of-Day during an automatic timed
bake function, press the set button to display the Time-of-
Day. Rotate the set knob to the desired time of day.
When the Auto Timer has timed out to zero, the display will
show ":00" and the word "AUTO". The "END OF CYCLE"
tone will sound three (3) times even if the Time-of-Day is
displayed. "AUTO" and ":00" will turn off and the "TIME-
OF-DAY" will be displayed. If the oven is being controlled
by the timer (i.e. Timed Bake or Self-Clean) the oven will
turn off.
TO PROGRAM OVEN FOR TIMED BAKE
1. Set the selector knob to the "AUTO" position.
2. Turn the oven control to the desired baking tempera-
ture.
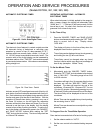
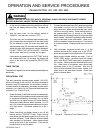
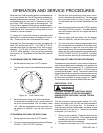
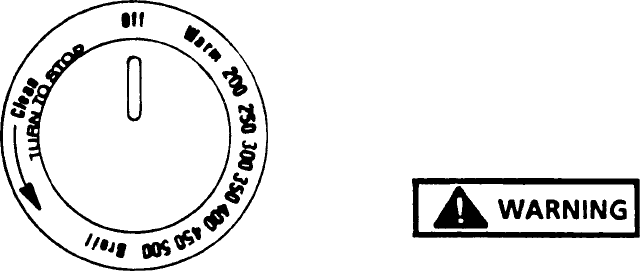
Figure 62 - Oven Control Knob
3. Set cooking hours using Auto Timer instructions.
To cancel the timed bake function, simply rotate the
set knob counterclockwise until the display reads
":00". After the timed bake function has ended, turn
the selector to "MANUAL" and the oven control to
"OFF".
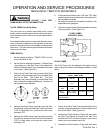
TO PROGRAM THE OVEN FOR SELF-CLEAN
1. Set the selector knob to the "AUTO" position.
2. Turn oven control knob counterclockwise until it stops
("CLEAN - TURN TO STOP" position).
3. Set the Auto Timer according to auto timer instruc-
tions for desired length of clean time. The clean cycle
should normally be set for three (3) hours. NOTE:
The self-clean start time cannot be delayed for this
time.
4. Move the latch lever from the left ("COOK") position
to the right ("CLEAN") position. The clean indicator
and oven indicator will come on to signal the start of
the clean cycle.
5. After the clean cycle has ended, turn the selector
switch to "MANUAL" and the oven control to "OFF".
6. The oven door can be opened approximately thirty
(30) minutes after the completion of the clean cycle.
Do not attempt to open the oven door latch until
approximately thirty (30) minutes have elapsed, oth-
erwise the door lock mechanism may be damaged.
DO NOT FORCE THE LATCH HANDLE. If the oven
door will not open wait five (5) minutes and try again.
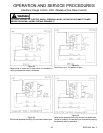
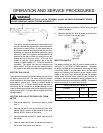
COOK AND OFF TIMER TESTING PROCEDURES
The electronic timer featured in this model provides auto-
matic timing of bake/roast or self-clean oven operation by
means of two (2) relay-operated S.P.S.T. switches which
are normally open, contact 1-2 and 3-4. 120 VAC power is
connected to terminals L1 and N. The numeric value of the
4-digit display can be increased by clockwise rotation of the
"SET" knob and decreased by counterclockwise rotation.
All knobs are removable by pulling straight out. NOTE:
The oven start time cannot be delayed with this timer.
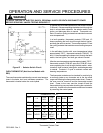
OPERATIONAL TEST
TO AVOID THE RISK OF ELECTRICAL SHOCK,
PERSONAL INJURY OR DEATH DISCONNECT
POWER BEFORE SERVICING, UNLESS TESTING
REQUIRES IT.
This test procedure requires power applied (120 VAC)
either in the range or with 120 VAC line cord connected to
terminals L1 and N for bench test. An ohmmeter or
continuity tester should be alternately connected across
switch terminals 1 to 2 and 3 to 4. Disconnect wire leads
to terminals 1 to 2 and 3 to 4.
1. Set time of day on display. Program minute timer for
five (5) to ten (10) seconds. Timer switches should
indicate open condition on ohmmeter. The alarm will
sound at the end of the countdown.
2. Connect the ohmmeter (set to RX1 range) across