


FIRE OR EXPLOSION - TO AVOID THE RISK OF ELECTRICAL SHOCK, PERSONAL
INJURY, OR DEATH, DISCONNECT POWER TO THE OVEN BEFORE SERVICING.
DISASSEMBLY PROCEDURES - RST MODELS
85 RC231002 Rev. 3
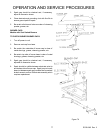
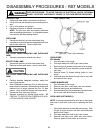
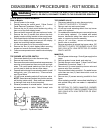
OVEN BURNER IGNITOR
1. Disconnect electricity at main disconnect plug.
2. Remove oven door, racks and oven bottom.
3. Remove lower storage drawer.
4. Locate the two (2) wire leads attached to the oven
burner ignitor assembly. Access to the leads is
located behind the storage drawer area. Remove the
two (2) wire nuts securing the oven burner ignitor
leads to the violet wires. (Note the position and
configuration of ignitor assembly to the oven burner.)
5. Remove the screw securing the oven burner ignitor
assembly mounting bracket to the oven burner and
two (2) screws securing the ignitor bracket to the rear
oven wall.
6. Remove the entire oven ignitor assembly. Slide
ignitor to the left keeping ignitor assembly horizontal.
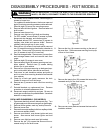
BROIL BURNER IGNITOR
1. Disconnect electricity at main disconnect plug.
2. Remove the oven door and oven racks.
3. Remove the two (2) hex head screws securing the
broiler burner ignitor shield bracket to the mounting
bracket attached to the cavity wall.
4. Pull ignitor slowly toward the front of the oven cavity
until the white wires connecting to the ignitor are
visible.
5. Grasp the one (1) "WHITE" ignitor lead and GENTLY
PULL until the wire nut and approximately four (4)
inches of the attached wire is inside the oven com-
partment. Repeat procedure for remaining ignitor
lead. The hole in the left side of the oven wall is large
enough to clean only "ONE" (1) wire nut at a time.
6. Remove the tape and wire nut from each of the ignitor
assembly lead wires.
7. Reverse procedure to reinstall the broiler burner
ignitor assembly. Reconnect wires tightly and retape
the wire nuts. Be certain to insert wire nuts through
oven back and combustion chamber.
Then, pushing two (2) "WHITE" ignitor leads through
the hole until the broiler burner ignitor mounting
bracket is in position to be reattached to the broiler
burner. Check position of the ignitor to burner.
Correct position is important for proper ignition.
CARE MUST BE TAKEN WHILE HANDLING THE
IGNITOR ASSEMBLY TO PREVENT BREAKAGE.
DO NOT INTERCHANGE A ROUND IGNITOR FOR
A FLAT TYPE OR VICE VERSA. THEIR CURRENT
RATINGS ARE DIFFERENT.
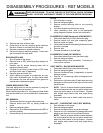
OVEN ELECTRIC GAS VALVE
1. Disconnect electricity at main disconnect plug.
2. Remove storage drawer.
3. Shut off main gas supply to range or shut off gas
supply to gas valve at inlet pipe shut off valve.
4. Disconnect the four (4) wires from the gas valve
assembly. Violet and Blue - Bake, Brown and White
- Broil.
5. Disconnect main gas tubing from inlet pipe to gas
valve at "elbow" on gas valve. Be certain to double
wench the fitting to avoid damage.
6. Disconnect the broiler supply gas outlet line located
on the right side of the gas valve assembly. Be
certain to double wrench the fitting to avoid damage.
Similarly disconnect the bake outlet line on the left
side of the valve assembly.
7. Remove the four (4) NUTS from the mounting studs
which secure the gas valve assembly to the gas valve
mounting bracket.
8. Remove gas valve and gas inlet tubing from range,
reinstall gas inlet tubing or new gas valve.
9. To reinstall gas valve assembly, reverse procedure.
10. Check all gas connections with soap for gas leaks.
11. Refer to the wiring diagram on the range for correct
wire termination. Be certain all insulator sleeves are
reinstalled and insulating pads are on the valve
terminals.
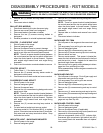
BROILER BURNER
1. Disconnect electricity at main disconnect plug.
2. Remove oven door and oven racks.
3. Remove the two (2) screws securing the broiler
burner to the top front of the broiler cavity.
NOTE: Ignitor is not mounting to broiler but to top of
broiler cavity. Edge flange of broiler rests on top of
the ignitor shield flange.
4. Lower front of broiler and twist slightly to clear broiler
flange from top of ignitor flange.
5. Pull down gently, then forward to remove broiler
burner.
NOTE: Care must be taken to avoid damaging the
ignitor or the burner screening.
6. Reverse procedure to reinstall broiler burner. Be sure
burner flange rests on top of ignitor flange.
OVEN BURNER
1. Disconnect electricity at main disconnect plug.
2. Remove oven door, oven racks, and oven bottom.
3. Loosen oven burner ignitor and set aside.
4. Remove screw securing oven burner to mounting
bracket at front of lower burner base.
5. Gently turn and pull oven burner to come out.
6. Reverse procedure to reinstall oven burner.