The HBAnyware Utility User Manual Page 84
To add a persistent binding:
1. In the Targets Table, click the target that you want to bind.
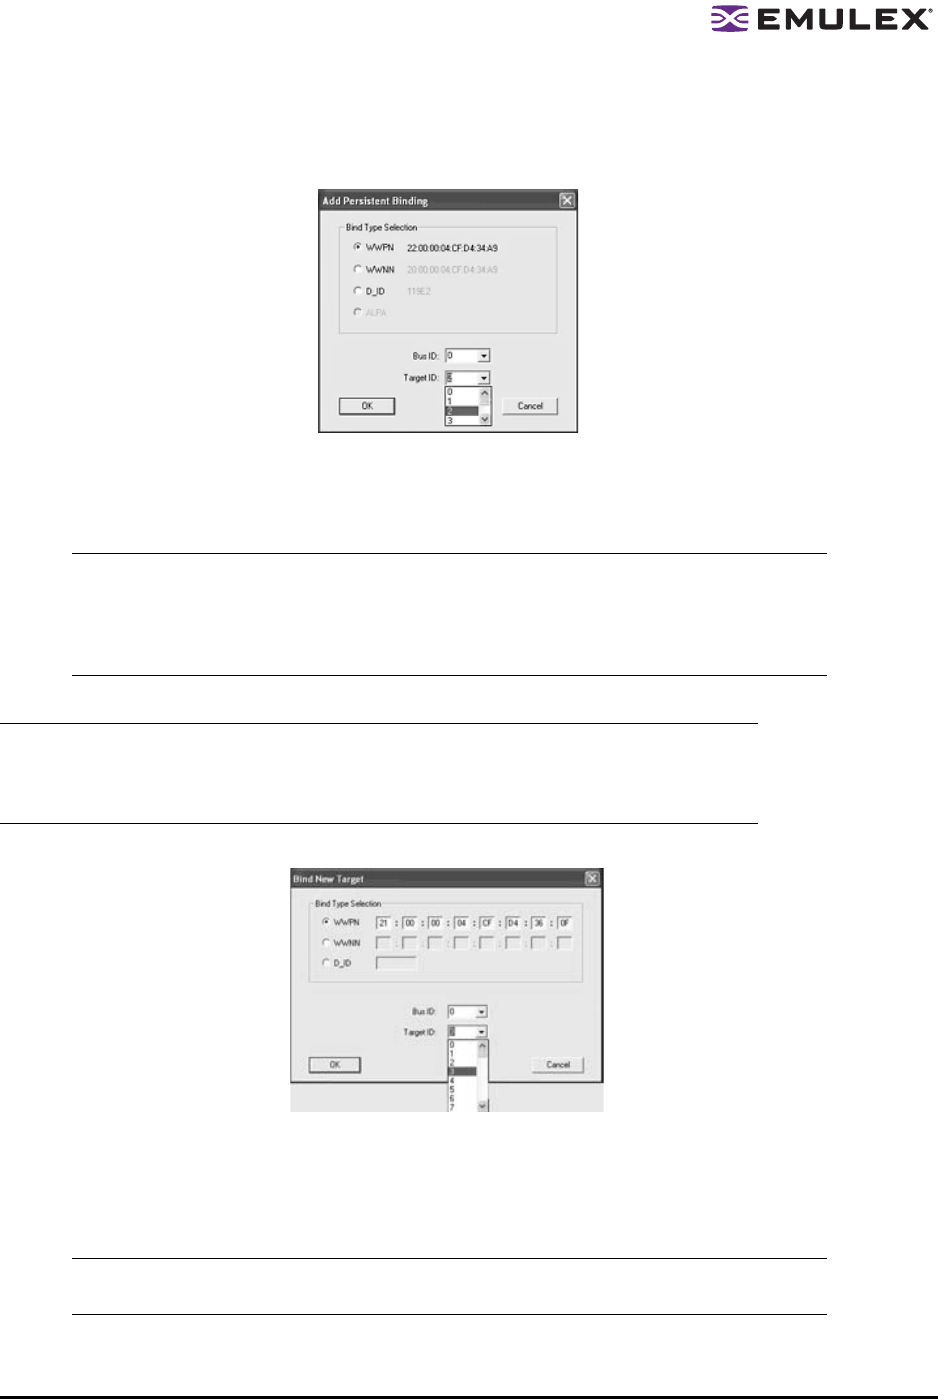
2. Click Add Binding. The Add Persistent Binding dialog box is displayed.
Figure 38: Add Persistent Binding dialog box
3. Select the bind type that you want to use (WWPN, WWNN or D_ID).
4. Select the bus ID and target ID that you want to bind, and click OK.
To bind a target that does not appear in the Persistent Binding table on the Target Mapping tab:
1. Click Bind New. The Bind New Target dialog box is displayed.
Figure 39: Bind New Target dialog box
2. Click the type of binding you want to use, and type the WWPN, WWNN or D_ID you want to bind
to the target.
3. Select the Bus ID and Target ID that you want to bind, and click OK.
Note: Automapped targets have entries only in the second column of the Targets Table.
Persistently bound targets have entries in the second and third columns. In this case,
the third column contains the SCSI bus and target numbers you specified in the Add
Persistent Binding dialog box. This binding takes effect only after the local machine is
rebooted.
Note: It is possible to specify a SCSI bus and target that have already been used on behalf
of a different FC target. Attempting to bind a target already in the Persistent Binding
table on the Target Mapping tab results in an error message, “Target already in target
list. Use the Add Binding button.”
Note: A target will not appear on the target list if automapping has been disabled and the
target is not already persistently bound.
