


14
Easy to follow steps to baking with the
Ma-bake.r
The following instructions are designed to guide
beginners through the baking process step by step.
These instructions are specifically for the Bread,
Dough or Pasta recipes from the recipe section of
this booklet.
All recipes listed in this booklet use local
ingredients and Standard Metric
Measuring tools (spoons, cups and measuring
scales).
We advise that all ingredients should be weighed
for accuracy.
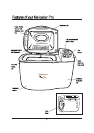
Step 1. Add ingredients.
Simply add ingredients to the baking pan.
Ingredients should be added in the following
order:
1. Liquid Ingredients
2. Dry Ingredients
3. Yeast
Tip: For a good result it is important that the
ingredients are added in the correct order and are
weighed for accuracy.
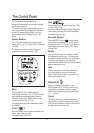
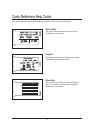
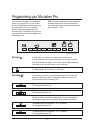
Step 2. Select menu setting
PresstheMENUbuttontomakeyourdesired
selection. As you press the MENU button you
move through each of the recipes from (1) to (12)
and as you scroll through the recipes the number is
displayed on the LCD window.
Step 3. Select crust colour
Press the CRUST button to select your choice of
crust colour. You are able to choose from the
Light, Medium or Dark crust colours on selected
settings (refer to the chart on page 74).
Unless you select a crust colour theMa-baker Pro
will automatically default to a Medium crust colour.
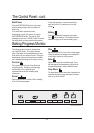
Step 4. Select loaf size
Press the SIZE button to select the desired loaf size
- 750g, 1.0kg or 1.25kg (1.5kg).
Unless you select a size the Ma-baker Pro
will automatically default to a 1.0kg loaf size.
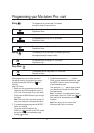
Step 5. Press start.
Note: If nothing has been selected the
Ma-baker Pro will default to a 1.0kg loaf with a
Medium crust colour setting on Menu 1.
Press the START button to commence selected
setting. The LCD window will display the hours
and minutes until the cycle is complete.
Step 6. Hot fresh homemade bread
At the end of the baking cycle the machine
will beep and the display will read “0.00”. The
Ma-baker Pro will automatically switch to
a Keep Warm cycle for 60 minutes. Warm air will
circulate throughout the baking camber, to help
reduce condensation.
A red light, in which is located on the control panel
(to the right of the LCD window), will flash for
approximately 15-20 minutes. Once the red light
has stopped flashing, using oven mitts, remove the
baking pan from the baking chamber by lifting it
straight up.
Allow the bread to cool in the bread pan for 10
minutes before removing. Then with the oven
mitts tap the sides and base of the baking pan and
turn upside down and gently shake until the bread
slides out. If necessary, use a plastic spatula to
loosen bread from the side of the pan.
Place the bread on a wire rack and allow the
bread to cool. We recommend that sufficient
cooling time is approximately 15 minutes to ensure
optimum bread texture and this also makes slicing
easier.
After using your Ma-baker Pro
Unplug the machine and allow it to cool for 30
minutes before commencing another program.
If you attempt to use the tooMa-baker Pro
soon, it may beep and the display will read ‘E:01’,
indicating the has not cooledMa-baker Pro
sufficiently. Wait until the Ma-baker Pro
has cooled and then press START .