3-49
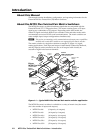
MTPX Plus Twisted Pair Matrix Switchers • Operation
1 2 3 16
17 18 19 32
I
N
P
U
T
S
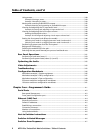
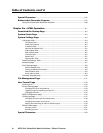
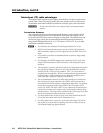
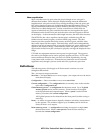
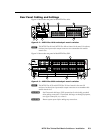
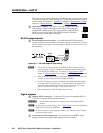
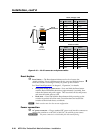
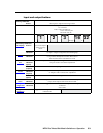
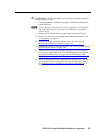
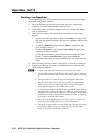
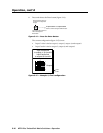
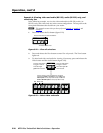
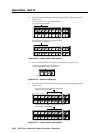
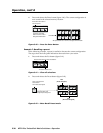
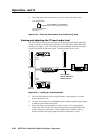
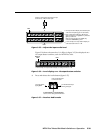
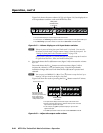
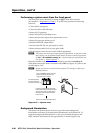
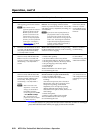
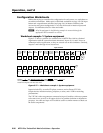
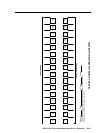
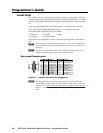
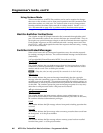
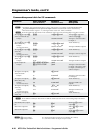
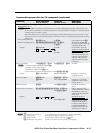
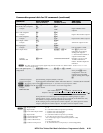
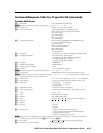
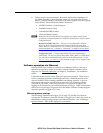
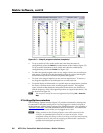
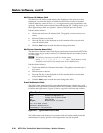
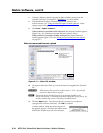
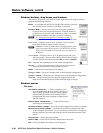
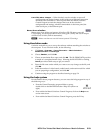
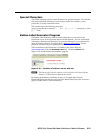
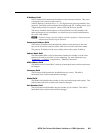
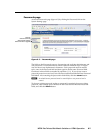
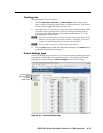
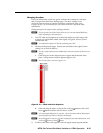
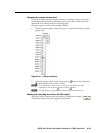
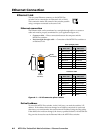
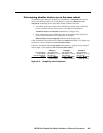
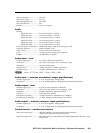
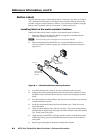
Press and hold the Input 1 and Input 2
buttons simultaneously to toggle
background illumination mode on or off.
After approximately 2 seconds, release
the Input 1 and Input 2 buttons.
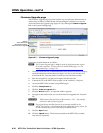
Figure 3-68 — Toggle background illumination on or off
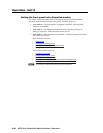
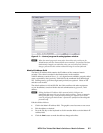
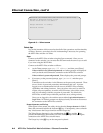
Defining the audio/RS-232 wire pair
N
TheTPaudio/RS-232inputwirepaircongurationsareprotectedwhenfront
panel Lockmode2isselected.YoucanviewthecongurationsinLockmode2
butyoucannotadjustthemfromthefrontpanel.See“Settingthefrontpanel
Locks (Executivemodes)”onpage3-46.
The switcher is compatible with MTPs that transmit and receive mono audio and
those that transmit and receive RS-232 serial data. You must configure the switcher
for the appropriate audio/RS-232 input for each TP input. Each TP input’s audio/
RS-232 settings can be viewed and changed from the front panel.
View and configure the switcher’s TP input audio/RS-232 configuration settings as
follows:
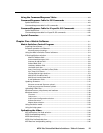
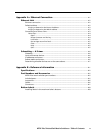
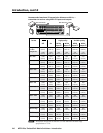
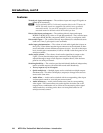
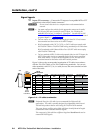
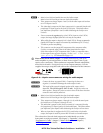
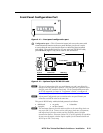
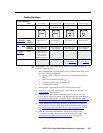
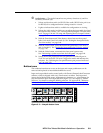
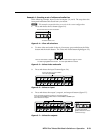
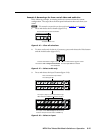
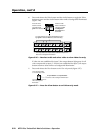
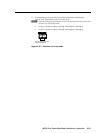
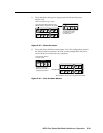
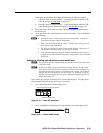
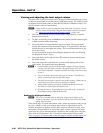
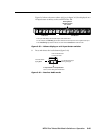
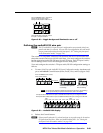
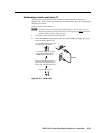
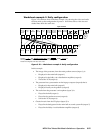
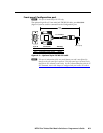
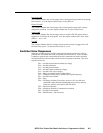
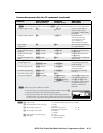
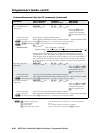
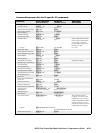
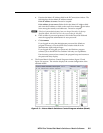
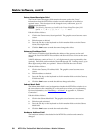
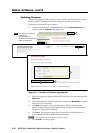
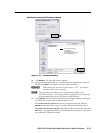
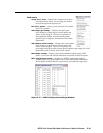
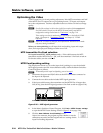
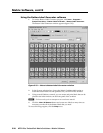
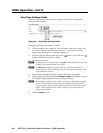
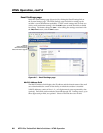
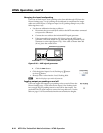
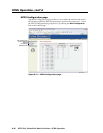
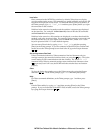
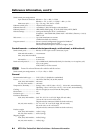
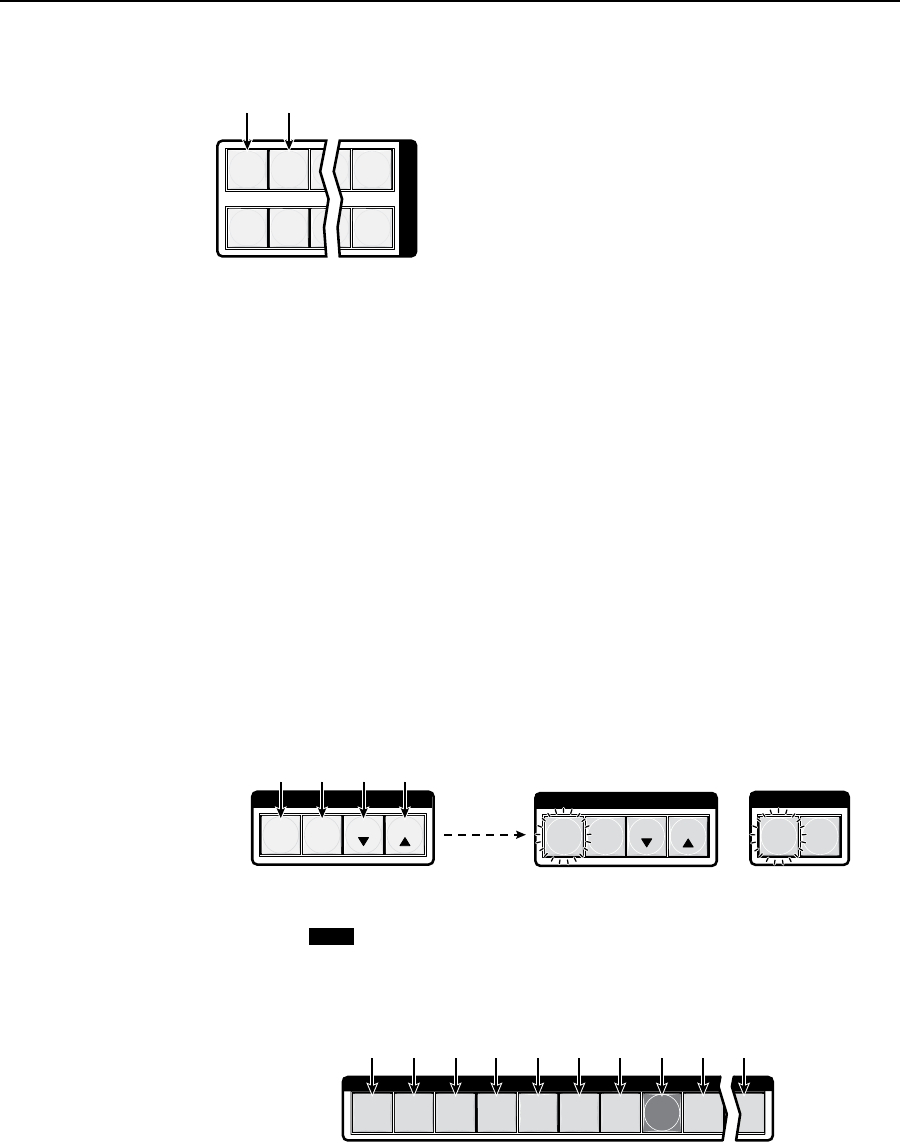
1. To enter SerialPortandAudio/RS-232InputCongurationmode, simultaneously
press and hold allControlbuttons(Enter,Preset,View,andEsc)(gure3-69).
2 seconds
I / O
VIDEO AUDIO
C O N T R O L
PRESET
ENTER
ESCVIEW
C O N T R O L
PRESET
ENTER
ESCVIEW
2
1 3 4 5 6 7 8 9
16
INPUTS
The Control and I/O buttons indicate the baud rate and protocol. See “Selecting
the rear panel Remote port protocol and baud rate”, later in this chapter.
Press and hold the Enter, Preset,
View, and Esc buttons.
All Control buttons light with
one flashing.
Both I/O buttons light
with one flashing.
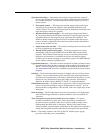
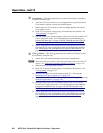
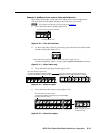
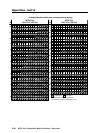
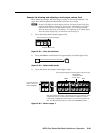
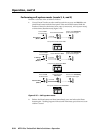
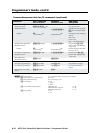
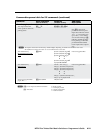
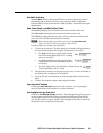
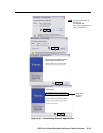
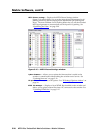
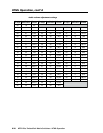
NOTE
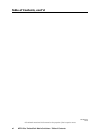
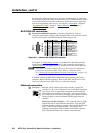
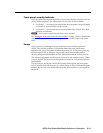
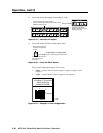
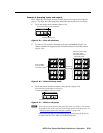
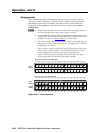
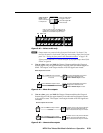
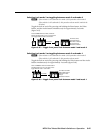
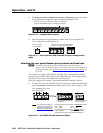
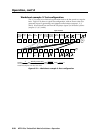
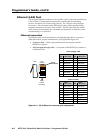
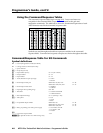
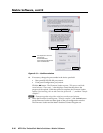
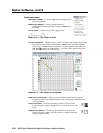
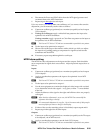
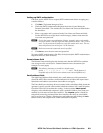
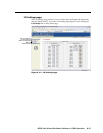
Unlit input buttons indicate that the input’s audio/RS-232 twisted wire pair is configured as audio.
Red input buttons indicate that the input’s audio/RS-232 twisted wire pair is configured as RS-232.
Unlit Unlit Unlit Unlit Unlit Unlit
Red
(RS-232)
Unlit
(audio)
Unlit Unlit
Figure 3-69 — Audio/RS-232 display
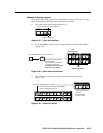
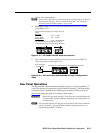
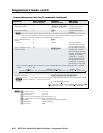
2. Release the Control buttons.
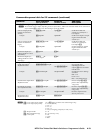
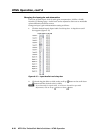
N
IffrontpanelLockmode2isselectedandyoutrytoperformstep3, the actions
areignoredandtheEnter,Video,andAudiobuttonsash.See“Settingthe
front panel Locks (Executivemodes)”onpage3-46.