18
Wiring
(4) Cable size of the control circuit power supply (terminal R1/L11, S1/L21)
· Terminal Screw Size: M4
· Cable size: 0.75mm
2
to 2mm
2
· Tightening torque: 1.5N·m
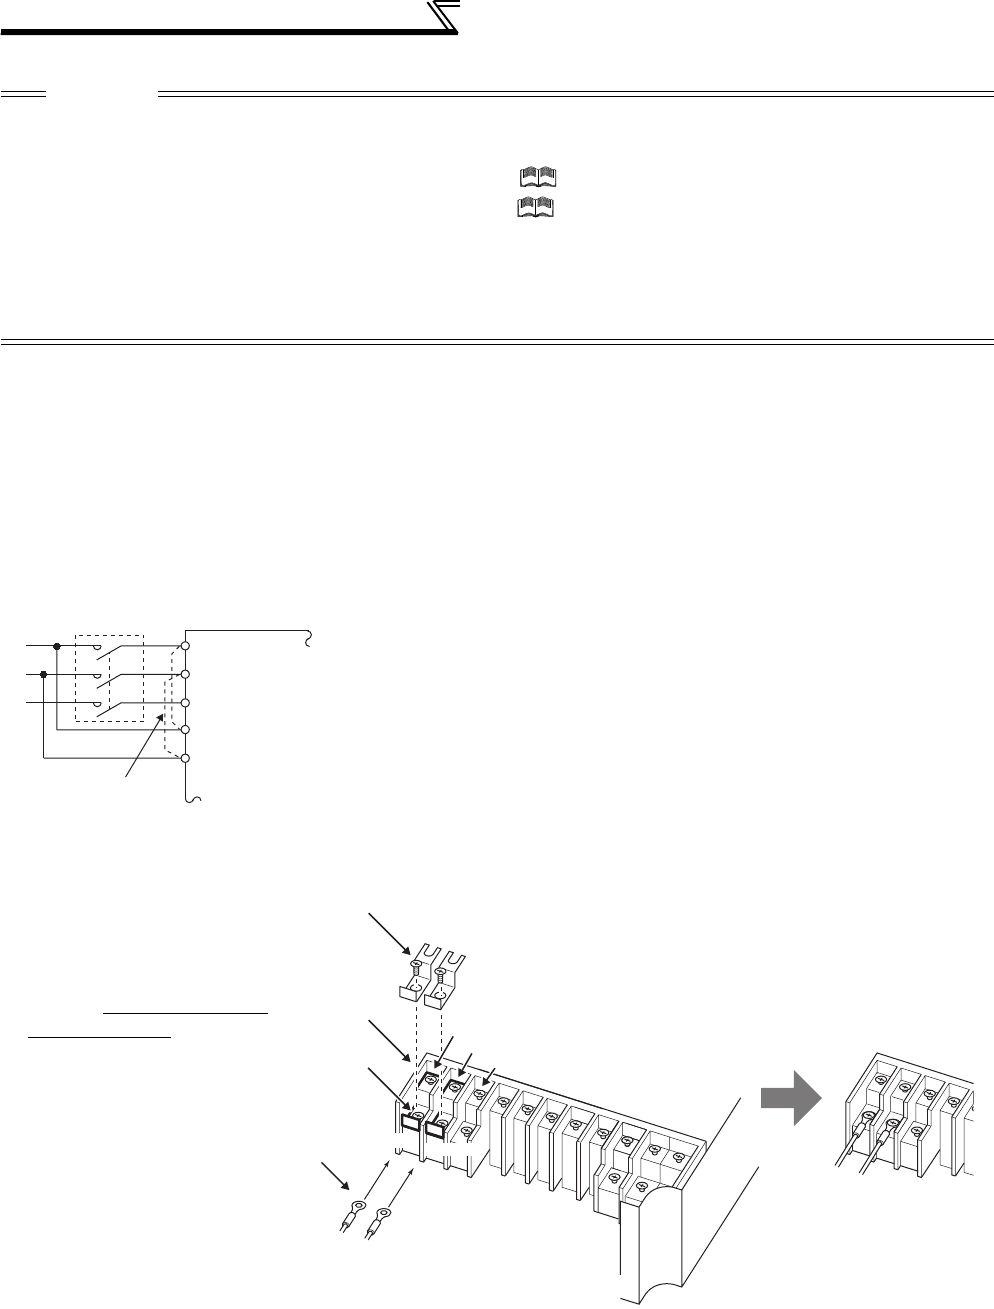
(5) When connecting the control circuit and the main circuit separately to the power supply
• FR-F720P-0.75K to 5.5K, FR-F740P-0.75K to 5.5K
CAUTION
· Especially for long-distance wiring, the inverter may be affected by a charging current caused by the stray capacitances of the
wiring, leading to a malfunction of the overcurrent protective function or fast response current limit function or a malfunction or fault
of the equipment connected on the inverter output side. If fast-response current limit function malfunctions, disable this function.
(For Pr.156 Stall prevention operation selection, refer to Chapter 4 of the Instruction Manual (Applied).)
· For details of Pr. 72 PWM frequency selection , refer to Chapter 4 of the Instruction Manual (Applied). (When using an optional
sine wave filter (MT-BSL/BSC) for the 75K or higher, set "25" in Pr.72 (2.5kHz).
(Sine wave filter can be only used with a general-
purpose motor.)
· The surge voltage suppression filter (FR-ASF-H/FR-BMF-H) option and sine wave filter (MT-BSL/BSC) cannot be used under
IPM motor control, so do not connect them.
· For explanation of surge voltage suppression filter (FR-ASF-H/FR-BMF-H) and sine wave filter (MT-BSL/BSC), refer to the
manual of each option.
<Connection diagram> When fault occurs, opening of the electromagnetic contactor (MC) on the
inverter power supply side results in power loss in the control circuit,
disabling the fault output signal retention. Terminals R1/L11 and S1/L21 are
provided for when retention of a fault signal is required. In this case, connect
the power supply terminals R1/L11 and S1/L21 of the control circuit to the
primary side of the MC.
Do not connect the power cable to incorrect terminals. Doing so may
damage the inverter.
1)Loosen the upper screws.
2)Remove the lower screws.
3)Remove the jumper
4)Connect the separate power
supply cable for the control
circuit to the lower terminals
(R1/L11, S1/L21).
Inverter
MC
R/L1
S/L2
T/L3
R1/L11
S1/L21
Remove the jumper
Main circuit terminal block
R1/L11
S1/L21
3)
1)
2)
4)
S/L2
T/L3
R1/L11
S1/L21
R/L1


