


55
Model PH90 Operating Procedures
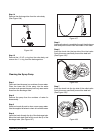
Step 12
Install the cylinder onto the larger opening in the valve
body by tilting the cylinder away from the discharge
tube and sliding the widest section of flange under the
center locking groove on the valve body. Align the tabs
on the cylinder with the locking grooves on the valve
body. Turn the cylinder clockwise until the tabs fully
engage into the locking grooves on the valve body.
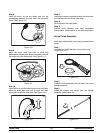
Step 13
Install the lid by inserting the discharge tube through
the smaller hole in the lid. Slide the lid until the larger
hole fits a round the top of the cylinder. The discharge
tube lock nut will secure the lid in position.
Step 14
Install the discharge tube lock nut.
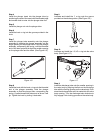
Step 15
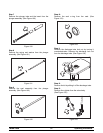
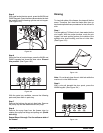
Lubricate and install the plunger assembly into the
cylinder opening in the pump body. (See Figure 118.)
Figure 118
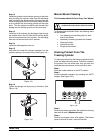
Step 16
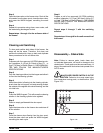
T ighten the plunger nut by turning it clockwise. (See
Figure 119.)
Figure 119
Manual Brush Cleaning
This Procedure Must Be Done Every Two Weeks!
ALWAYS FOLLOW LOCAL HEALTH CODES.
To disassemble the Model PH90, the following items
will be needed:
S T wo cleaning and sanitizing pails for each
side of the freezer
S Necessary brushes (provided with freezer)
S Cleaning solution
S Sanitizing solution
S Single service towels
Draining Product From The
Freezing Cylinder
To drain the product from the freezing cylinder for both
sides, the steps will be the same. Therefore, first drain
the product from the shake side, then go back and
duplicate these procedures for the soft serve side.
Step 1
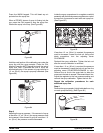
Place the heater switches in the OFF position.
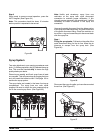
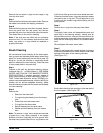
Step 2
Cancel automatic operation by pressing the AUTO
keypad. (See Figure 120.)
Figure 120
Step 3
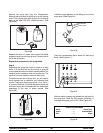
Remove the shake cup holder. Set it aside for cleaning
later with all parts. (Shake side only)
Step 4
Remove the hopper cover and agitator . Take these
parts to the sink to w ash, rinse and sanitize.