


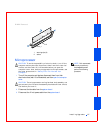

Installing Upgrades 91
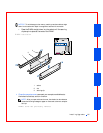
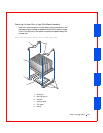
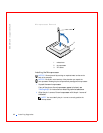
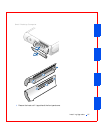
NOTICE: Lay the heat sink down with the thermal grease facing upward. Do
not lay the heat sink down with the thermal grease touching the work surface.
2
Lift the heat sink or heat sink/blower assembly away from the
microprocessor.
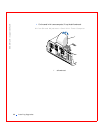
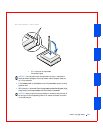
3 On the small form-factor and small desktop computers, remove the
two screws on the blower to remove it from the heat sink.
NOTICE: Do not discard the original heat sink and securing clips unless you
are installing a microprocessor upgrade kit from Dell. If you are
not
installing
a microprocessor upgrade kit from Dell, reuse the original heat sink, blower,
and securing clips when installing your new microprocessor.
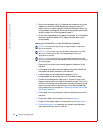
4
Discard the original heat sink and securing clips.
NOTE: Do not discard
the blower; reuse the
blower. Your
microprocessor upgrade
kit from Dell includes only
a replacement heat sink
and two replacement
securing clips.
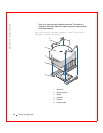
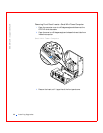
Removing the Microprocessor
NOTICE: Be careful not to bend any of the pins when you remove the
microprocessor from its socket. Bending the pins can permanently damage the
microprocessor.
Your microprocessor socket is a zero insertion force (ZIF) socket with a
lever-type handle that secures the microprocessor in, or releases it
from, the socket.
1 Pull the release lever straight up until the microprocessor is released,
and then remove the microprocessor from the socket.
2 Leave the release lever extended so that the socket is ready for the new
microprocessor.