


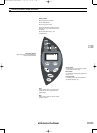
11
m
easurement. A ‘guesstimate’ is not good enough
as it could throw out the critical balance of the
r
ecipe.
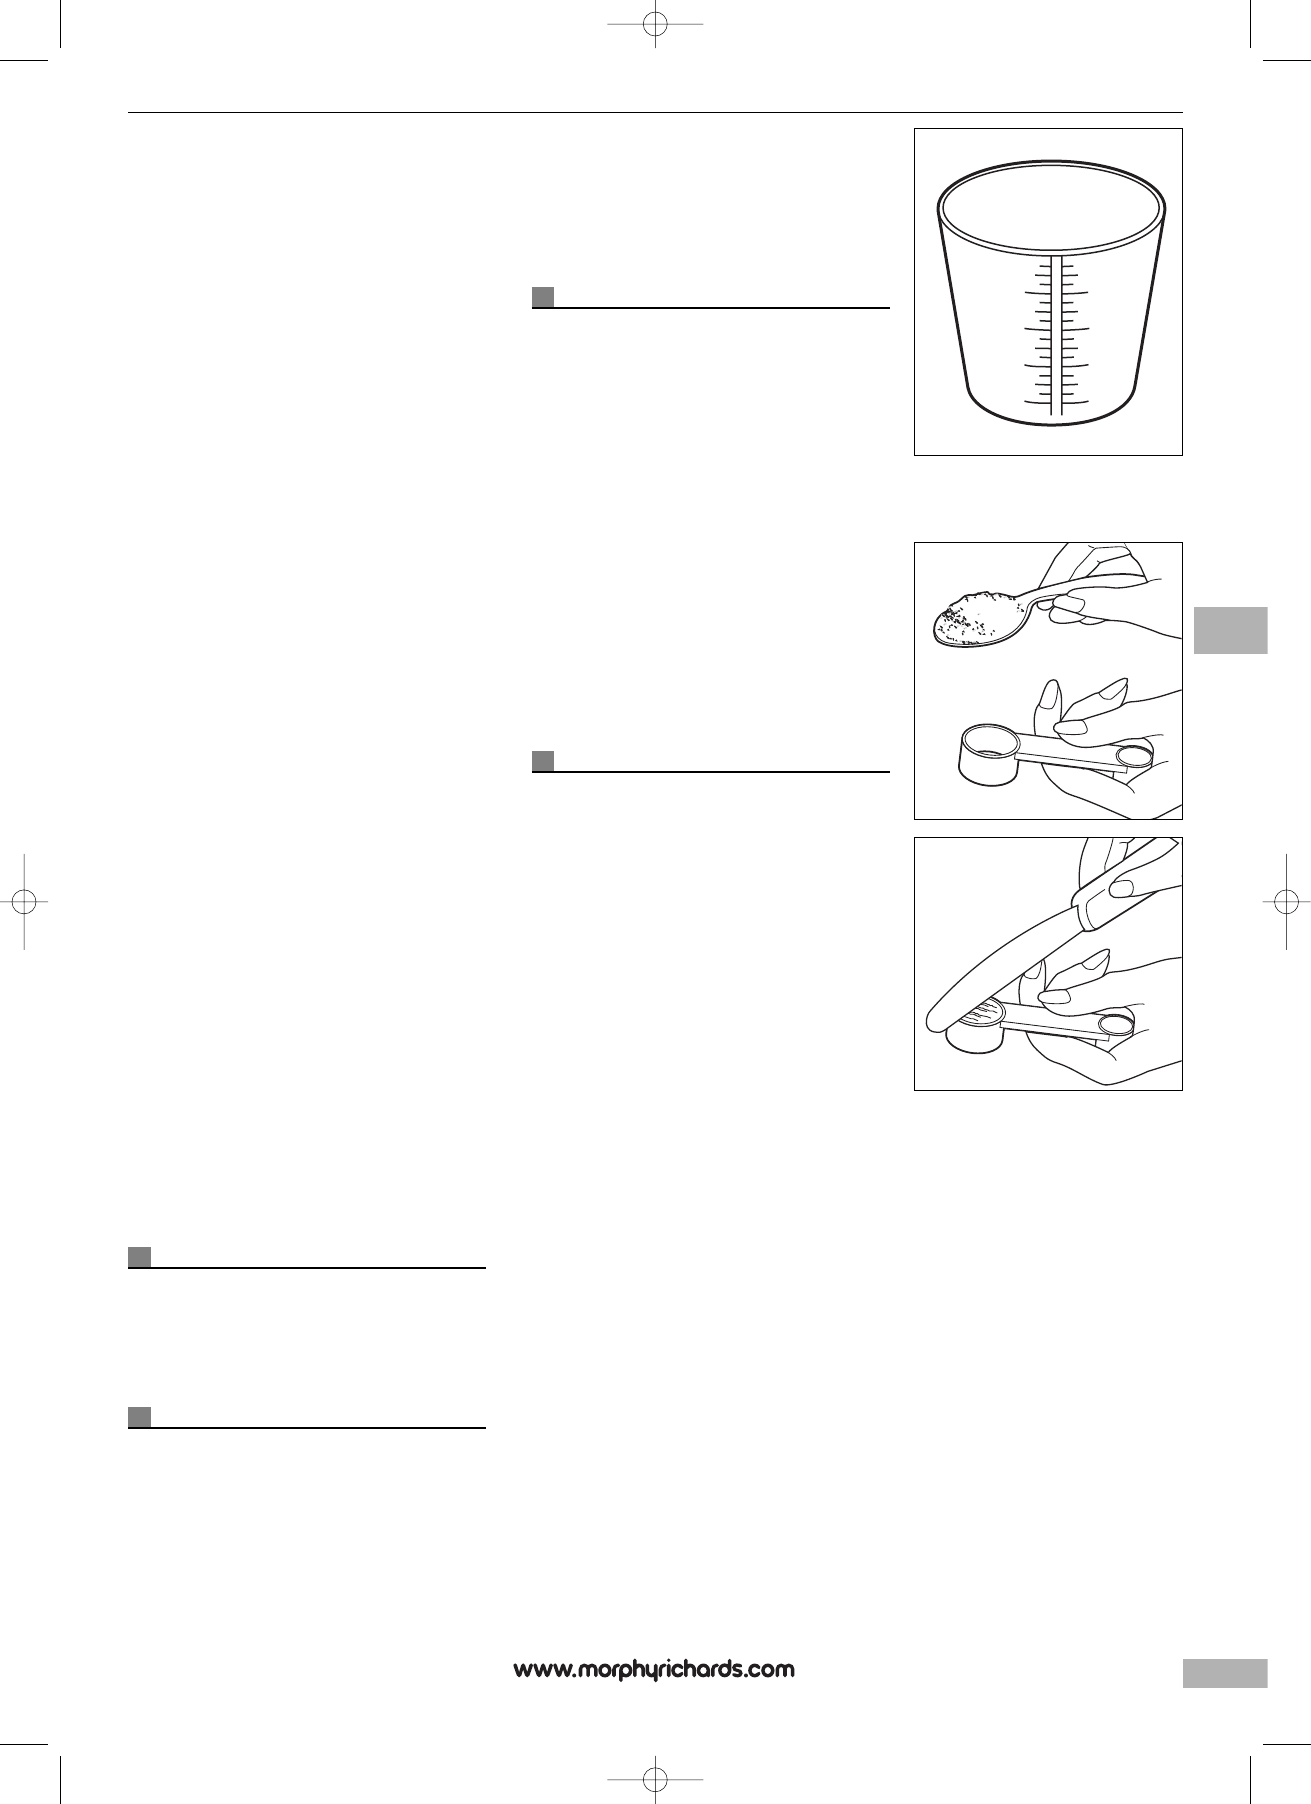
D
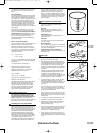
ry measurements
Dry measurements (especially flours) must be done
u
sing the measuring cup provided. The measuring
c
up is based on the American standard 8 fluid oz
cup - British cup is 10 fluid oz. Dry measuring must
be done by gently spooning ingredients into the
m
easuring cup and then once filled, levelling off
w
ith a knife. Scooping or tapping a measuring cup
w
ill pack the ingredients and you will end up with
more than is required. This extra amount could
a
ffect the balance of the recipe. Do not sift the flour,
u
nless stated.
When measuring small amounts of dry or liquid
i
ngredients (ie yeast, sugar, salt, powdered milk,
h
oney, molasses)
t
he measuring spoon which is
p
rovided must be used.
M
easurements must be
level, not heaped as this small difference could
t
hrow out the critical balance of the recipe.
D
O NOT USE NORMAL KITCHEN TEASPOONS
OR TABLESPOONS.
Hints on measuring ingredients
• The cup is marked in various ‘volume measurement’
scales. The recipes in this book use the ‘cup’
v
olume which is based on the ‘American cup of
8
floz and is conveniently marked in
1/16 d
ivisions.
•
If you prefer to use weight (gms) as a measurement
f
ill and weigh the required number of cups and
r
ecord this conversion.
ie) 2 cups = xx gms
3 cups = xxx gms
You must use a good quality set of accurate scales,
we prefer to use the ‘cup’ measure for consistency
and accuracy.
A
conversion table is provided page 18.
• There are 2 spoons provided to cover all
combinations of quantities in the recipes.
Tablespoon tbsp, teaspoon, for
1/2 teaspoon
measurements use the
1/4 tsp twice.
1tsp = 5 millilitres
1 tbsp = 3 tsp = 15 millilitres
Hint measure dry ingredients first with the
tablespoon, then wet (oil) last.
Your breadmaker produces delicious baked goods
with ease. This machine requires only that you
carefully follow the recipe instructions. In basic
cooking, normally ‘a pinch of this and a dash of
that’ is fine, but not for breadmakers. Using an
automatic breadmaker requires you accurately
measure each ingredient for best results.
Ingredient temperatures
All ingr
edients, including the machine and
pan, and especially liquids (water or milk),
should be warmed to room temperature 21°C
(70°F).
If ingredients are too cold, below 10°C
(50°F), they will not activate the yeast. Extremely hot
liquids, above 40°C (104°F), may kill the yeast.
Creating your own yeast breads
With the breadmaker, even the most inexperienced
baker can achieve the satisfying experience of
baking a loaf of bread. All of the mystery and hard
work is gone. Inside this talented machine with an
electronic brain, the dough is mixed, kneaded,
proofed and baked without you being present.
The automatic breadmaker can also just prepare
the dough, and when it's ready, you shape, allow to
rise and bake in a conventional oven. The recipes
on the following pages are ‘tailored’ for this
breadmaker. Each recipe features ingredients that
best compliment a particular loaf of bread, and
e
ach was tested in our machines. It is extremely
important not to exceed the amounts of flour
s
pecified in each of the recipes or else it could
r
esult in unsatisfactory baking performance. When
c
reating your own yeast bread recipes or baking an
old favourite, use the recipes in this cookbook as a
g
uide for converting portions from your recipe to
y
our breadmaker.
Special glazes for yeast breads
G
ive your just baked bread a professional finish.
Select one of the following special glazes to
e
nhance your bread.
Egg glaze
Beat 1 large egg and 1 tablespoon of water
t
ogether, brush generously. Note: apply only to
d
oughs before baking.
Melted butter crust
B
rush melted butter over just baked bread for a
s
ofter, tender crust.
Milk glaze
For a softer, shiny crust, brush just baked bread
w
ith milk or cream.
Sweet icing glaze
Mix 1 cup sifted icing sugar with 1 to 2 tablespoons
o
f milk to make a glaze consistency and drizzle over
r
aisin bread or sweet breads.
P
oppy/Sesame/Caraway seed/Oatmeal
S
prinkle your choice of these seeds generously over
j
ust glazed bread.
Other tips
• Place all recipe ingredients into the baking pan so
that yeast is not touching any liquid.
• After completing the process of making dough in
your bre
admaker, typically when letting dough rise
o
utside the breadmaker, allow 30 minutes or until
dough doubles in size. Dough should be lightly
greased and covered with grease proof paper and a
dry towel. It should be placed in a warm area free
from drafts.
•
Humidity can cause problems, therefore humidity
and high altitudes require adjustments. For high
humidity, add an extra tablespoon of flour if
consistency is not right. For high altitudes, decrease
yeast amount by approximately
1/4 teaspoon, and
decrease sugar and/or water or milk slightly.
• The DOUGH setting is great for mixing, kneading
and pr
oofing, allowing dough to rise. Use the
automatic breadmaker to prepare this dough so all
you need to do is shape and bake it according to
your recipe.
• When recipes call for a ‘lightly floured surface,’ use
about 1 to 2 tablespoons of flour on the surface.
You may want to lightly flour your fingers or rolling
pin for easy dough manipulation.
• When you let dough ‘rest’ and ‘rise’ according to a
recipe, place it in a warm, draught-free area. If the
dough does not double in size, it may not pr
oduce a
tender product.
• If the dough you are rolling shrinks back, let it rest
covered for a few minutes before rolling again.
•
Dough may be wrapped in plastic and stor
ed in a
freezer for later use. Bring the dough to room
temperature before using.
• After 5 minutes of kneading, open the lid and check
the dough consistency. The dough should form a
soft, smooth ball. If too dry, add liquid. If too wet,
add flour (
1/2 to 1 tablespoon at a time).
•
When using honey
, malt extract, golden syrup or
treacle, coat the spoon or cup with oil first, this will
prevent these ingredients from sticking to the spoon
or cup.
g
BM48268SMEE-SSBreadmaker 27/3/07 09:43 Page 11