


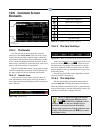


Set Up TCP/IP Quick Start • 10-11
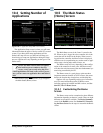
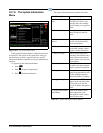
You can choose between an internal modem (one that
is mounted directly on to the E2 circuit board (via the
PC-104 slot in previous generation E2 circuit boards) or
an external modem. If you have a modem, navigate to
the COM3 Modem Port field and select Internal
Modem. Press (LOOK UP) for the Option List
Selection screen.
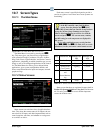
10.10 Set Up TCP/IP
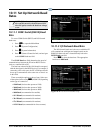
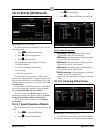
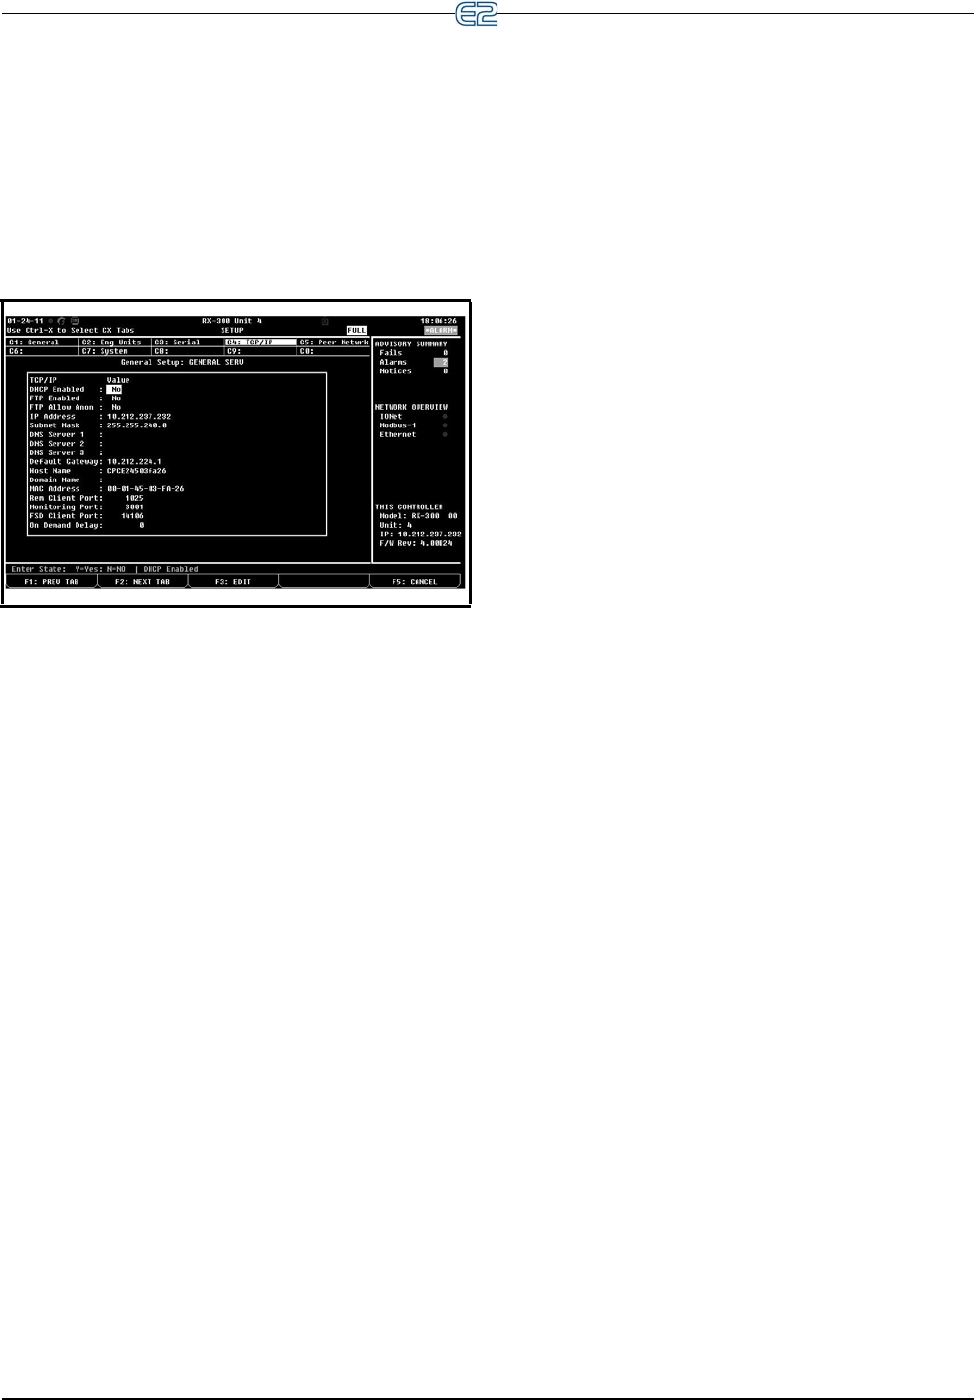
Figure 10-17 - TCP/IP Addressing
The TCP/IP screen is where you enter the information
necessary to allow Ethernet connection to this controller.
If this site uses Ethernet box-to-box, you will need to enter
a TCP/IP address and a group name to allow all E2s on
site to communicate as a group. See Section 7, E2 Ether-
net Peer Communications for more information.
From the Main Menu:
1. Press
(System Configuration)
2. Press
(Remote Communications)
3. Press
(TCP/IP Setup) to advance to the TCP/
IP Setup screen
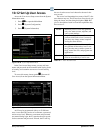
E2 units may be configured to communicate across an
Ethernet com
puter network using TCP/IP protocol. To
enable Ethernet communication, you will need to enter IP
address information for the E2 in the Serial IP screen.
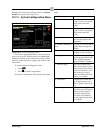
IP Address The IP Address field sets the network
address for th
is E2. Other network devices (such as
PCs running UltraSite) will communicate with this
E2 by sending information to this specified address.
Contact your network administrator to determine
what IP address to enter.
The IP Address always consists of four numbers
from
zero to 255, each of which is separated by a
period. Enter the address in this format.
Subnet Mask Contact your network administrator
to
get the correct subnet mask value, and enter it in
this field.
The default value, “255.255.255.0”, is the subnet
m
ask commonly used for small networks.
Primary DNS Contact your network administrator
to
see if a Primary DNS value is required for this E2.
If so, enter the Primary DNS address supplied by
your administrator in this field. If not, leave this field
set to “0.0.0.0”.
Secondary DNS Contact your network administra-
tor to see if a Secondary DNS value is required for
th
is E2. If so, enter the Secondary DNS address sup-
plied by your administrator in this field. If not, leave
th
is field set to “0.0.0.0”.
Primary Gateway Contact your network adminis-
trator to see if a Primary G
ateway value is required
for this E2. If so, enter the Primary Gateway address
supplied by your administrator in this field. If not,
leave this field set to “0.0.0.0”.
Secondary Gateway Contact your network
adm
inistrator to see if a Secondary Gateway value is
required for this E2. If so, enter the Secondary Gate-
way address supplied by your administrator in this
fi
eld. If not, leave this field set to “0.0.0.0”.
DHCP Enabled Dynamic Host Communication
Prot
ocol (DHCP) is a protocol that assigns a dynamic
IP address to devices on a network. With dynamic
addressing, a device could have a different IP address
every time it connects to the network. When set to
Yes, DHCP Enabled keeps track of IP addresses and
enables a new IP device to be added to a network
without having to manually assign it a unique IP
address. DHCP supports a mix of static and dynamic
IP addresses.