


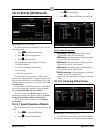

Set Up Echelon Network Quick Start • 10-17
2. Press (System Configuration)
3. Press
(Network Setup)
4. Press
(Network Summary)
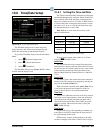
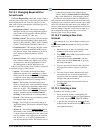
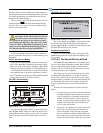
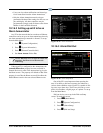
Figure 10-26
- Network Summary Screen
NOTE: A device may only be commissioned if
it is properly connected on the network
and
powered up.
How Echelon Commissioning Works
Each device that is capable of communicating on a
Echelon Network has a unique 12-digit “Neuron ID” code
number that is hard-coded in a chip on the board. In order
for the E2 to begin communications with a unit controller
or another E2, it must know the device’s ID number.
When a device is commissioned, its 12-digit code is
eith
er entered by hand into the E2 (via the front panel key-
board) or sent across the network to the E2 using the
devi
ce’s service button. Once the E2 knows the device’s
12-digit ID, it establishes communication and gives the
device its user-defined subnet and node address. From that
point on, the E2 uses only the subnet and node address to
communicate with the device.
As mentioned above, there are two ways in which a
devi
ce may be commissioned. No one way is better than
the other in terms of effectiveness, but one of the methods
may be less difficult than the other depending on the type
of installation.
MODBUS Commissioning
If commissioning a MODBUS device and multiple
MODBUS ports are available, you will be prompted to
select the appropriate network during the commissioning
process.
I/O Network Commissioning
If commissioning an I/O Net device and multiple I/O
Net ports are available, you will be prompted to select the
appropriate network during the commissioning process.
Three I/O Net connections can be operational at the same
time, and note that
duplicate board numbers cannot be set
up on different I/O Net connections. For example, only one
board can be set to address "1" per board type across all I/
O Net connections. If there is more than one I/O Net con-
nection defined, select which I/O Net connection the board
is on from
the Network Summary screen through the F4
Commissioning process.
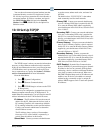
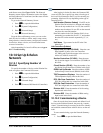
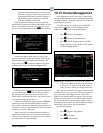
10.14.2.1 The Service Button Method
To commission a device using the service button, you
must first set up the E2 to receive a service button signal,
and then press the service button on the device. When the
signal is received by the E2, the device will be commis-
sioned.
To set up the E2 to receive a service button signal,
m
ove the cursor to the Controller Name field of the record
you wish to set up, and press
(SET ADDRESS).
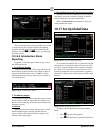
Figure 10-27 - Commissioning Menu
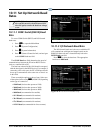
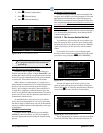
A menu will appear on the screen, giving you the
option of either pressing the service button, entering the
Neuron ID by hand, or canceling and returning to the main
screen. Press
to select the service button option.
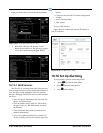
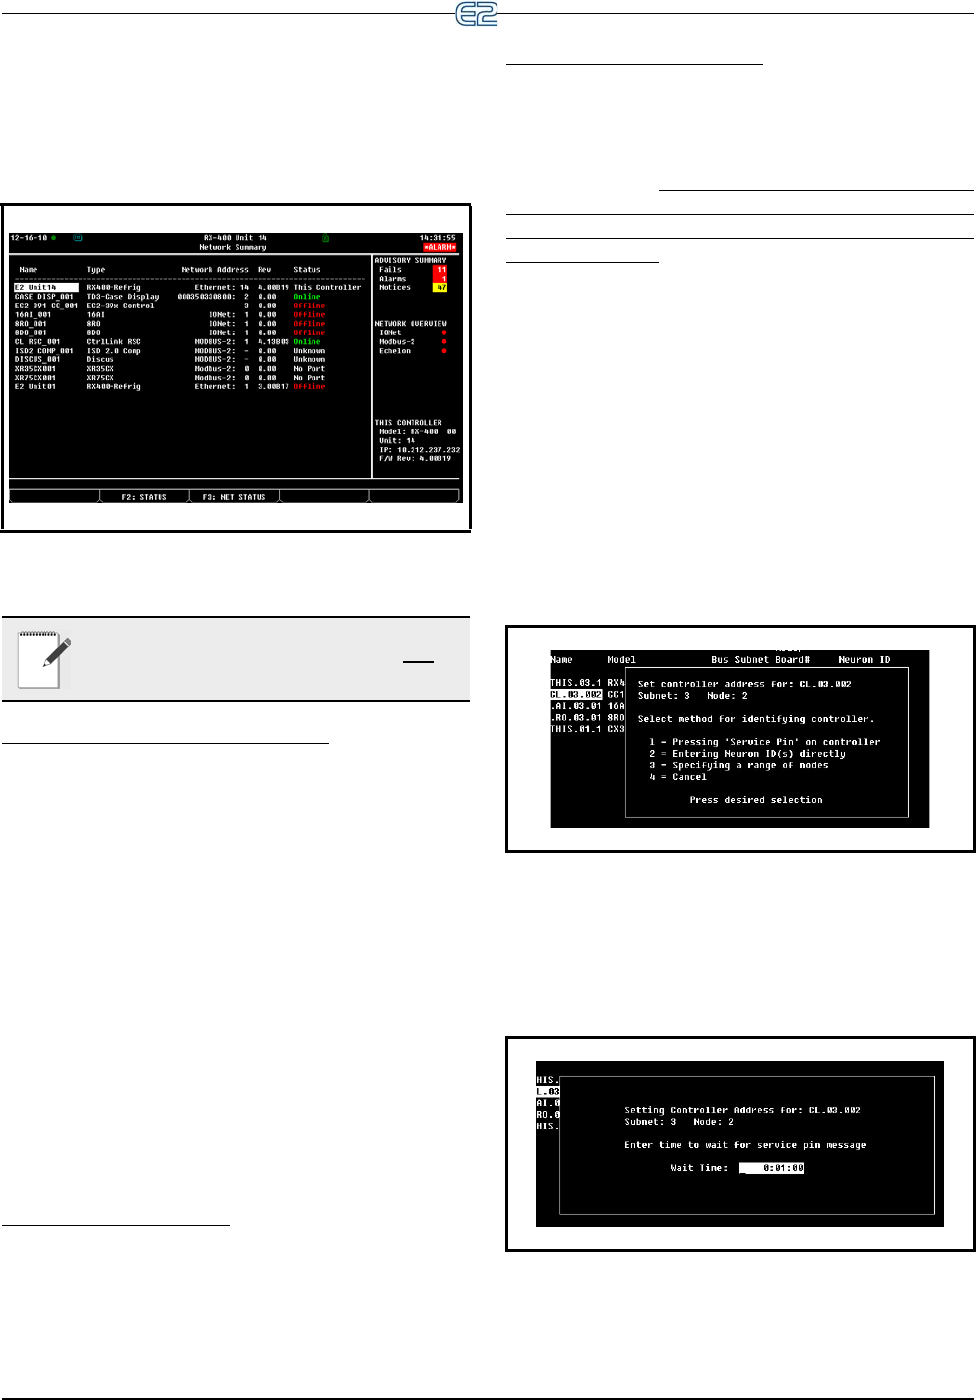
Figure 10-28
- Service Button Screen
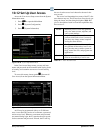
The E2 will prompt you to enter a wait time in the Wait
Time field. The Wait Time is the amount of time the E2